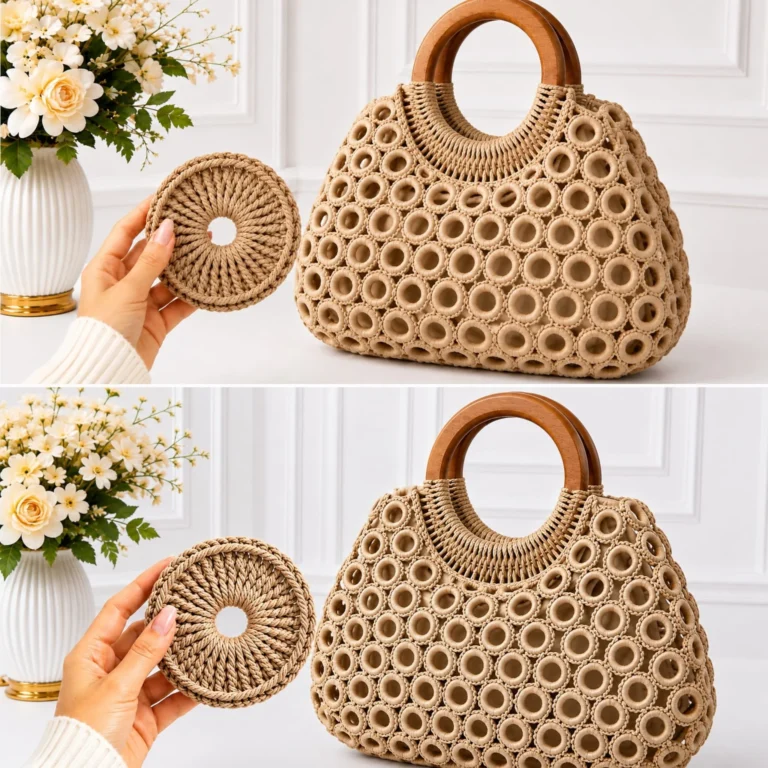

4 Small Crochet Gift and Home Accessory Ideas
Try four small crochet gift ideas with counted US-term patterns for owl motifs, a flower mug band, a scissors sleeve and decorative little bells. Each photo is paired with an original construction, materials, counted steps and finishing notes.
US crochet terms and working rules
ch = chain; sl st = slip stitch; sc = single crochet; hdc = half double crochet; dc = double crochet; inc = 2 stitches in one stitch; sc2tog = single crochet two stitches together; st(s) = stitch(es); sp = space; RS = right side. A magic ring is an adjustable yarn loop. Numbers in brackets give end-of-round or end-of-row counts. Repeat instructions between parentheses the stated number of times.
Unless a step explicitly says otherwise, beginning chains do not count as stitches. For dc rounds, ch 2 to reach height, then work the first dc into the first stitch; join to the first real dc. For sc rounds, ch 1 and join to the first sc. For flat sc rows, ch 1 and turn. Flat dc rows explicitly use ch 3 as the first counted dc. Do not work into joining slip stitches. Change color by completing the last yarn-over of the preceding stitch with the new yarn.
To work sc2tog: insert hook into the next stitch and draw up a loop, repeat in the following stitch, yarn over and draw through all three loops. For a surface slip stitch, bring the yarn up from behind the fabric, insert the hook into the next chosen gap and pull the new loop through the loop already on the hook. Keep these stitches loose.
US terms: inc = 2 stitches of the stated type in one stitch; sc2tog/dc2tog/dc3tog = work two or three stitches together as named; BLO = back loop only; FPdc = front-post double crochet; tr = treble crochet. Ch 3 counts as a dc unless stated otherwise; ch 1 for turning never counts. Joined rounds close with sl st unless continuous rounds are specified. The printed charts in some photographs are reference content, not instructions verified or transcribed here.
1. Bright Owl Motif Trio
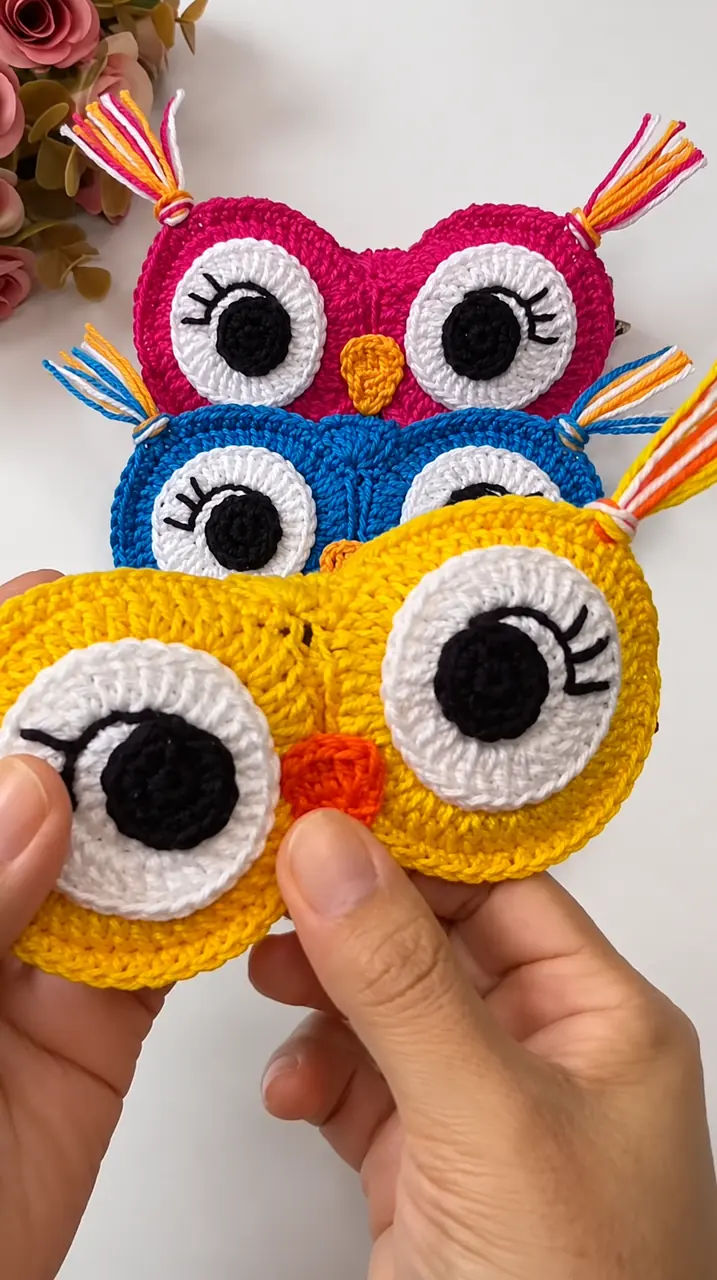
This bright owl motif trio highlights pink, blue, yellow, white and black. The written version explains a complete original construction while simplifying details that cannot be recovered reliably from the photograph.
Materials, gauge and size
Washable DK cotton, approximately 20–60 g per small project. Colors: pink, blue, yellow, white and black. Hook: 2.5–3.5 mm. Quantities are estimates; weigh a sample and add 15–20% for assembly, edging and adjustments.
Also use a yarn needle, scissors, markers, measuring tape and blocking pins. Add buttons and lining fabric where specified.
Gauge and size: For firm sc pieces start near 20 sc × 22 rows per 10 cm; measure the actual mug handle or closed scissors before deciding row and stitch counts.
Owl body and ear corners
- Make three owls in pink, blue and yellow. Joined rounds: Round 1: 6 sc in magic ring [6]. Round 2: inc in every stitch [12]. Round 3: (sc, inc) six times [18]. Round 4: (2 sc, inc) six times [24]. Round 5: (3 sc, inc) six times [30]. Round 6: (4 sc, inc) six times [36].
- Round 7: sc in next 7, (hdc, dc, ch 2, dc, hdc) in next stitch, sc in next 12, (hdc, dc, ch 2, dc, hdc) in next stitch, sc in last 15 [42 stitches and 2 ear tips]. Fasten off and block with the ear tips up. This disc is a flat applique; make two per owl and sew together if a thicker coaster-like ornament is desired.
Eyes, beak and details
- Each eye: 6 sc in magic ring [6], then inc around [12], then (sc, inc) six times [18]. Make six white eyes total. Pupils: 6 sc in black magic ring [6]; make six and sew to white centers. Embroider a tiny white highlight on each pupil.
- Sew two eyes side by side on the upper body, keeping the ear tips visible. Beak: ch 4; sc across [3], next row sc3tog [1]; fasten off and sew below eye centers. Add three short folded yarn strands through each ear tip and trim to 2 cm. Reinforce all features and weave ends so the back is smooth.
Assembly and finishing
- Check all counts before joining. Weave ends through several stitches in three directions. Sew point joins more than once and distribute tension evenly.
- Wash a sample using the yarn care instructions, block gently and allow it to dry completely. Recheck fit or motif size after washing. These original patterns are photo-inspired and physically untested; they do not reproduce a verified photographed chart.
2. Flower-Trim Mug Handle Band
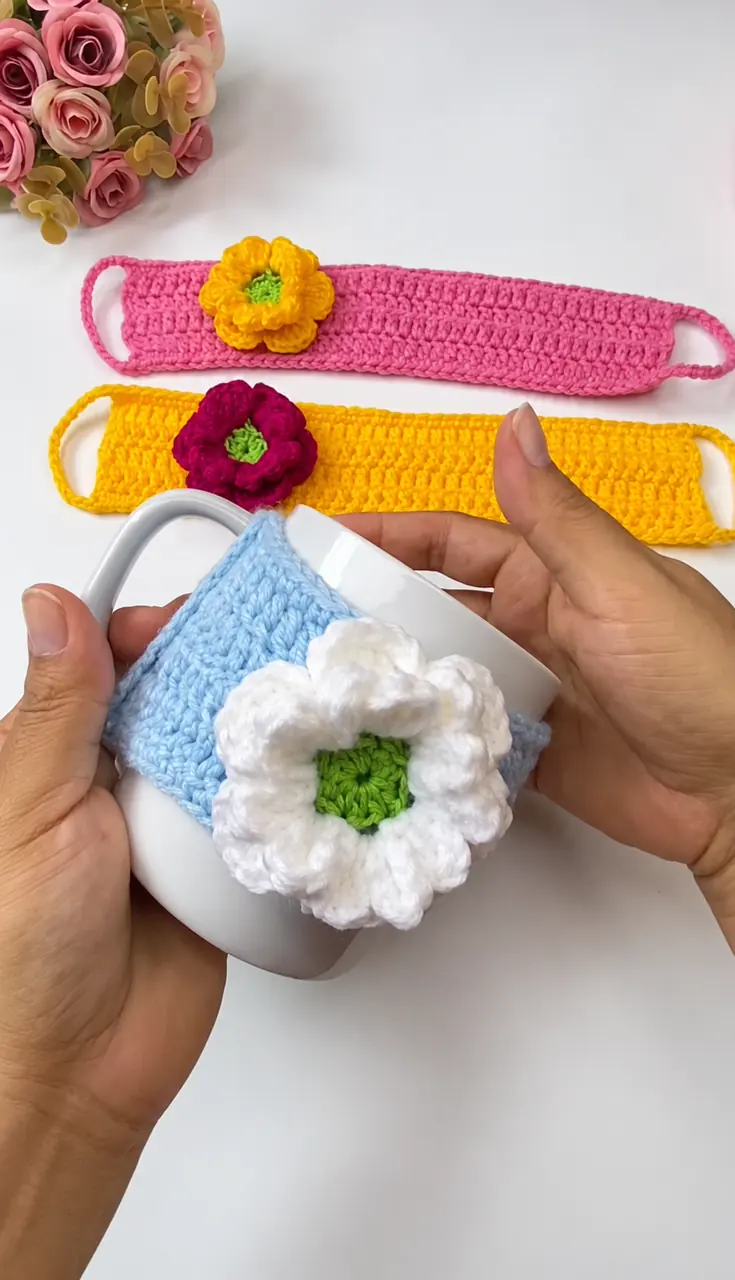
This flower-trim mug handle band highlights pink, yellow, blue, white and green. The written version explains a complete original construction while simplifying details that cannot be recovered reliably from the photograph.
Materials, gauge and size
Washable DK cotton, approximately 20–60 g per small project. Colors: pink, yellow, blue, white and green. Hook: 2.5–3.5 mm. Quantities are estimates; weigh a sample and add 15–20% for assembly, edging and adjustments.
Also use a yarn needle, scissors, markers, measuring tape and blocking pins. Add buttons and lining fabric where specified.
Gauge and size: For firm sc pieces start near 20 sc × 22 rows per 10 cm; measure the actual mug handle or closed scissors before deciding row and stitch counts.
Measured mug-handle comfort band
- Use washable cotton and test it on a cool mug first. This is a decorative handle wrap, not heat-protective equipment. Ch 7; Row 1 sc in second chain and across [6]. Rows 2–30 sc across [6]. At 22 rows per 10 cm this is roughly 14 cm long; measure the path around the actual handle and adjust rows.
- At the final short end ch 6, sl st into its opposite corner, then work six sc around the loop. Sew a button to the starting short end. The closed wrap should sit securely without pulling the mug handle or preventing a comfortable grip. Make three wraps in pink, yellow and blue.
- With the center color work 10 sc into a magic ring; join [10]. With the petal color repeat (sl st in next sc, 5 dc in next sc) five times. [Five petals] Fasten off with a sewing tail; weave or sew both ends securely.
Tiny leaf
- Ch 7. Starting in second chain, work sc, hdc, 2 dc, hdc, then 3 sc in the last chain. Working along the underside, hdc, 2 dc, hdc, sc [13 stitches]. Sl st to the beginning and fasten off. Make the number specified in the project, leaving sewing tails.
Flower trim and ruffled version
- Make one contrasting flower and two leaves per band, sewing the flower center and leaf bases to the outside face. Keep decoration away from the inside finger-grip surface.
- For the white ruffle example, first fit a plain white band. Work one sc along each long edge, one per row end. Next row: 3 dc in each edge sc; let the edge ruffle naturally. Use the original button/loop closure and one small flower. The ruffle is decorative; it does not certify protection from a hot cup.
Assembly and finishing
- Check all counts before joining. Weave ends through several stitches in three directions. Sew point joins more than once and distribute tension evenly.
- Wash a sample using the yarn care instructions, block gently and allow it to dry completely. Recheck fit or motif size after washing. These original patterns are photo-inspired and physically untested; they do not reproduce a verified photographed chart.
3. Striped Granny Scissors Sleeve
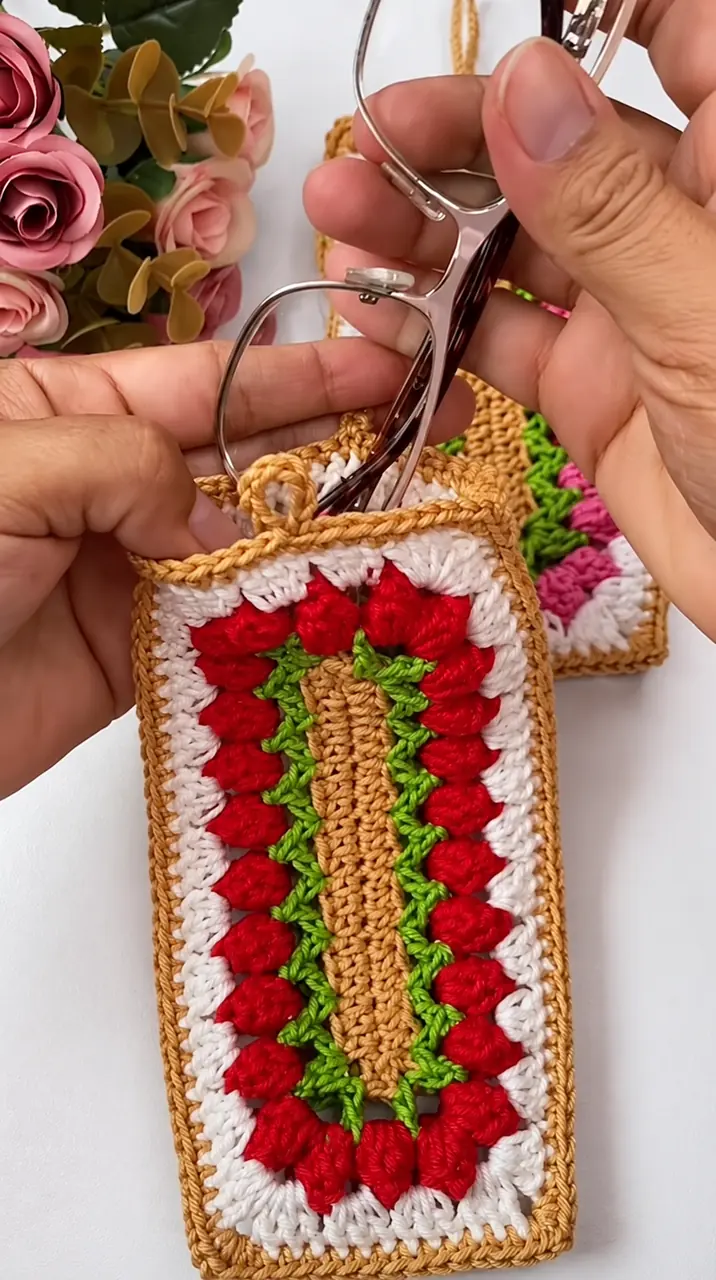
This striped granny scissors sleeve highlights red, green, gold and ivory. The written version explains a complete original construction while simplifying details that cannot be recovered reliably from the photograph.
Materials, gauge and size
Washable DK cotton, approximately 20–60 g per small project. Colors: red, green, gold and ivory. Hook: 2.5–3.5 mm. Quantities are estimates; weigh a sample and add 15–20% for assembly, edging and adjustments.
Also use a yarn needle, scissors, markers, measuring tape and blocking pins. Add buttons and lining fabric where specified.
Gauge and size: For firm sc pieces start near 20 sc × 22 rows per 10 cm; measure the actual mug handle or closed scissors before deciding row and stitch counts.
Striped sleeve panels
- Measure closed scissors first and allow at least 1 cm ease around the blade section. Example panel at 20 sc per 10 cm: ch 17; Row 1 sc in second chain and across [16]. Rows 2–28: sc across [16]. Change between red, cream, green and gold every two rows. Make two panels.
- Round the lower tip on both panels: from Row 28, work sc2tog at each end on the next four rows [14, 12, 10, 8]. Fasten off. Stack panels with striped faces outward, sew both long sides and the tapered bottom, leaving the top open. The 16-stitch width is only an example; fit before completing the seam.
- Opening edge: sc once around, one sc per top stitch [32 before seam loss]. Work one additional sc round. Optional scallops: (skip 1, 5 dc in next, skip 1, sl st in next) eight times if the opening remains 32 positions; otherwise use plain sc to absorb leftovers at seams.
Hanging loop and fabric lining
- Loop: ch 31, sc in second chain and across [30], fold and sew both ends into the rear top seam. Reinforce through several fabric rows. Add a tightly woven fabric lining shaped to the sleeve so the points do not pass between stitches. The sleeve is for closed craft scissors and is not a childproof sharp-tool case.
- For the small companion shown, use ch 11, 10 sc across and 18 straight rows, then decrease both ends twice [8, 6]. Make two, join three sides and line. Fit to the actual tool before use; the smaller version is not guaranteed to fit every pair of snips.
Assembly and finishing
- Check all counts before joining. Weave ends through several stitches in three directions. Sew point joins more than once and distribute tension evenly.
- Wash a sample using the yarn care instructions, block gently and allow it to dry completely. Recheck fit or motif size after washing. These original patterns are photo-inspired and physically untested; they do not reproduce a verified photographed chart.
4. Little Red, White and Green Bells
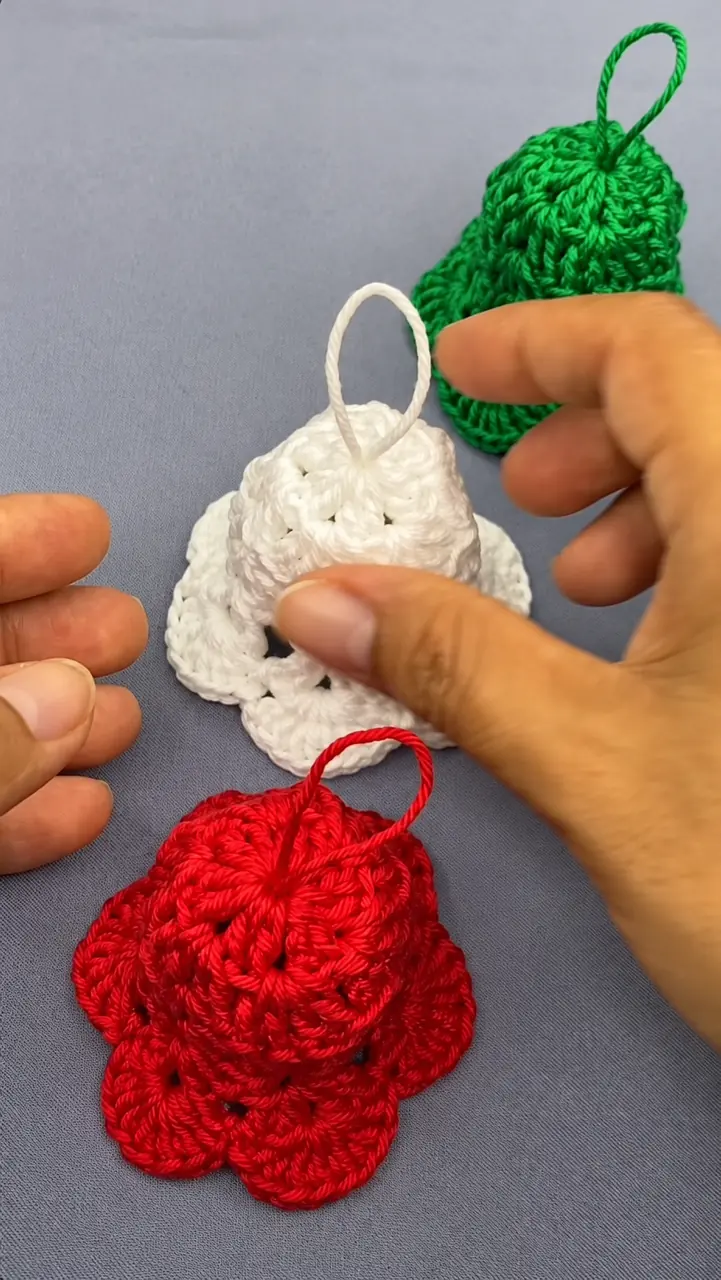
This little red, white and green bells highlights red, white and green. The written version explains a complete original construction while simplifying details that cannot be recovered reliably from the photograph.
Materials, gauge and size
Washable DK cotton, approximately 20–60 g per small project. Colors: red, white and green. Hook: 2.5–3.5 mm. Quantities are estimates; weigh a sample and add 15–20% for assembly, edging and adjustments.
Also use a yarn needle, scissors, markers, measuring tape and blocking pins. Add buttons and lining fabric where specified.
Gauge and size: For firm sc pieces start near 20 sc × 22 rows per 10 cm; measure the actual mug handle or closed scissors before deciding row and stitch counts.
Small bell shell — make three
- Use firm cotton and joined rounds. Round 1: 6 sc in magic ring [6]. Round 2: inc in each [12]. Round 3: (sc, inc) six times [18]. Rounds 4–7: sc around [18]. Round 8: (2 sc, inc) six times [24]. Round 9: sc around [24]. Round 10: (3 sc, inc) six times [30].
- Round 11: (sl st in next stitch, skip 1, 5 dc in next, skip 1, sl st in next) six times [6 scallops, 30 base positions consumed]. Fasten off. Each scallop has five dc and two slip-stitch anchors; do not count the skipped stitches as outputs. Make shells in red, white and green.
- Crocheted clapper: 6 sc in magic ring [6], one plain round [6], then three sc2tog [3]; close without stuffing. Ch 11, sl st along 10 chains; sew one end to the clapper and the other inside the bell top so the ball hangs just above the scalloped rim.
- Hanging loop: ch 21, sl st along 20 chains and sew both ends through the shell top. Wet-block over a suitably sized smooth form covered with plastic wrap, then remove when completely dry. The soft shell is a decorative bell shape and produces no sound unless a purchased bell is added as a separate supply.
Assembly and finishing
- Check all counts before joining. Weave ends through several stitches in three directions. Sew point joins more than once and distribute tension evenly.
- Wash a sample using the yarn care instructions, block gently and allow it to dry completely. Recheck fit or motif size after washing. These original patterns are photo-inspired and physically untested; they do not reproduce a verified photographed chart.