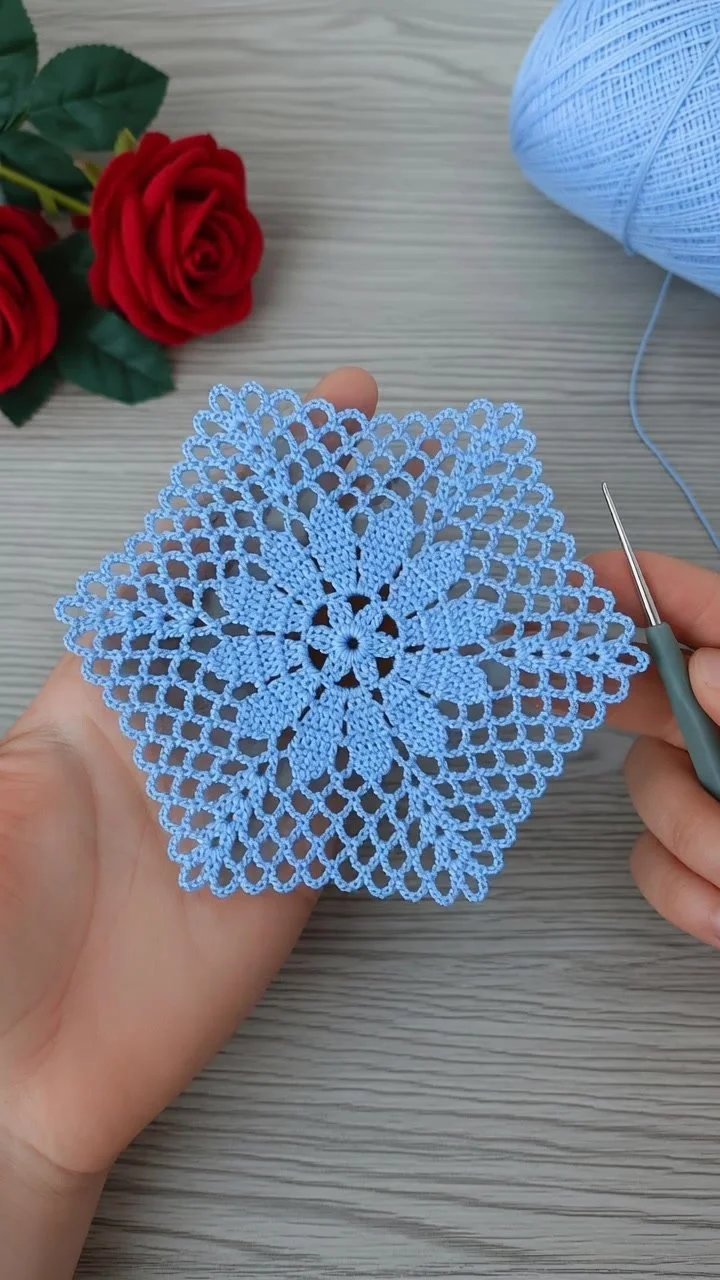

8 Crochet Lace and Texture Stitch Ideas
Try eight crochet lace and texture stitch ideas: daisy bands, puff mesh, fans, openwork, scale overlays and waffle texture, with counted instructions. Each photo is paired with an original construction, materials, counted steps and finishing notes.
US crochet terms and working rules
ch = chain; sl st = slip stitch; sc = single crochet; hdc = half double crochet; dc = double crochet; inc = 2 stitches in one stitch; sc2tog = single crochet two stitches together; st(s) = stitch(es); sp = space; RS = right side. A magic ring is an adjustable yarn loop. Numbers in brackets give end-of-round or end-of-row counts. Repeat instructions between parentheses the stated number of times.
Unless a step explicitly says otherwise, beginning chains do not count as stitches. For dc rounds, ch 2 to reach height, then work the first dc into the first stitch; join to the first real dc. For sc rounds, ch 1 and join to the first sc. For flat sc rows, ch 1 and turn. Flat dc rows explicitly use ch 3 as the first counted dc. Do not work into joining slip stitches. Change color by completing the last yarn-over of the preceding stitch with the new yarn.
To work sc2tog: insert hook into the next stitch and draw up a loop, repeat in the following stitch, yarn over and draw through all three loops. For a surface slip stitch, bring the yarn up from behind the fabric, insert the hook into the next chosen gap and pull the new loop through the loop already on the hook. Keep these stitches loose.
US terms: inc = 2 stitches of the stated type in one stitch; sc2tog/dc2tog/dc3tog = work two or three stitches together as named; BLO = back loop only; FPdc = front-post double crochet; tr = treble crochet. Ch 3 counts as a dc unless stated otherwise; ch 1 for turning never counts. Joined rounds close with sl st unless continuous rounds are specified. The printed charts in some photographs are reference content, not instructions verified or transcribed here.
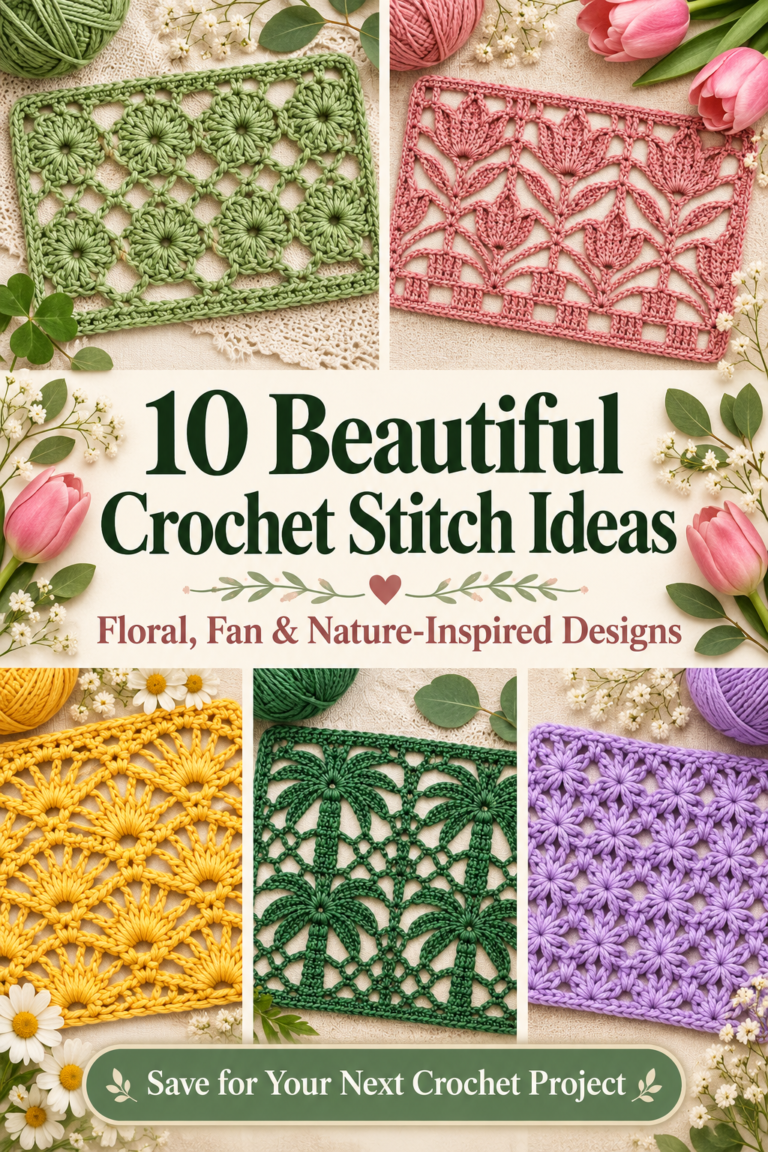
1. Daisy and Leaf Crochet Band
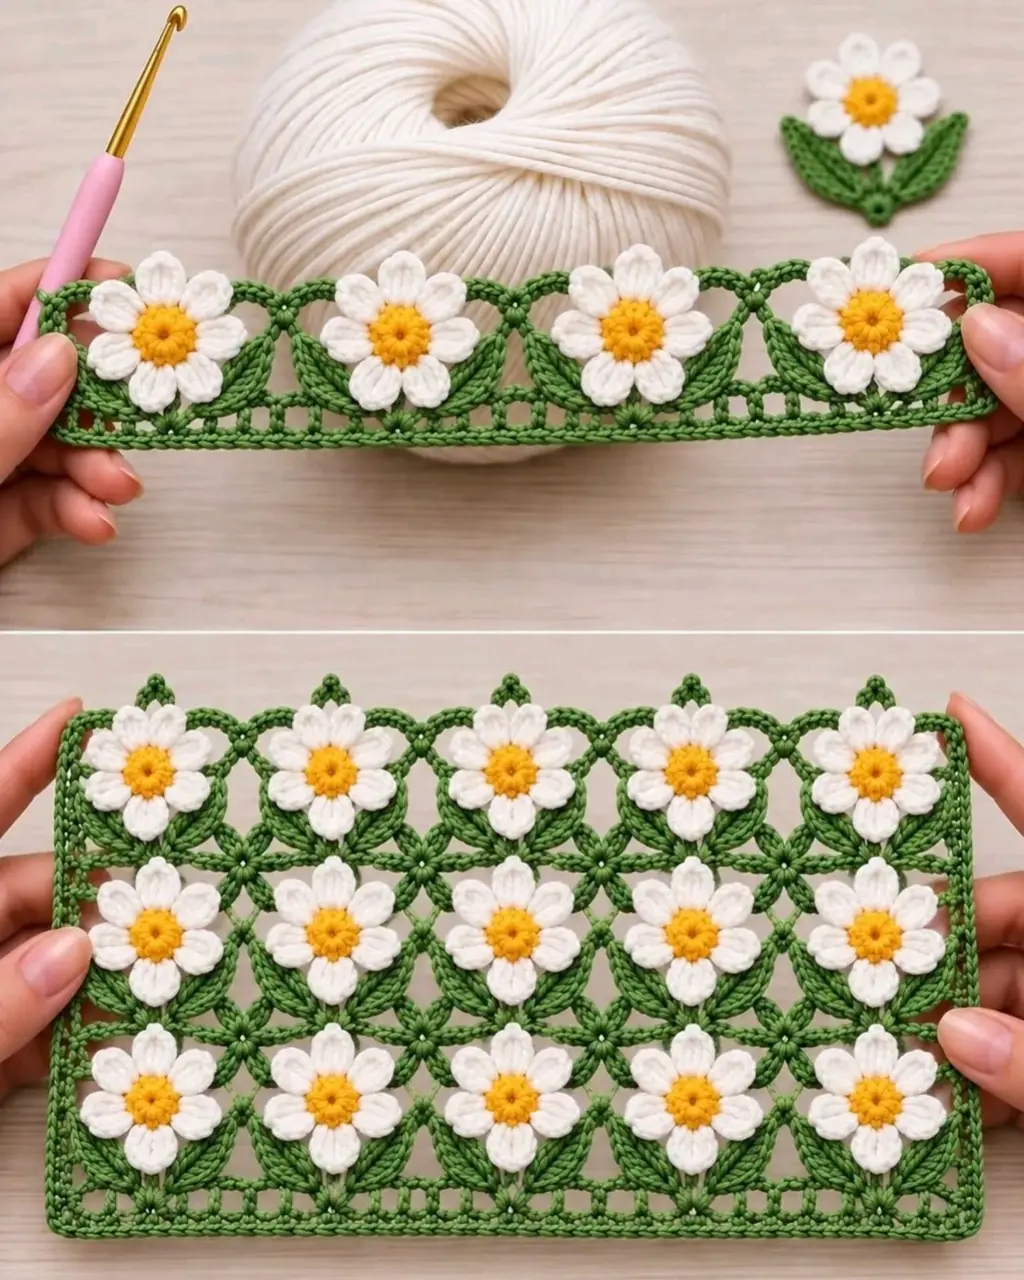
This daisy and leaf crochet band highlights white, gold and green. The written version explains a complete original construction while simplifying details that cannot be recovered reliably from the photograph.
Materials, gauge and size
Smooth sport or DK cotton, approximately 60–180 g per sample panel. Colors: white, gold and green. Hook: 2.5–3.5 mm. Quantities are estimates; weigh a sample and add 15–20% for assembly, edging and adjustments.
Also use a yarn needle, scissors, markers, measuring tape and blocking pins.
Gauge and size: Start near 16 dc × 9 rows per 10 cm, then measure the actual repeat after washing. Raised puffs and overlays need their own gauge.
Eight-petal daisy motif
- Round 1: with gold work 8 sc in a magic ring; join [8]. Round 2: with white, in each sc work (sc, ch 3, dc, ch 3, sl st) [8 petals]. Fasten off with a sewing tail. Make the quantity stated in the project assembly; do not add a separate garland or leaf set.
Tiny leaf
- Ch 7. Starting in second chain, work sc, hdc, 2 dc, hdc, then 3 sc in the last chain. Working along the underside, hdc, 2 dc, hdc, sc [13 stitches]. Sl st to the beginning and fasten off. Make the number specified in the project, leaving sewing tails.
Six-daisy band and green rails
- Make six daisies and twelve tiny leaves. Block flowers to the same diameter. Arrange in one row, sewing adjacent outer petal tips at two points per join. Sew one leaf to each side of every flower, keeping leaves outside the flower centers.
- Top rail: join green to the first top petal tip; ch 7 to the next top tip and sl st to attach, repeating five times. Row 2: ch 1, turn; sc in every chain and attachment. Row 3: dc in every sc. Repeat along the bottom edge, using identical bridge lengths. If seven chains pull the flowers inward, lengthen all bridges equally and record the actual chain count.
- For the wider panel make 24 daisies in four rows of six. Join touching petals first, then add a pair of leaves in each gap. Add rails only to the outside top and bottom. Work one sc outline around the remaining sides, placing three sc at corners. This applique-and-rail construction simplifies the pictured continuous daisy fabric.
Assembly and finishing
- Check all counts before joining. Weave ends through several stitches in three directions. Sew point joins more than once and distribute tension evenly.
- Wash a sample using the yarn care instructions, block gently and allow it to dry completely. Recheck fit or motif size after washing. These original patterns are photo-inspired and physically untested; they do not reproduce a verified photographed chart.
2. Cream Puff Mesh Sample
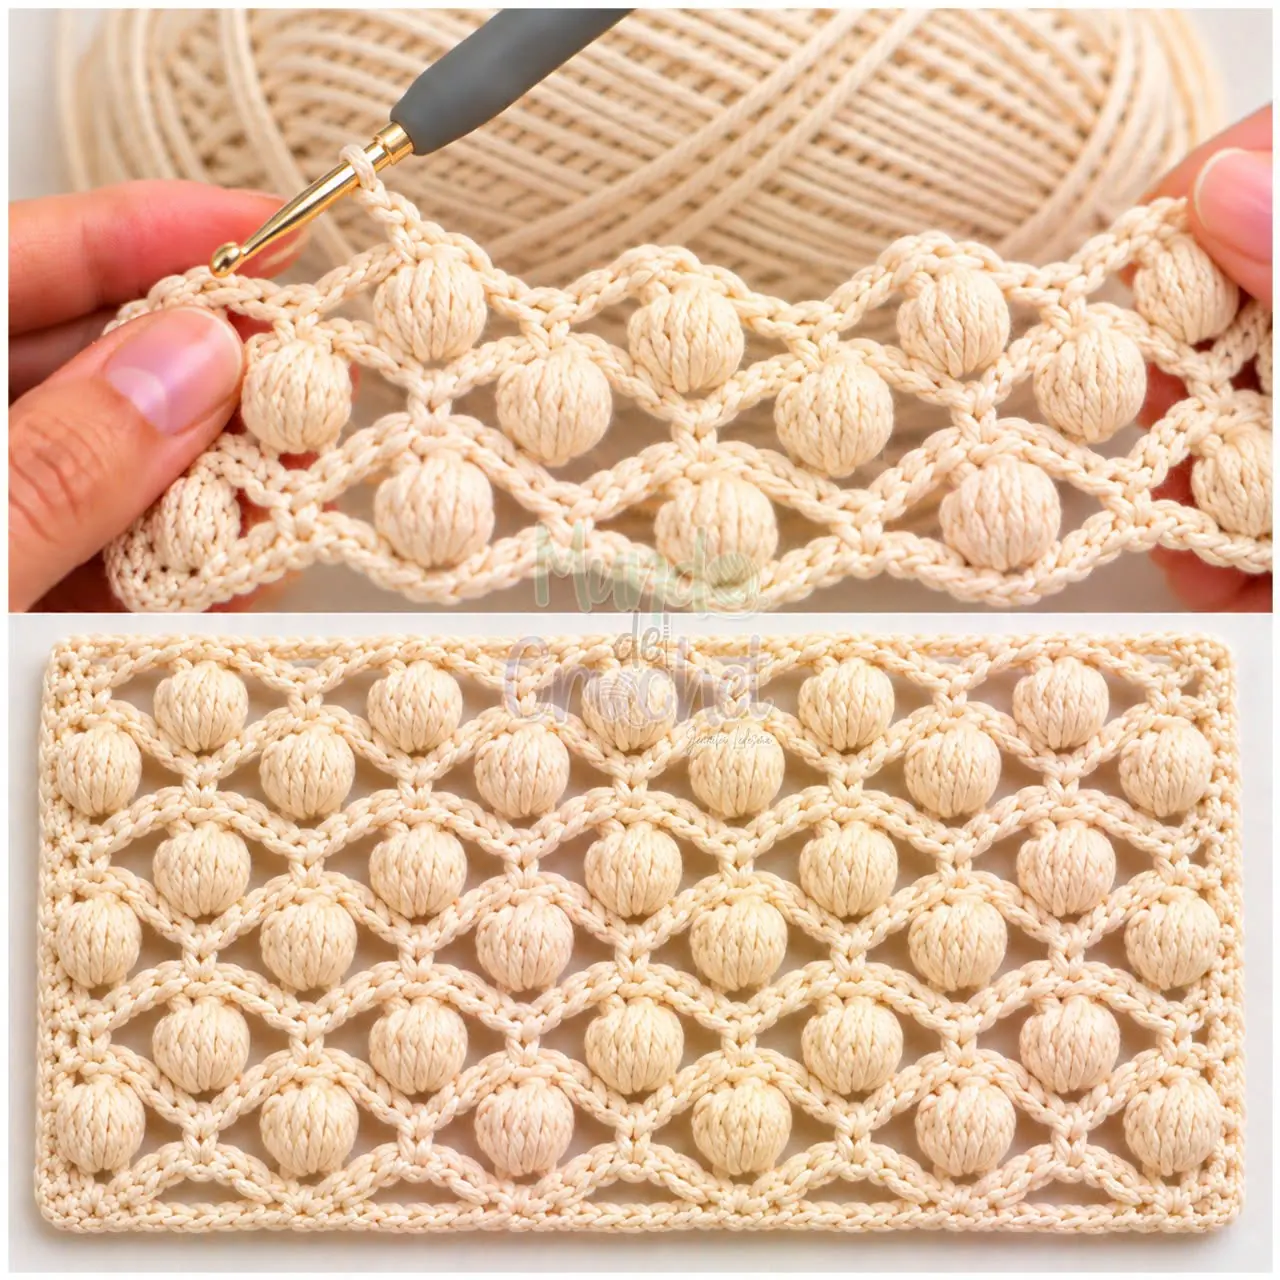
This cream puff mesh sample highlights cream. The written version explains a complete original construction while simplifying details that cannot be recovered reliably from the photograph.
Materials, gauge and size
Smooth sport or DK cotton, approximately 60–180 g per sample panel. Colors: cream. Hook: 2.5–3.5 mm. Quantities are estimates; weigh a sample and add 15–20% for assembly, edging and adjustments.
Also use a yarn needle, scissors, markers, measuring tape and blocking pins.
Gauge and size: Start near 16 dc × 9 rows per 10 cm, then measure the actual repeat after washing. Raised puffs and overlays need their own gauge.
Puff definition and 49-position mesh
- Puff: (yarn over, insert in the indicated stitch and draw up a long loop) five times [11 loops]; yarn over and pull through all 11. The next chain closes and spaces the puff; do not add another closure chain.
- Ch 51. Row 1: dc in fourth chain and across, skipped ch 3 counts as first dc [49]. Row 2: ch 1, turn; sc in first stitch, (ch 3, skip 2, puff in next stitch, ch 3, skip 2, sc in next stitch) eight times [9 sc, 8 puffs, 16 ch-3 spaces]. Each repeat consumes six old stitches.
- Row 3: ch 3 counts as first dc, turn; for each of the eight repeats work 2 dc in next chain space, dc in puff, 2 dc in next chain space, dc in next sc [49 dc]. This uses two dc per three-chain arch to restore the original width.
- Rows 4–17: repeat Rows 2–3 seven times [49 positions on solid rows]. Finish with one sc outline, using three sc at corners. Block without flattening the puffs. For a longer band add foundation stitches in multiples of six; for a wider sample add complete two-row repeats.
Assembly and finishing
- Check all counts before joining. Weave ends through several stitches in three directions. Sew point joins more than once and distribute tension evenly.
- Wash a sample using the yarn care instructions, block gently and allow it to dry completely. Recheck fit or motif size after washing. These original patterns are photo-inspired and physically untested; they do not reproduce a verified photographed chart.
3. Pink Fan Lace Sample
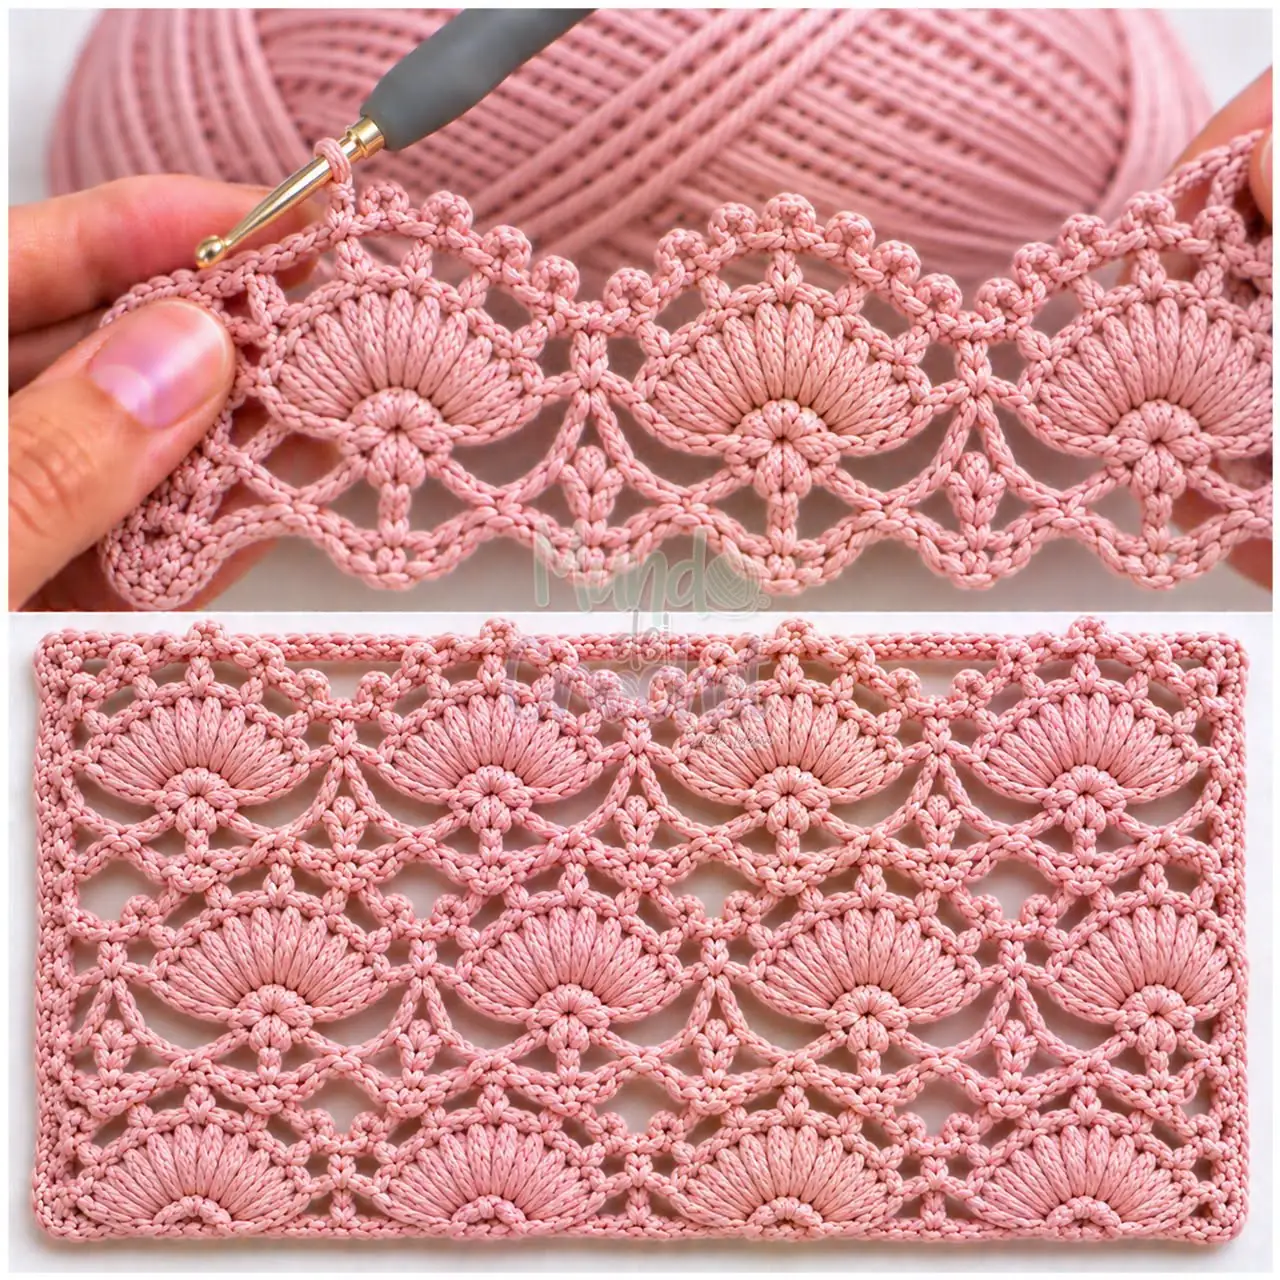
This pink fan lace sample highlights pink. The written version explains a complete original construction while simplifying details that cannot be recovered reliably from the photograph.
Materials, gauge and size
Smooth sport or DK cotton, approximately 60–180 g per sample panel. Colors: pink. Hook: 2.5–3.5 mm. Quantities are estimates; weigh a sample and add 15–20% for assembly, edging and adjustments.
Also use a yarn needle, scissors, markers, measuring tape and blocking pins.
Gauge and size: Start near 16 dc × 9 rows per 10 cm, then measure the actual repeat after washing. Raised puffs and overlays need their own gauge.
Shell-and-mesh fabric
- Ch 49. Row 1: Sc in second chain and across. [48 sc]
- Row 2: Ch 1, turn; repeat (sc in next stitch, skip 2, 5 dc in next stitch, skip 2) eight times. [Eight sc and eight shells; 48 stitches]
- Row 3: Ch 3 (counts as first dc), turn; dc in every remaining stitch. [48 dc]
- Row 4: Ch 3, turn; (ch 1, skip 1, dc in next stitch) 23 times, then dc in the last stitch. [25 dc, 23 ch-1 spaces; 48 positions]
- Row 5: Ch 1, turn; sc in every dc and in each ch-1 space. [48 sc]
- Repeat Rows 2–5 until there are 33 rows, or the measured length is reached. End after a plain sc row. For a narrow trim use a multiple of six stitches; add one chain for the foundation. All rows retain the same number of stitch/chain positions.
- Border with one sc round, 3 sc at corners, one sc at sc row-ends and 2 sc at taller row-ends. Add an optional row of (sc, ch 3, skip 1) arches along the long sides. Use plain sc at corners and incomplete repeats. Wet-block without stretching the chain spaces.
This independent shell-and-mesh repeat interprets the lace texture; it does not reproduce a hidden stitch chart.
Fan variation and trim
- For a pink fan trim, work only the first five sample rows, then add one sc row. For the larger sample use all repeated rows as written. The fan pattern is a simplified interpretation of the photographed radial shells.
- After blocking, measure one six-position repeat. For garment edging choose a total divisible by six; work partial repeats only by replacing the remainder with plain sc at a seam. Never stretch a trim to force it onto a shorter edge.
Assembly and finishing
- Check all counts before joining. Weave ends through several stitches in three directions. Sew point joins more than once and distribute tension evenly.
- Wash a sample using the yarn care instructions, block gently and allow it to dry completely. Recheck fit or motif size after washing. These original patterns are photo-inspired and physically untested; they do not reproduce a verified photographed chart.
4. Denim Flower-Net Lace Sample
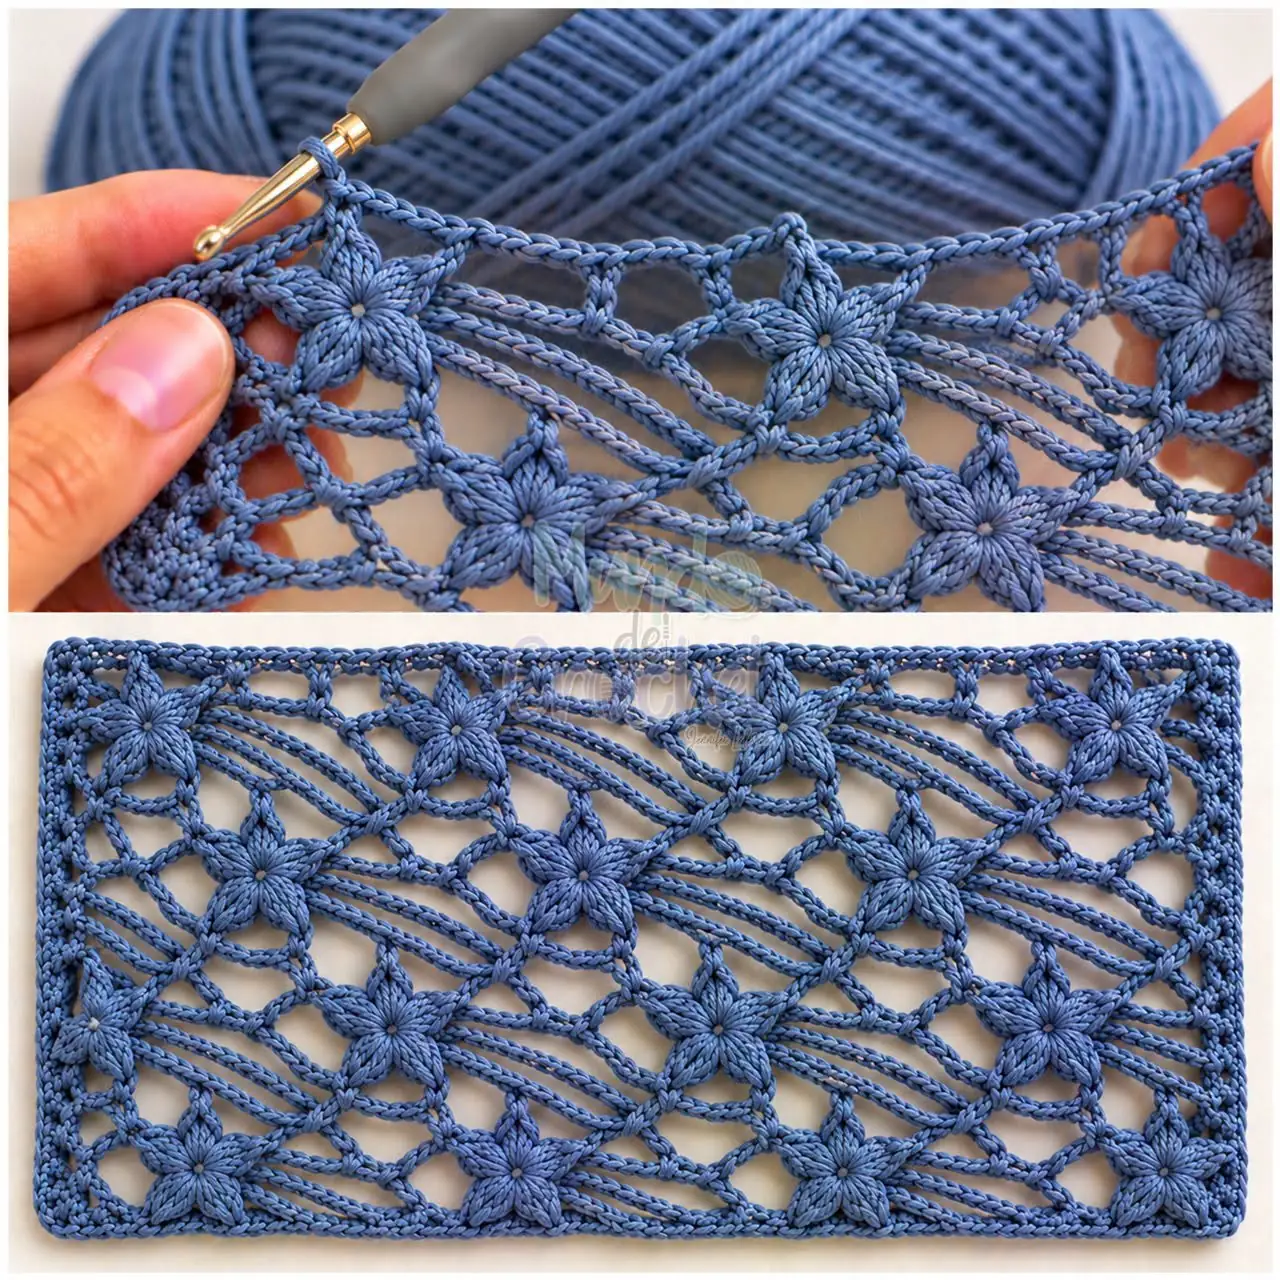
This denim flower-net lace sample highlights denim blue. The written version explains a complete original construction while simplifying details that cannot be recovered reliably from the photograph.
Materials, gauge and size
Smooth sport or DK cotton, approximately 60–180 g per sample panel. Colors: denim blue. Hook: 2.5–3.5 mm. Quantities are estimates; weigh a sample and add 15–20% for assembly, edging and adjustments.
Also use a yarn needle, scissors, markers, measuring tape and blocking pins.
Gauge and size: Start near 16 dc × 9 rows per 10 cm, then measure the actual repeat after washing. Raised puffs and overlays need their own gauge.
Flower-net sample
- Ch 51. Row 1: dc in fourth chain and across, counting skipped ch 3 as first dc [49]. Row 2: ch 1, turn; sc in first stitch, (ch 5, skip 5, sc in next stitch) eight times [9 sc and 8 arches].
- Row 3: ch 3 counts as first dc, turn; (5 dc in next arch, dc in next sc) eight times [49 dc]. Row 4: repeat Row 2 [8 arches]. Row 5: repeat Row 3 [49]. Repeat Rows 2–3 until the sample has 21 rows, then fasten off.
- Small overlay flower: 6 sc in magic ring; join. Round 2: in each sc work (sl st, ch 3, dc, ch 3, sl st) [6 petals]. Make eight flowers and sew one to each alternate-row arch junction across the center of the sample. Make sixteen for two decorated horizontal rows. Sew each center and two petal tips so flowers lie flat.
- Outline with one sc round, using three sc at corners and five sc in each exposed arch. The final border count depends on the number of repeats. This written net and applique interpretation replaces the more integrated flower-chain arrangement in the reference.
Assembly and finishing
- Check all counts before joining. Weave ends through several stitches in three directions. Sew point joins more than once and distribute tension evenly.
- Wash a sample using the yarn care instructions, block gently and allow it to dry completely. Recheck fit or motif size after washing. These original patterns are photo-inspired and physically untested; they do not reproduce a verified photographed chart.
5. Teal Scale Overlay Stitch
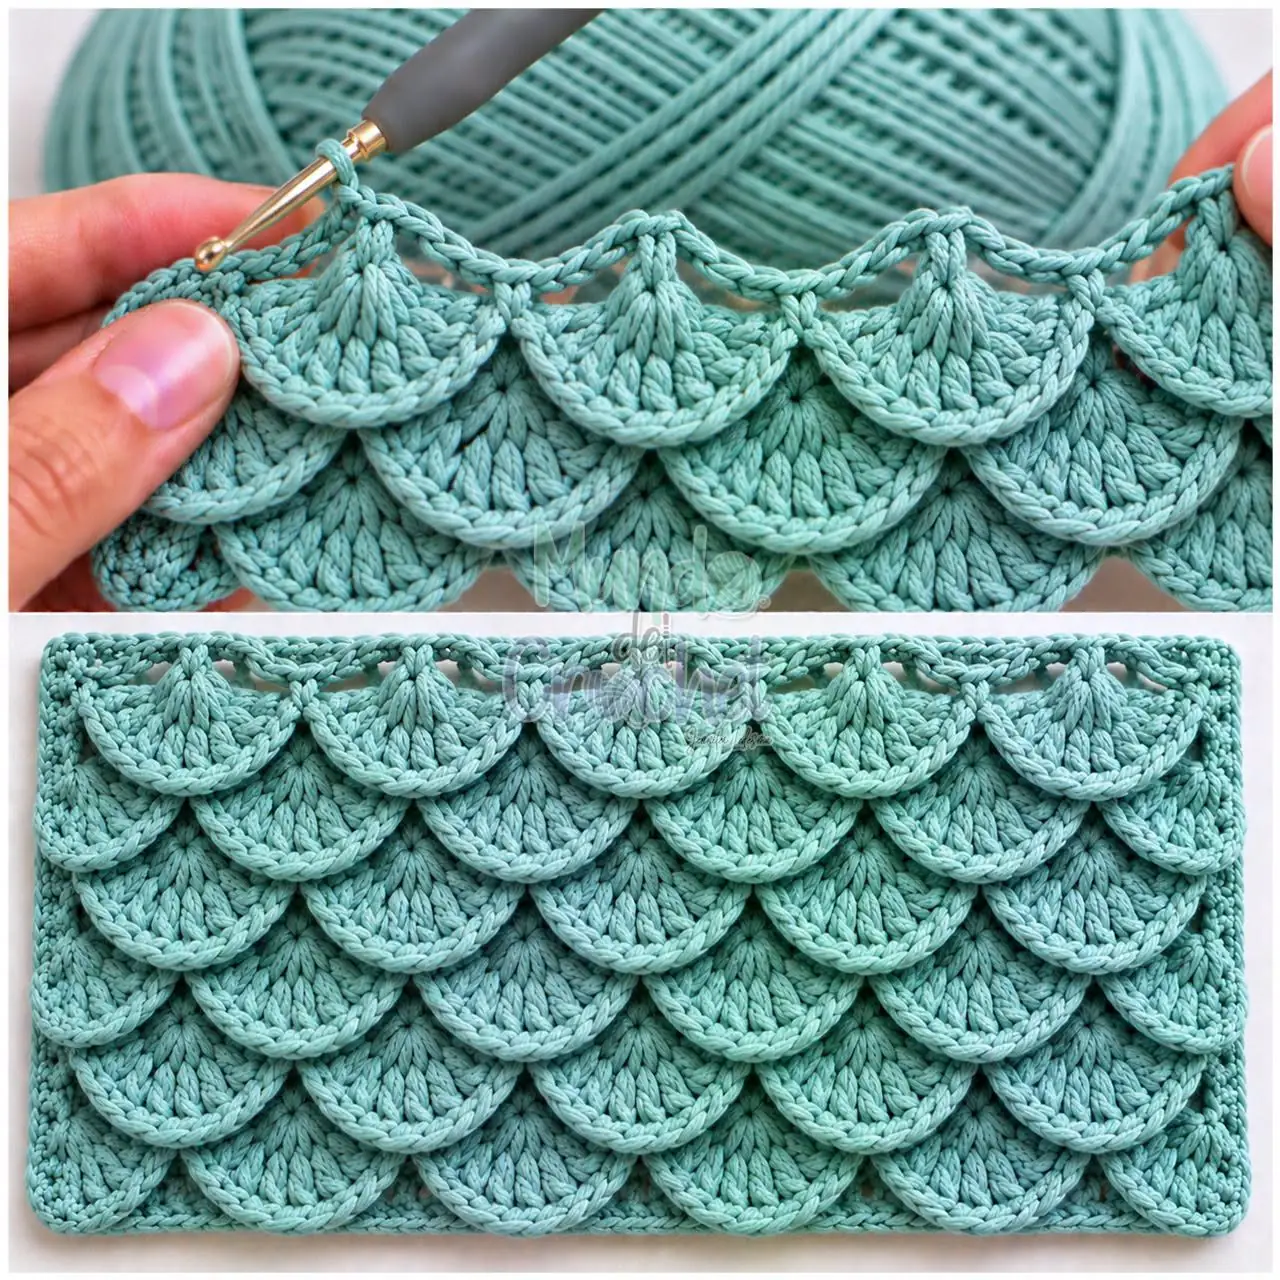
This teal scale overlay stitch highlights teal. The written version explains a complete original construction while simplifying details that cannot be recovered reliably from the photograph.
Materials, gauge and size
Smooth sport or DK cotton, approximately 60–180 g per sample panel. Colors: teal. Hook: 2.5–3.5 mm. Quantities are estimates; weigh a sample and add 15–20% for assembly, edging and adjustments.
Also use a yarn needle, scissors, markers, measuring tape and blocking pins.
Gauge and size: Start near 16 dc × 9 rows per 10 cm, then measure the actual repeat after washing. Raised puffs and overlays need their own gauge.
Mesh ground
- Ch 51. Row 1: dc in fourth chain and across, counting skipped ch 3 as first dc [49]. Row 2: ch 3 counts as first dc, turn; (ch 1, skip 1, dc in next) 24 times [25 dc, 24 spaces; 49 positions]. Row 3: dc in each stitch and once in each space [49]. Repeat Rows 2–3 to Row 17.
Separate scale overlays
- Make a scale: ch 4, join to form a ring. Row 1: ch 3 counts as first dc and work 6 more dc into ring [7 dc]. Row 2: ch 3 counts as first dc, turn; dc in same first stitch, 2 dc in each remaining stitch [14]. Row 3: ch 1, turn; sc in each stitch [14]. Fasten off with a long tail. The straight foundation edge is the scale top.
- Make 20 scales. Mark four horizontal attachment lines on the ground, each about four fabric rows apart. On the lowest line sew five scale tops evenly across the 49-position panel. On the next line place five scales half a scale to the side, allowing a small overhang at both edges; sew the tops only so they overlap the lower row. Continue for four rows of five, alternating alignment.
- Secure each scale at both top corners and center; leave the curved lower edge free. Work a plain sc perimeter around the mesh ground, catching outside scale corners only where they would otherwise curl off the panel. This overlay construction is an original alternative to integrated crocodile stitch, not a claimed transcription.
Assembly and finishing
- Check all counts before joining. Weave ends through several stitches in three directions. Sew point joins more than once and distribute tension evenly.
- Wash a sample using the yarn care instructions, block gently and allow it to dry completely. Recheck fit or motif size after washing. These original patterns are photo-inspired and physically untested; they do not reproduce a verified photographed chart.
6. Taupe Flower-Net Stitch Sample
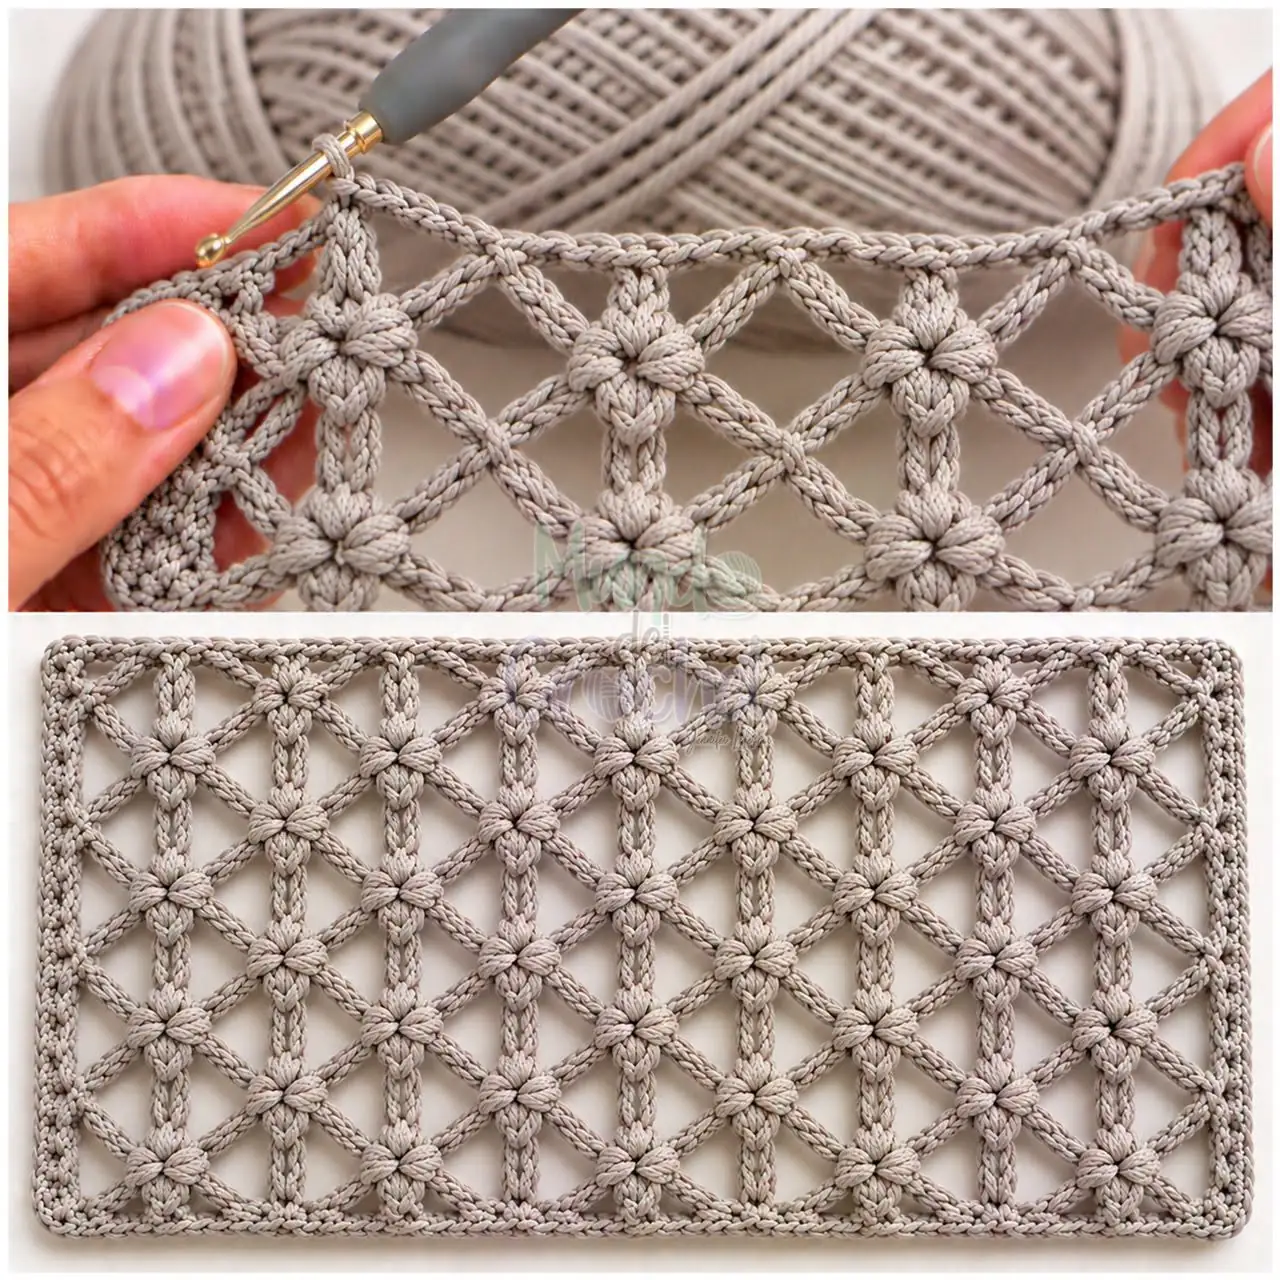
This taupe flower-net stitch sample highlights taupe. The written version explains a complete original construction while simplifying details that cannot be recovered reliably from the photograph.
Materials, gauge and size
Smooth sport or DK cotton, approximately 60–180 g per sample panel. Colors: taupe. Hook: 2.5–3.5 mm. Quantities are estimates; weigh a sample and add 15–20% for assembly, edging and adjustments.
Also use a yarn needle, scissors, markers, measuring tape and blocking pins.
Gauge and size: Start near 16 dc × 9 rows per 10 cm, then measure the actual repeat after washing. Raised puffs and overlays need their own gauge.
Flower-net sample
- Ch 51. Row 1: dc in fourth chain and across, counting skipped ch 3 as first dc [49]. Row 2: ch 1, turn; sc in first stitch, (ch 5, skip 5, sc in next stitch) eight times [9 sc and 8 arches].
- Row 3: ch 3 counts as first dc, turn; (5 dc in next arch, dc in next sc) eight times [49 dc]. Row 4: repeat Row 2 [8 arches]. Row 5: repeat Row 3 [49]. Repeat Rows 2–3 until the sample has 21 rows, then fasten off.
- Small overlay flower: 6 sc in magic ring; join. Round 2: in each sc work (sl st, ch 3, dc, ch 3, sl st) [6 petals]. Make eight flowers and sew one to each alternate-row arch junction across the center of the sample. Make sixteen for two decorated horizontal rows. Sew each center and two petal tips so flowers lie flat.
- Outline with one sc round, using three sc at corners and five sc in each exposed arch. The final border count depends on the number of repeats. This written net and applique interpretation replaces the more integrated flower-chain arrangement in the reference.
Assembly and finishing
- Check all counts before joining. Weave ends through several stitches in three directions. Sew point joins more than once and distribute tension evenly.
- Wash a sample using the yarn care instructions, block gently and allow it to dry completely. Recheck fit or motif size after washing. These original patterns are photo-inspired and physically untested; they do not reproduce a verified photographed chart.
7. Rose Heart-Fan Lace Sample
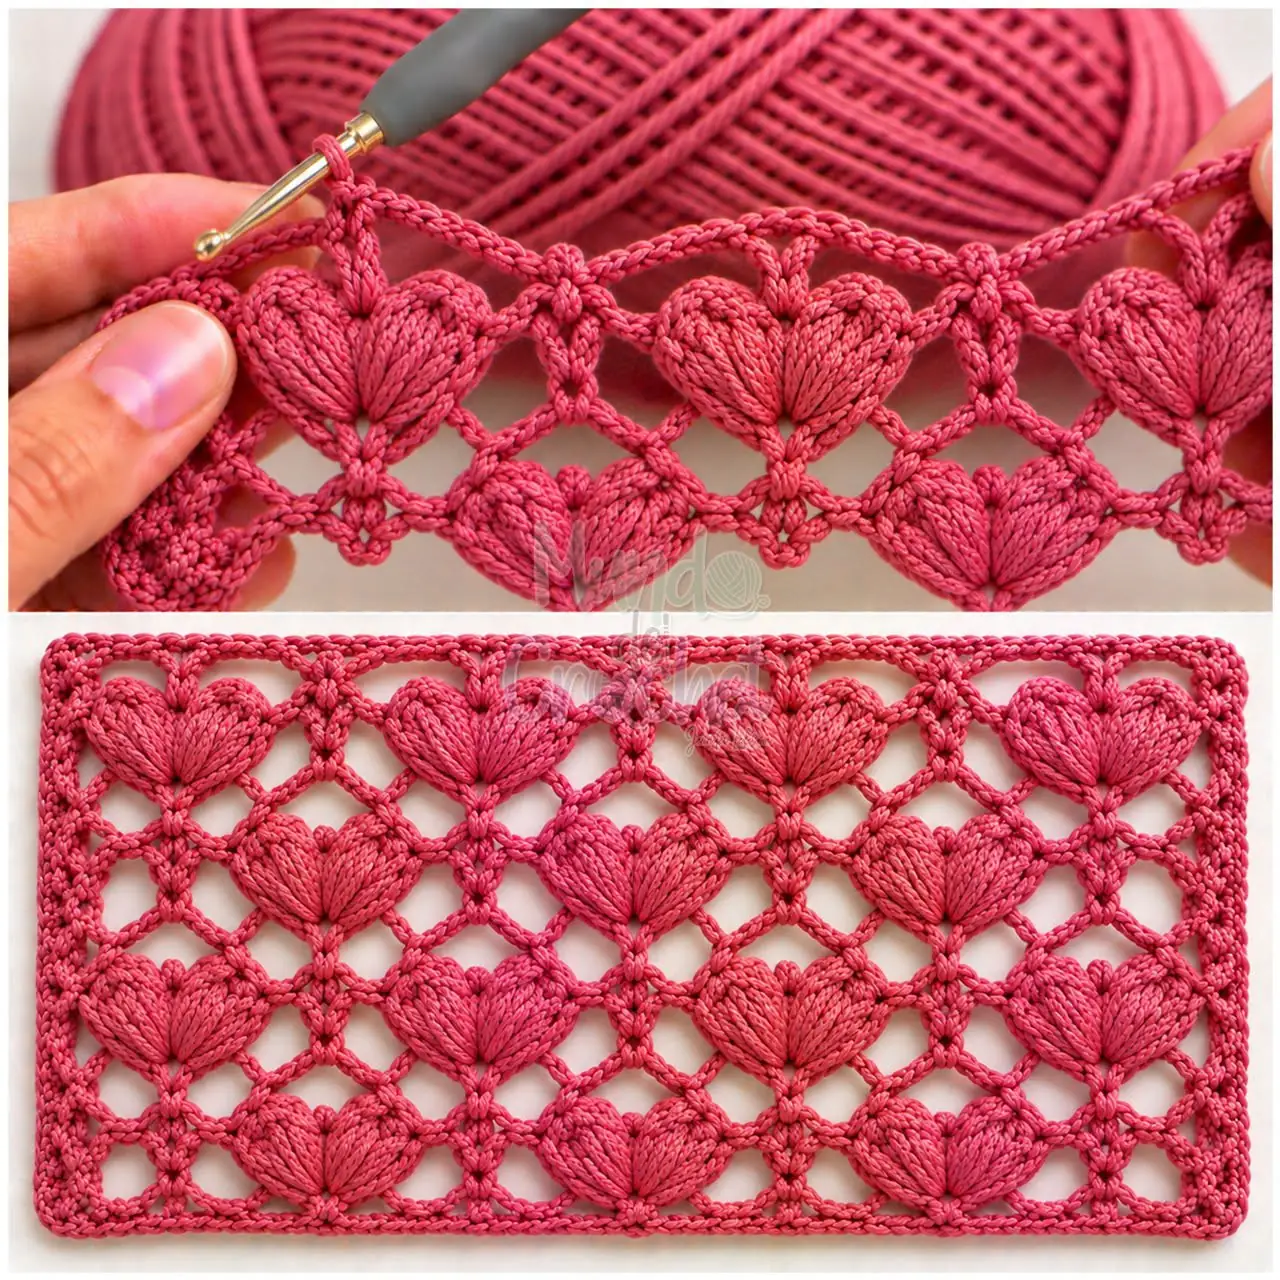
This rose heart-fan lace sample highlights deep rose. The written version explains a complete original construction while simplifying details that cannot be recovered reliably from the photograph.
Materials, gauge and size
Smooth sport or DK cotton, approximately 60–180 g per sample panel. Colors: deep rose. Hook: 2.5–3.5 mm. Quantities are estimates; weigh a sample and add 15–20% for assembly, edging and adjustments.
Also use a yarn needle, scissors, markers, measuring tape and blocking pins.
Gauge and size: Start near 16 dc × 9 rows per 10 cm, then measure the actual repeat after washing. Raised puffs and overlays need their own gauge.
Shell-and-mesh fabric
- Ch 49. Row 1: Sc in second chain and across. [48 sc]
- Row 2: Ch 1, turn; repeat (sc in next stitch, skip 2, 5 dc in next stitch, skip 2) eight times. [Eight sc and eight shells; 48 stitches]
- Row 3: Ch 3 (counts as first dc), turn; dc in every remaining stitch. [48 dc]
- Row 4: Ch 3, turn; (ch 1, skip 1, dc in next stitch) 23 times, then dc in the last stitch. [25 dc, 23 ch-1 spaces; 48 positions]
- Row 5: Ch 1, turn; sc in every dc and in each ch-1 space. [48 sc]
- Repeat Rows 2–5 until there are 33 rows, or the measured length is reached. End after a plain sc row. For a narrow trim use a multiple of six stitches; add one chain for the foundation. All rows retain the same number of stitch/chain positions.
- Border with one sc round, 3 sc at corners, one sc at sc row-ends and 2 sc at taller row-ends. Add an optional row of (sc, ch 3, skip 1) arches along the long sides. Use plain sc at corners and incomplete repeats. Wet-block without stretching the chain spaces.
This independent shell-and-mesh repeat interprets the lace texture; it does not reproduce a hidden stitch chart.
Fan variation and trim
- For the rose heart-fan reference, embroider a loose V-shaped pair of surface chains over the center three dc of each five-dc shell. Keep the surface chains loose and stitch their ends on the back; the V suggests a heart without changing any of the sample’s 48 positions.
- After blocking, measure one six-position repeat. For garment edging choose a total divisible by six; work partial repeats only by replacing the remainder with plain sc at a seam. Never stretch a trim to force it onto a shorter edge.
Assembly and finishing
- Check all counts before joining. Weave ends through several stitches in three directions. Sew point joins more than once and distribute tension evenly.
- Wash a sample using the yarn care instructions, block gently and allow it to dry completely. Recheck fit or motif size after washing. These original patterns are photo-inspired and physically untested; they do not reproduce a verified photographed chart.
8. Burgundy and Cream Waffle Stitch
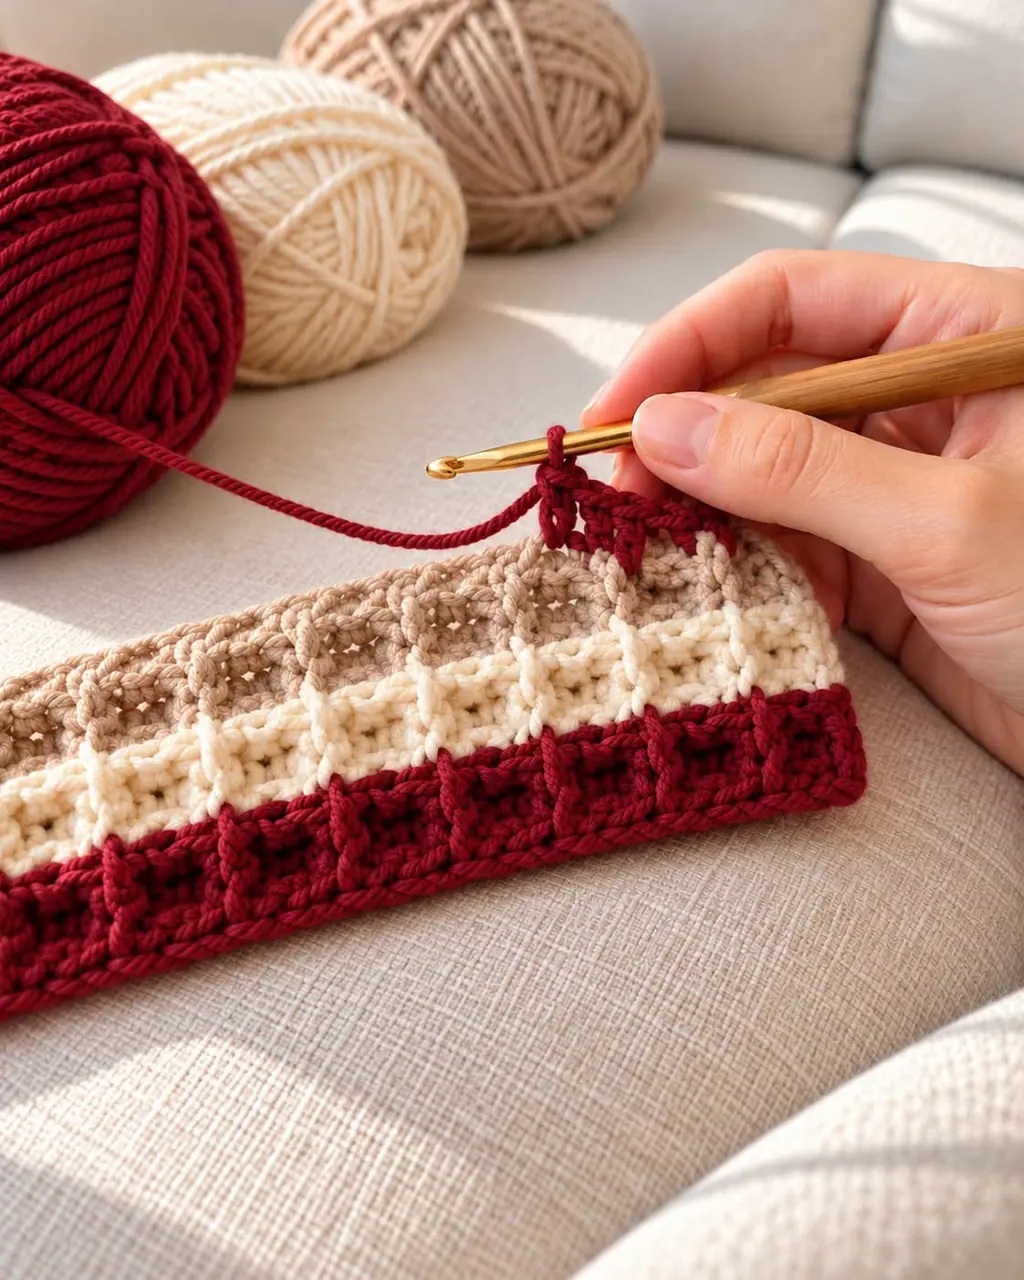
This burgundy and cream waffle stitch highlights burgundy and cream. The written version explains a complete original construction while simplifying details that cannot be recovered reliably from the photograph.
Materials, gauge and size
Smooth sport or DK cotton, approximately 60–180 g per sample panel. Colors: burgundy and cream. Hook: 2.5–3.5 mm. Quantities are estimates; weigh a sample and add 15–20% for assembly, edging and adjustments.
Also use a yarn needle, scissors, markers, measuring tape and blocking pins.
Gauge and size: Start near 16 dc × 9 rows per 10 cm, then measure the actual repeat after washing. Raised puffs and overlays need their own gauge.
Counted waffle-style sample
- US front-post dc (FPdc): yarn over, insert around the next dc post from front to back to front, draw up a loop and finish as dc. Count its top as one stitch. Ch 37; Row 1: dc in fourth chain and across, skipped ch 3 counts as first dc [35].
- Row 2: ch 3 counts as first dc, turn; (FPdc around next post, dc in next two stitches) eleven times; dc in last stitch [35]. Row 3: ch 3 counts as first dc, turn; (dc in next stitch, FPdc around each of next two posts) eleven times; dc in last [35].
- Rows 4–23: alternate Rows 2–3 [35 each row]. Use burgundy for Rows 1–5, cream for Rows 6–17 and burgundy for Rows 18–23. Changing color after a complete texture pair gives a cleaner boundary; move a stripe by one row if your preferred face requires it.
- Work one sc border with three sc at corners. For a wider panel use 3n + 2 dc positions and add two foundation chains: the sample uses n = 11. Wash and dry before using the stitch for a blanket, because the raised texture can contract substantially.
Assembly and finishing
- Check all counts before joining. Weave ends through several stitches in three directions. Sew point joins more than once and distribute tension evenly.
- Wash a sample using the yarn care instructions, block gently and allow it to dry completely. Recheck fit or motif size after washing. These original patterns are photo-inspired and physically untested; they do not reproduce a verified photographed chart.