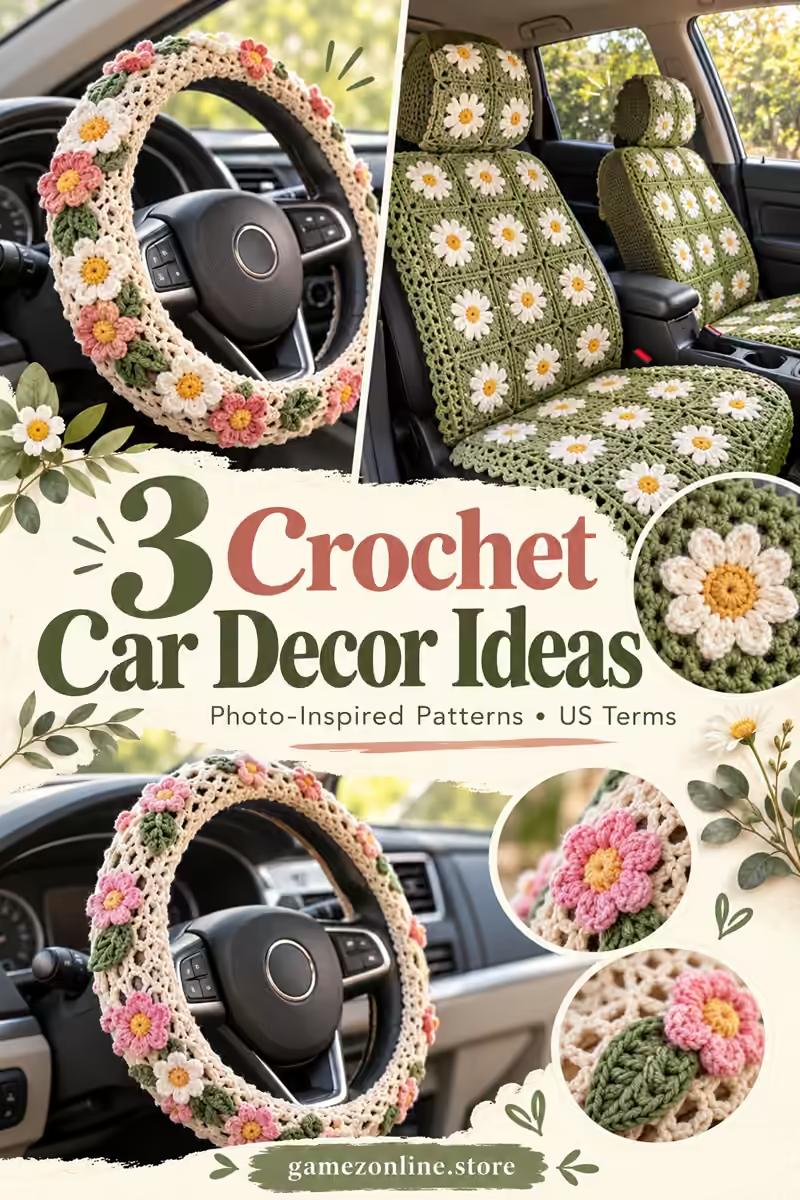
3 Crochet Car Decor Ideas
Explore three crochet car decor ideas for parked displays, with floral wheel covers and daisy seat panels, original counts and removable construction. Each image below has its own original written construction, materials, stitch counts, assembly and finishing notes.
US crochet terms and working rules
ch = chain; sl st = slip stitch; sc = single crochet; hdc = half double crochet; dc = double crochet; inc = 2 stitches in one stitch; sc2tog = single crochet two stitches together; st(s) = stitch(es); sp = space; RS = right side. A magic ring is an adjustable yarn loop. Numbers in brackets give end-of-round or end-of-row counts. Repeat instructions between parentheses the stated number of times.
Unless a step explicitly says otherwise, beginning chains do not count as stitches. For dc rounds, ch 2 to reach height, then work the first dc into the first stitch; join to the first real dc. For sc rounds, ch 1 and join to the first sc. For flat sc rows, ch 1 and turn. Flat dc rows explicitly use ch 3 as the first counted dc. Do not work into joining slip stitches. Change color by completing the last yarn-over of the preceding stitch with the new yarn.
To work sc2tog: insert hook into the next stitch and draw up a loop, repeat in the following stitch, yarn over and draw through all three loops. For a surface slip stitch, bring the yarn up from behind the fabric, insert the hook into the next chosen gap and pull the new loop through the loop already on the hook. Keep these stitches loose.
Additional US terms: inc = 2 stitches of the stated type in one stitch; sc2tog/dc2tog/dc3tog = work two or three stitches together as named; sc3tog = single crochet three together; BLO = back loop only; FPdc = front-post double crochet; BPdc = back-post double crochet; tr = treble crochet. Ch 3 counts as one dc unless stated otherwise; ch 1 for turning does not count. Close joined rounds with a sl st unless continuous rounds are specified. Photographed charts are visual references, not patterns verified or transcribed here.
1. Pink Flower Wheel Display Cover
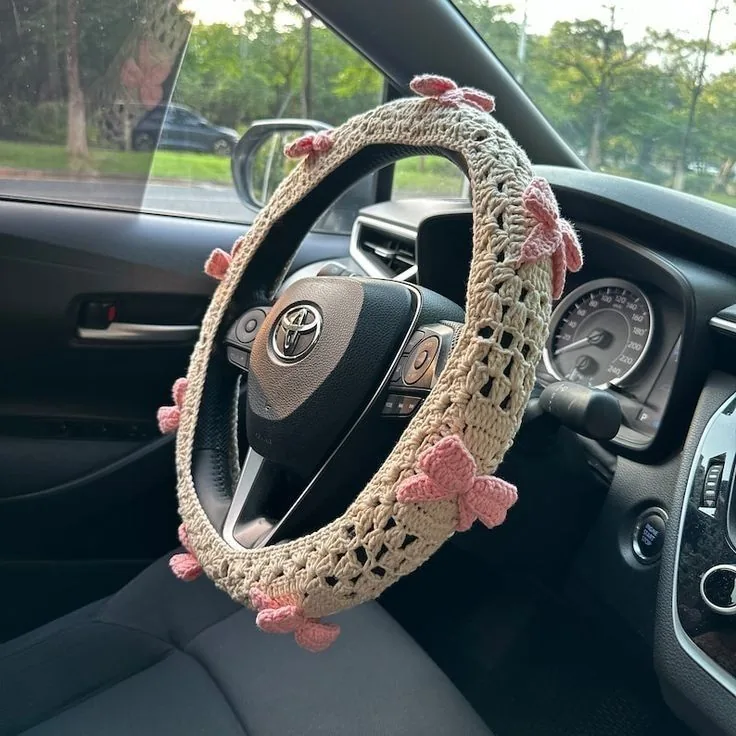
This pink flower wheel display cover combines cream and pink with the form shown in the reference. The original construction below simplifies details that cannot be reliably recovered from a photograph; it does not promise an exact chart match.
Materials, gauge and size
Washable cotton, approximately 150–300 g per wheel display cover or 500–900 g for the daisy seat display panels. Colors: cream and pink. Hook: 3–4 mm. These are estimates: weigh a sample, multiply by component count and add 15–20% for joining and adjustments.
Also use a yarn needle, scissors, stitch markers, measuring tape and blocking pins. Use a removable lacing cord for the wheel display and fabric backing if needed. Remove all decor before driving or occupying the seat.
Gauge and sizing: Measure the stationary rim or washed square directly. The pattern is for removable unoccupied parked displays, with no driving, airbag or seat-sensor compatibility claim.
Removable wheel cover for a parked display
- Use only as stationary display decor, with nobody operating the vehicle. Remove the whole cover before driving; do not cover the central airbag, controls or any moving mechanism. The pattern has no tested grip or automotive compatibility.
- Measure the rim’s outer circumference C and the distance around its cross-section B. At washed sc gauge g stitches and r rows per cm, choose strip width round(B × g), and row count round(C × r). Example: B = 9 cm, C = 110 cm, g = 2 and r = 2.2 gives an 18-stitch × 242-row strip.
- For the example ch 19; Row 1 sc across [18]. Rows 2–242: sc across [18]. Join the short ends without twisting to make a ring. Fit around the stationary rim and loosely lace the two long edges together on the inside using a removable chain cord, never a permanent tight stitch. The cover must come off in one piece before the vehicle moves.
Eight-petal daisy motif
- Round 1: with gold work 8 sc in a magic ring; join [8]. Round 2: with white, in each sc work (sc, ch 3, dc, ch 3, sl st) [8 petals]. Fasten off with a sewing tail. Make the quantity stated in the project assembly; do not add a separate garland or leaf set.
Tiny leaf
- Ch 7. Starting in second chain, work sc, hdc, 2 dc, hdc, then 3 sc in the last chain. Working along the underside, hdc, 2 dc, hdc, sc [13 stitches]. Sl st to the beginning and fasten off. Make the number specified in the project, leaving sewing tails.
Floral decoration and variants
- Make twelve pink or ivory daisies and 24 small green leaves. Sew flower centers and all petal tips to the outside display surface, keeping the removable lacing and controls clear.
- Sew every leaf at both ends, weave tails inside and photograph the cover only while parked. Store the removed cover away from pedals, levers and the driver’s footwell.
Assembly and finishing
- Check all counts before joining. Weave ends through several stitches in three directions. Sew point joins more than once and distribute tension evenly.
- Wash a sample using the yarn care instructions, block gently and allow it to dry completely. Recheck fit or motif size after washing. These original patterns are photo-inspired and physically untested; they do not reproduce a verified photographed chart.
2. Four Floral Wheel Display Covers
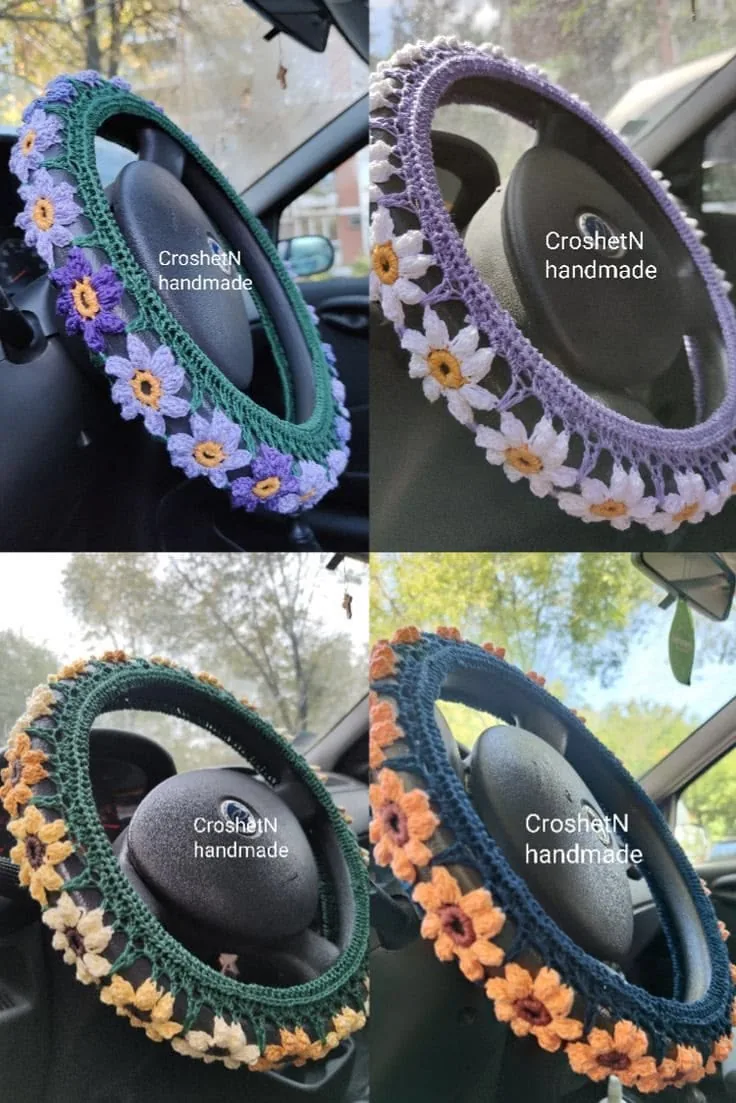
This four floral wheel display covers combines blue, lavender, sage and orange with the form shown in the reference. The original construction below simplifies details that cannot be reliably recovered from a photograph; it does not promise an exact chart match.
Materials, gauge and size
Washable cotton, approximately 150–300 g per wheel display cover or 500–900 g for the daisy seat display panels. Colors: blue, lavender, sage and orange. Hook: 3–4 mm. These are estimates: weigh a sample, multiply by component count and add 15–20% for joining and adjustments.
Also use a yarn needle, scissors, stitch markers, measuring tape and blocking pins. Use a removable lacing cord for the wheel display and fabric backing if needed. Remove all decor before driving or occupying the seat.
Gauge and sizing: Measure the stationary rim or washed square directly. The pattern is for removable unoccupied parked displays, with no driving, airbag or seat-sensor compatibility claim.
Removable wheel cover for a parked display
- Use only as stationary display decor, with nobody operating the vehicle. Remove the whole cover before driving; do not cover the central airbag, controls or any moving mechanism. The pattern has no tested grip or automotive compatibility.
- Measure the rim’s outer circumference C and the distance around its cross-section B. At washed sc gauge g stitches and r rows per cm, choose strip width round(B × g), and row count round(C × r). Example: B = 9 cm, C = 110 cm, g = 2 and r = 2.2 gives an 18-stitch × 242-row strip.
- For the example ch 19; Row 1 sc across [18]. Rows 2–242: sc across [18]. Join the short ends without twisting to make a ring. Fit around the stationary rim and loosely lace the two long edges together on the inside using a removable chain cord, never a permanent tight stitch. The cover must come off in one piece before the vehicle moves.
Eight-petal daisy motif
- Round 1: with gold work 8 sc in a magic ring; join [8]. Round 2: with white, in each sc work (sc, ch 3, dc, ch 3, sl st) [8 petals]. Fasten off with a sewing tail. Make the quantity stated in the project assembly; do not add a separate garland or leaf set.
Tiny leaf
- Ch 7. Starting in second chain, work sc, hdc, 2 dc, hdc, then 3 sc in the last chain. Working along the underside, hdc, 2 dc, hdc, sc [13 stitches]. Sl st to the beginning and fasten off. Make the number specified in the project, leaving sewing tails.
Floral decoration and variants
- Make four separate display covers in blue, lavender, sage and orange. For each make twelve small daisies and 24 leaves, spacing flowers equally around the outer surface. All four use the same measured strip construction, with row count recalculated for the actual wheel.
- Sew every leaf at both ends, weave tails inside and photograph the cover only while parked. Store the removed cover away from pedals, levers and the driver’s footwell.
Assembly and finishing
- Check all counts before joining. Weave ends through several stitches in three directions. Sew point joins more than once and distribute tension evenly.
- Wash a sample using the yarn care instructions, block gently and allow it to dry completely. Recheck fit or motif size after washing. These original patterns are photo-inspired and physically untested; they do not reproduce a verified photographed chart.
3. Sage Daisy Seat Display Panels
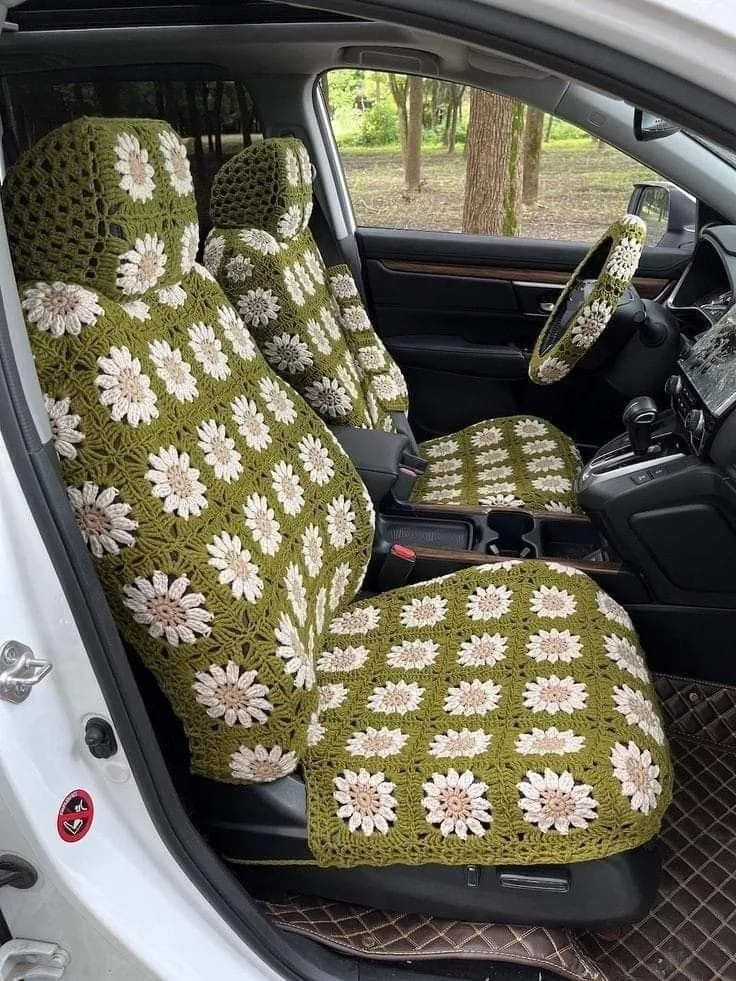
This sage daisy seat display panels combines sage, ivory and gold with the form shown in the reference. The original construction below simplifies details that cannot be reliably recovered from a photograph; it does not promise an exact chart match.
Materials, gauge and size
Washable cotton, approximately 150–300 g per wheel display cover or 500–900 g for the daisy seat display panels. Colors: sage, ivory and gold. Hook: 3–4 mm. These are estimates: weigh a sample, multiply by component count and add 15–20% for joining and adjustments.
Also use a yarn needle, scissors, stitch markers, measuring tape and blocking pins. Use a removable lacing cord for the wheel display and fabric backing if needed. Remove all decor before driving or occupying the seat.
Gauge and sizing: Measure the stationary rim or washed square directly. The pattern is for removable unoccupied parked displays, with no driving, airbag or seat-sensor compatibility claim.
Daisy square
- Round 1: With yellow work 8 sc in a magic ring; join. [8 sc]
- Round 2: With white, in each sc work (sc, ch 3, dc, ch 3, sl st). [Eight petals]
- Round 3: Behind the petals, work sc around each Round-1 sc post, ch 3 after each sc; join. [Eight sc, eight ch-3 spaces]
- Round 4: With the frame color, in the first space work (3 dc, ch 2, 3 dc), 3 dc in next space; repeat four times. [36 dc, four corners]
- Round 5: Sc in each dc, and (sc, ch 2, sc) in each corner. [44 sc, four corners; 11 sc along each side] Block square.
Removable daisy panels for an unoccupied parked display
- These are loose decorative panels for photography in an unoccupied parked car. Remove them before anyone uses the seat or the vehicle moves. They have no tested compatibility with airbags, seat sensors, seat belts, child restraints or seat heating.
- Make and wash one daisy square and record its width W. Example W = 12 cm: seat display panel sixteen squares in a 4 × 4 grid [48 × 48 cm]; back display panel twenty squares in a 4 × 5 grid [48 × 60 cm]. Make 36 squares total, with sage frames, ivory petals and gold centers.
- Whipstitch matching edges to form the two panels and add two sc border rounds with (sc, ch 2, sc) at outside corners. Do not sew them onto the seat upholstery. For a separate headrest-shaped display swatch make six more squares in a 3 × 2 grid and place it loosely for the photograph only.
- Keep all panels off seat-belt buckles, controls and airbag seams, and remove them in full after display. The same 36 squares can instead be joined into a 6 × 6 household throw, which avoids vehicle-fit assumptions.
Assembly and finishing
- Check all counts before joining. Weave ends through several stitches in three directions. Sew point joins more than once and distribute tension evenly.
- Wash a sample using the yarn care instructions, block gently and allow it to dry completely. Recheck fit or motif size after washing. These original patterns are photo-inspired and physically untested; they do not reproduce a verified photographed chart.