
11 Crochet Bag and Pouch Ideas
Discover 11 crochet bag and pouch ideas, with counted original patterns for totes, bottle carriers, phone bags, an orange pouch and a hen-shaped bag. Each image below has its own original written construction, materials, stitch counts, assembly and finishing notes.
US crochet terms and working rules
ch = chain; sl st = slip stitch; sc = single crochet; hdc = half double crochet; dc = double crochet; inc = 2 stitches in one stitch; sc2tog = single crochet two stitches together; st(s) = stitch(es); sp = space; RS = right side. A magic ring is an adjustable yarn loop. Numbers in brackets give end-of-round or end-of-row counts. Repeat instructions between parentheses the stated number of times.
Unless a step explicitly says otherwise, beginning chains do not count as stitches. For dc rounds, ch 2 to reach height, then work the first dc into the first stitch; join to the first real dc. For sc rounds, ch 1 and join to the first sc. For flat sc rows, ch 1 and turn. Flat dc rows explicitly use ch 3 as the first counted dc. Do not work into joining slip stitches. Change color by completing the last yarn-over of the preceding stitch with the new yarn.
To work sc2tog: insert hook into the next stitch and draw up a loop, repeat in the following stitch, yarn over and draw through all three loops. For a surface slip stitch, bring the yarn up from behind the fabric, insert the hook into the next chosen gap and pull the new loop through the loop already on the hook. Keep these stitches loose.
Additional US terms: inc = 2 stitches of the stated type in one stitch; sc2tog/dc2tog/dc3tog = work two or three stitches together as named; sc3tog = single crochet three together; BLO = back loop only; FPdc = front-post double crochet; BPdc = back-post double crochet; tr = treble crochet. Ch 3 counts as one dc unless stated otherwise; ch 1 for turning does not count. Close joined rounds with a sl st unless continuous rounds are specified. Photographed charts are visual references, not patterns verified or transcribed here.
1. Beige Fan-Texture Tote

This beige fan-texture tote combines beige with the form shown in the reference. The original construction below simplifies details that cannot be reliably recovered from a photograph; it does not promise an exact chart match.
Materials, gauge and size
Firm cotton, approximately 350–700 g for a tote, 100–250 g for a pouch or bottle carrier, and 200–350 g for a small shoulder bag. Colors: beige. Hook: 3–4 mm. These are estimates: weigh a sample, multiply by component count and add 15–20% for joining and adjustments.
Also use a yarn needle, scissors, stitch markers, measuring tape and blocking pins. Add lining fabric, strong sewing thread, fabric reinforcement tape, and a zipper or buttons where specified.
Gauge and sizing: Provisional firm fabric: 20 sc × 22 rows = 10 cm. Measure the intended phone, book, bottle or bag contents before selecting panel widths.
Front and back panels
- Ch 49. Row 1: sc in second chain and across [48]. Rows 2–48: ch 1, turn; sc in every stitch [48 each row]. Keep the same number of stitches at both edges; use markers in the first and last stitch. Make the number of panels specified in assembly. Wash and measure one before deciding the final size.
Body assembly and gusset
- Make two panels. At 20 sc per 10 cm each is approximately 24 cm wide before seams; wash and compare with the intended contents. Make an 8-sc-wide gusset strip, beginning ch 9 and repeating 8-sc rows until its measured length equals the two panel sides plus bottom. Pin it around the first panel, then sew its opposite long edge to the second panel.
- Top: work two sc rounds around the mouth, one per available stitch and approximately one per sc row edge. For the soft shoulder bag use one strap; for the structured tote use two handles. Sew a fabric lining inside and reinforce the gusset corners.
Reinforced strap
- Ch 9. Row 1: sc in second chain and across [8]. Repeat 8-sc rows for 80 rows, then measure against the intended use; row counts are a sample. Make the number of straps named in assembly. Sew a 4 cm overlap at each end through several body rows, reinforce the attachment corners and add a fabric tape backing for a bag carrying weight.
Make two handles, one on each panel, spacing their bases 12 cm apart.
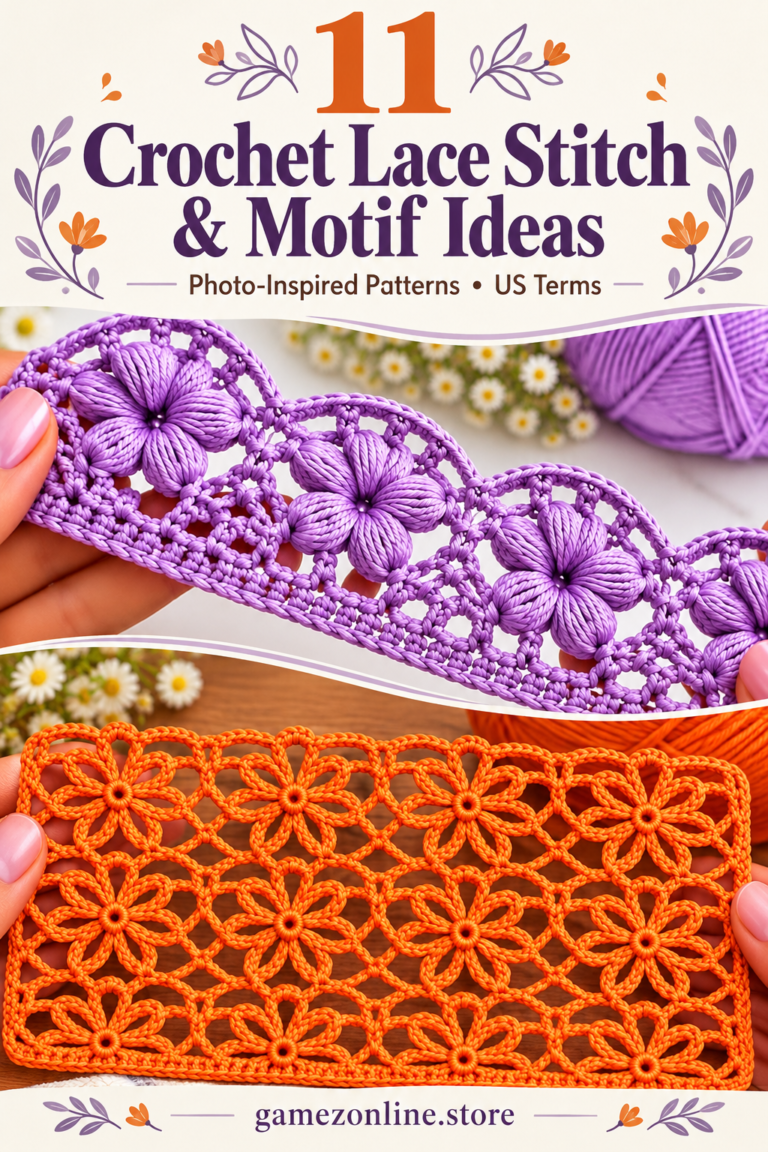
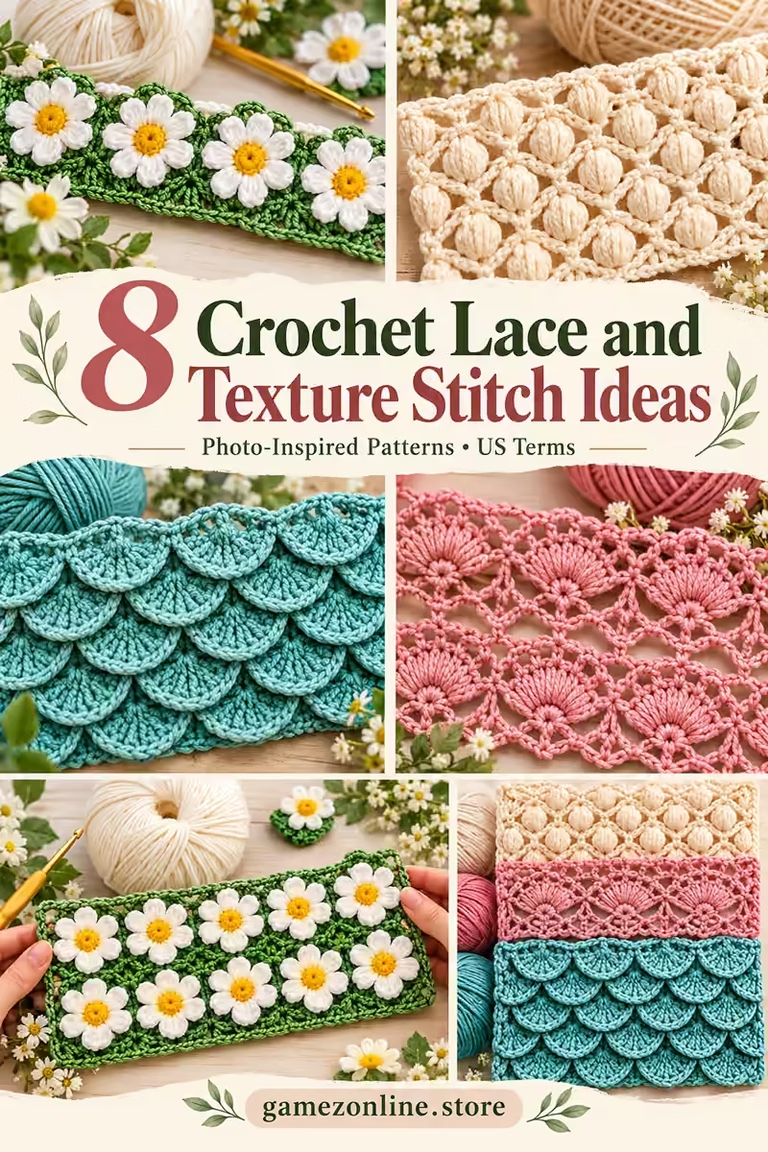
Shell-and-mesh fabric
- Ch 49. Row 1: Sc in second chain and across. [48 sc]
- Row 2: Ch 1, turn; repeat (sc in next stitch, skip 2, 5 dc in next stitch, skip 2) eight times. [Eight sc and eight shells; 48 stitches]
- Row 3: Ch 3 (counts as first dc), turn; dc in every remaining stitch. [48 dc]
- Row 4: Ch 3, turn; (ch 1, skip 1, dc in next stitch) 23 times, then dc in the last stitch. [25 dc, 23 ch-1 spaces; 48 positions]
- Row 5: Ch 1, turn; sc in every dc and in each ch-1 space. [48 sc]
- Repeat Rows 2–5 until there are 33 rows, or the measured length is reached. End after a plain sc row. For a narrow trim use a multiple of six stitches; add one chain for the foundation. All rows retain the same number of stitch/chain positions.
- Border with one sc round, 3 sc at corners, one sc at sc row-ends and 2 sc at taller row-ends. Add an optional row of (sc, ch 3, skip 1) arches along the long sides. Use plain sc at corners and incomplete repeats. Wet-block without stretching the chain spaces.
This independent shell-and-mesh repeat interprets the lace texture; it does not reproduce a hidden stitch chart.
For the fan-texture reference, make one 48-position shell overlay to the measured front-panel height and sew all four edges to the solid front before assembling the gusset. This separate overlay simplifies the pictured integral texture.
Assembly and finishing
- Check all counts before joining. Weave ends through several stitches in three directions. Sew point joins more than once and distribute tension evenly.
- Wash a sample using the yarn care instructions, block gently and allow it to dry completely. Recheck fit or motif size after washing. These original patterns are photo-inspired and physically untested; they do not reproduce a verified photographed chart.
2. Striped and Checked Bottle Carriers

This striped and checked bottle carriers combines mint, purple, black and cream with the form shown in the reference. The original construction below simplifies details that cannot be reliably recovered from a photograph; it does not promise an exact chart match.
Materials, gauge and size
Firm cotton, approximately 350–700 g for a tote, 100–250 g for a pouch or bottle carrier, and 200–350 g for a small shoulder bag. Colors: mint, purple, black and cream. Hook: 3–4 mm. These are estimates: weigh a sample, multiply by component count and add 15–20% for joining and adjustments.
Also use a yarn needle, scissors, stitch markers, measuring tape and blocking pins. Add lining fabric, strong sewing thread, fabric reinforcement tape, and a zipper or buttons where specified.
Gauge and sizing: Provisional firm fabric: 20 sc × 22 rows = 10 cm. Measure the intended phone, book, bottle or bag contents before selecting panel widths.
Flat sc base
- Round 1: In a magic ring, ch 1 and work 6 sc; join. [6 sc]
- Round 2: Work 2 sc in each stitch; join. [12]
- Round 3: Repeat (1 sc, 2 sc in next stitch) six times; join. [18 sc]
- Round 4: Repeat (2 sc, 2 sc in next stitch) six times; join. [24 sc]
- Round 5: Repeat (3 sc, 2 sc in next stitch) six times; join. [30 sc]
- Round 6: Repeat (4 sc, 2 sc in next stitch) six times; join. [36 sc]
- Round 7: Repeat (5 sc, 2 sc in next stitch) six times; join. [42 sc]
- Round 8: Repeat (6 sc, 2 sc in next stitch) six times; join. [48 sc]
- Keep the beginning marked. If the disk cups, loosen tension; if it waves, check that each round has exactly six increases. Fasten off only after the final required round.
Carrier walls and colorwork
- The base ends with 48 sc. At 20 sc per 10 cm the circumference is about 24 cm, suitable only if it matches the actual bottle plus a little ease. Round 9: sc BLO around [48]. Rounds 10–40: sc around [48]. Stop at the bottle shoulder, keeping its opening clear.
- Make three carriers: mint with three cream stripes (change color every four rounds); purple with a pale middle band; and black/cream checks. For checks use separate small balls and change color after every six sc, alternating four-round blocks, keeping floats short or enclosed.
- Top edge: work two additional sc rounds [48 each]. Fit the bottle before adding the strap. If 48 stitches do not fit, change the base by complete six-increase rounds, then carry the new total unchanged through the walls; record your actual count.
Reinforced strap
- Ch 7. Row 1: sc in second chain and across [6]. Repeat 6-sc rows for 120 rows, then measure against the intended use; row counts are a sample. Make the number of straps named in assembly. Sew a 4 cm overlap at each end through several body rows, reinforce the attachment corners and add a fabric tape backing for a bag carrying weight.
Assembly
- Make one strap per carrier and sew its ends to opposite top sides with 4 cm overlaps. Reinforce through the wall and a fabric tape backing. The bottom must support the bottle without stretching open; line it if needed and test gradually with the actual filled bottle. Add a decorative five-petal flower or small tassel only after the structural seams are complete.
Assembly and finishing
- Check all counts before joining. Weave ends through several stitches in three directions. Sew point joins more than once and distribute tension evenly.
- Wash a sample using the yarn care instructions, block gently and allow it to dry completely. Recheck fit or motif size after washing. These original patterns are photo-inspired and physically untested; they do not reproduce a verified photographed chart.
3. Purple Daisy Phone Pouch

This purple daisy phone pouch combines purple and ivory with the form shown in the reference. The original construction below simplifies details that cannot be reliably recovered from a photograph; it does not promise an exact chart match.
Materials, gauge and size
Firm cotton, approximately 350–700 g for a tote, 100–250 g for a pouch or bottle carrier, and 200–350 g for a small shoulder bag. Colors: purple and ivory. Hook: 3–4 mm. These are estimates: weigh a sample, multiply by component count and add 15–20% for joining and adjustments.
Also use a yarn needle, scissors, stitch markers, measuring tape and blocking pins. Add lining fabric, strong sewing thread, fabric reinforcement tape, and a zipper or buttons where specified.
Gauge and sizing: Provisional firm fabric: 20 sc × 22 rows = 10 cm. Measure the intended phone, book, bottle or bag contents before selecting panel widths.
Two pouch panels
- Ch 21. Row 1: sc in second chain and across [20]. Rows 2–34: ch 1, turn; sc in every stitch [20 each row]. Keep the same number of stitches at both edges; use markers in the first and last stitch. Make the number of panels specified in assembly. Wash and measure one before deciding the final size.
Seaming, top edge and closure
- Make two identical panels. At 20 sc per 10 cm each is about 10 cm wide before seam loss; compare to phone or glasses width plus thickness and at least 1 cm ease. Sew both side seams and the bottom, leaving the top open. Sc around the opening, one sc per panel top stitch [40 before seam loss].
- Flap: work across the rear 20 stitches only. Rows 1–8: 20 sc. Row 9: 8 sc, ch 4, skip 4, 8 sc [16 sc, 1 loop]. Row 10: 8 sc, 4 sc in loop, 8 sc [20]. Sew a button to the front after folding the flap.
- Optional flower decoration uses the counted daisy or granny motif below; sew centers and outside corners flat. Weave tails inside before fitting a fabric lining. Do not assume that the measured sample fits every phone or glasses frame.
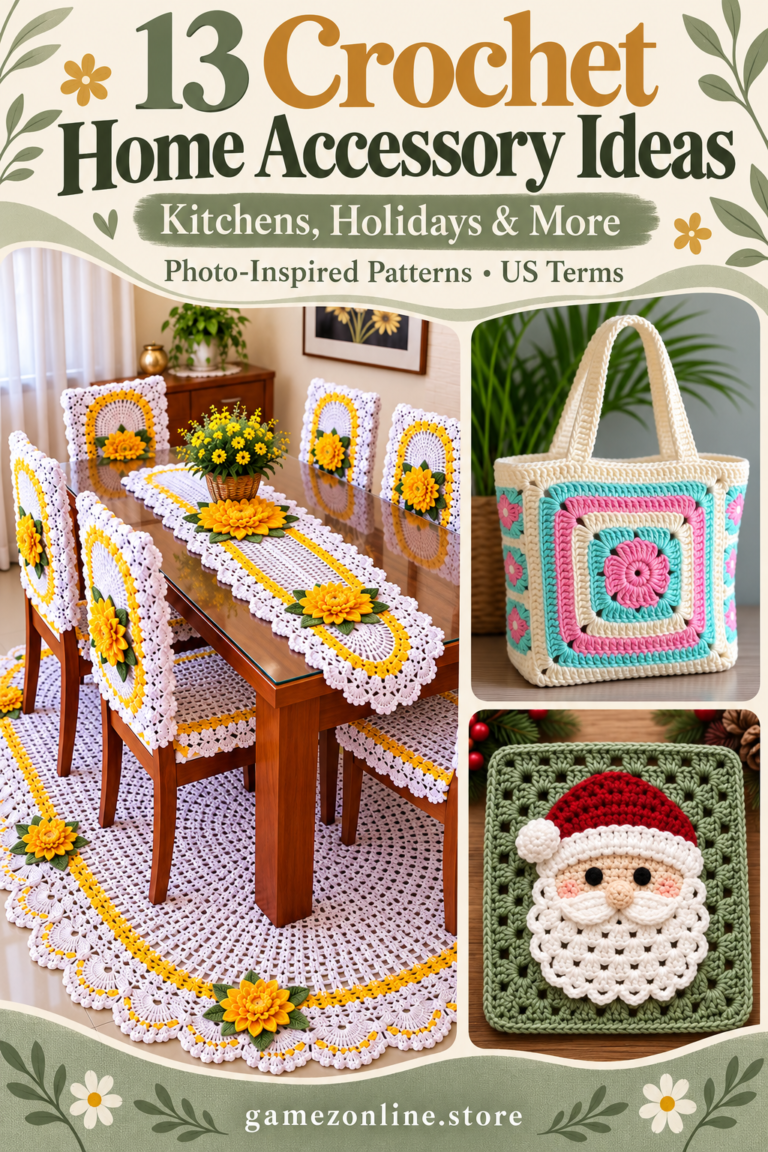
Daisy square
- Round 1: With yellow work 8 sc in a magic ring; join. [8 sc]
- Round 2: With white, in each sc work (sc, ch 3, dc, ch 3, sl st). [Eight petals]
- Round 3: Behind the petals, work sc around each Round-1 sc post, ch 3 after each sc; join. [Eight sc, eight ch-3 spaces]
- Round 4: With the frame color, in the first space work (3 dc, ch 2, 3 dc), 3 dc in next space; repeat four times. [36 dc, four corners]
- Round 5: Sc in each dc, and (sc, ch 2, sc) in each corner. [44 sc, four corners; 11 sc along each side] Block square.
Make two daisy squares in the pouch palette and sew one to the front and one to the flap, using only as many frame rounds as fit inside the panel.
Reinforced strap
- Ch 6. Row 1: sc in second chain and across [5]. Repeat 5-sc rows for 120 rows, then measure against the intended use; row counts are a sample. Make the number of straps named in assembly. Sew a 4 cm overlap at each end through several body rows, reinforce the attachment corners and add a fabric tape backing for a bag carrying weight.
Make one strap; attach it at opposite pouch side seams.
Assembly and finishing
- Check all counts before joining. Weave ends through several stitches in three directions. Sew point joins more than once and distribute tension evenly.
- Wash a sample using the yarn care instructions, block gently and allow it to dry completely. Recheck fit or motif size after washing. These original patterns are photo-inspired and physically untested; they do not reproduce a verified photographed chart.
4. Gray Bow Pencil Pouch
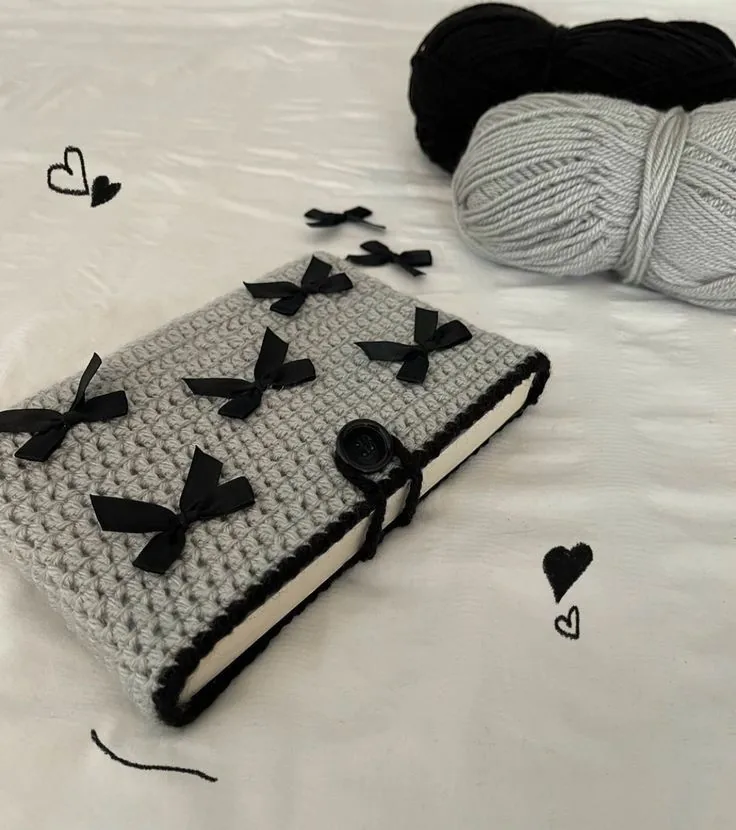
This gray bow pencil pouch combines gray and black with the form shown in the reference. The original construction below simplifies details that cannot be reliably recovered from a photograph; it does not promise an exact chart match.
Materials, gauge and size
Firm cotton, approximately 350–700 g for a tote, 100–250 g for a pouch or bottle carrier, and 200–350 g for a small shoulder bag. Colors: gray and black. Hook: 3–4 mm. These are estimates: weigh a sample, multiply by component count and add 15–20% for joining and adjustments.
Also use a yarn needle, scissors, stitch markers, measuring tape and blocking pins. Add lining fabric, strong sewing thread, fabric reinforcement tape, and a zipper or buttons where specified.
Gauge and sizing: Provisional firm fabric: 20 sc × 22 rows = 10 cm. Measure the intended phone, book, bottle or bag contents before selecting panel widths.
Front and back panels
- Ch 37. Row 1: sc in second chain and across [36]. Rows 2–26: ch 1, turn; sc in every stitch [36 each row]. Keep the same number of stitches at both edges; use markers in the first and last stitch. Make the number of panels specified in assembly. Wash and measure one before deciding the final size.
Body assembly and gusset
- Make two panels. At 20 sc per 10 cm each is approximately 18 cm wide before seams; wash and compare with the intended contents. Sew the lower edge and both short ends, leaving the upper long edge open for a purchased zipper.
- Sew a purchased 18–20 cm zipper to the opening after confirming its length against the actual pouch. Add five small bows: for each ch 9 and work 8 sc for four rows; wrap the middle six times and sew the center and ends flat to the front. Fit a fabric lining behind the zip.
Assembly and finishing
- Check all counts before joining. Weave ends through several stitches in three directions. Sew point joins more than once and distribute tension evenly.
- Wash a sample using the yarn care instructions, block gently and allow it to dry completely. Recheck fit or motif size after washing. These original patterns are photo-inspired and physically untested; they do not reproduce a verified photographed chart.
5. Zigzag Bottle Carrier
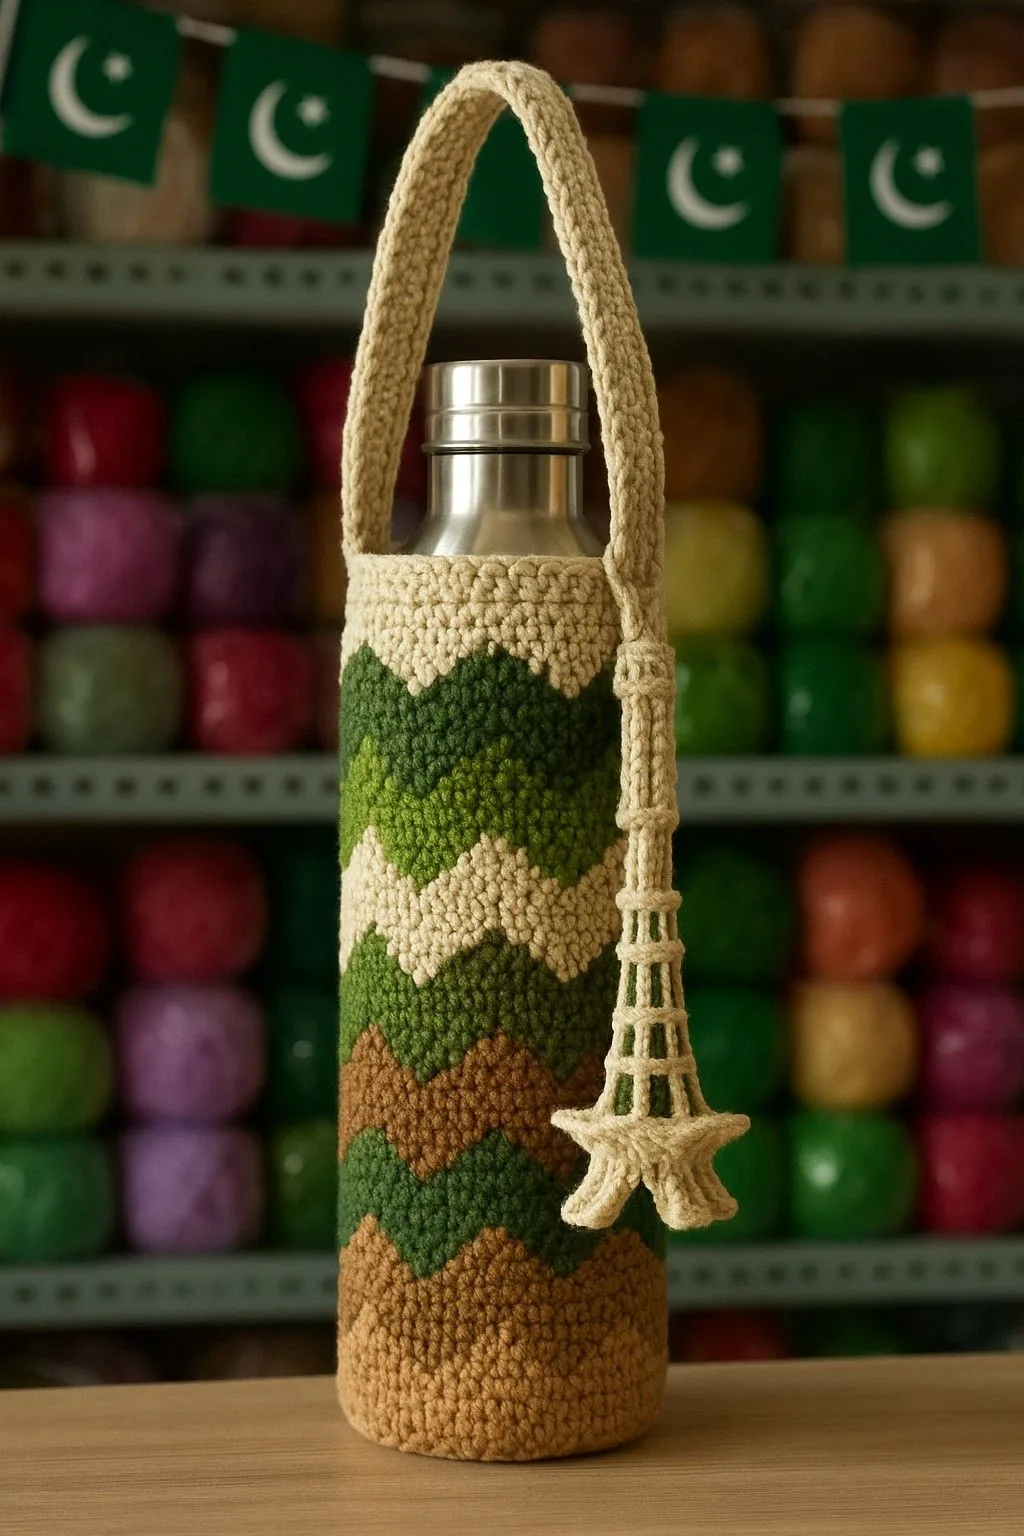
This zigzag bottle carrier combines olive, dark green and cream with the form shown in the reference. The original construction below simplifies details that cannot be reliably recovered from a photograph; it does not promise an exact chart match.
Materials, gauge and size
Firm cotton, approximately 350–700 g for a tote, 100–250 g for a pouch or bottle carrier, and 200–350 g for a small shoulder bag. Colors: olive, dark green and cream. Hook: 3–4 mm. These are estimates: weigh a sample, multiply by component count and add 15–20% for joining and adjustments.
Also use a yarn needle, scissors, stitch markers, measuring tape and blocking pins. Add lining fabric, strong sewing thread, fabric reinforcement tape, and a zipper or buttons where specified.
Gauge and sizing: Provisional firm fabric: 20 sc × 22 rows = 10 cm. Measure the intended phone, book, bottle or bag contents before selecting panel widths.
Flat sc base
- Round 1: In a magic ring, ch 1 and work 6 sc; join. [6 sc]
- Round 2: Work 2 sc in each stitch; join. [12]
- Round 3: Repeat (1 sc, 2 sc in next stitch) six times; join. [18 sc]
- Round 4: Repeat (2 sc, 2 sc in next stitch) six times; join. [24 sc]
- Round 5: Repeat (3 sc, 2 sc in next stitch) six times; join. [30 sc]
- Round 6: Repeat (4 sc, 2 sc in next stitch) six times; join. [36 sc]
- Round 7: Repeat (5 sc, 2 sc in next stitch) six times; join. [42 sc]
- Round 8: Repeat (6 sc, 2 sc in next stitch) six times; join. [48 sc]
- Keep the beginning marked. If the disk cups, loosen tension; if it waves, check that each round has exactly six increases. Fasten off only after the final required round.
Carrier walls and colorwork
- The base ends with 48 sc. At 20 sc per 10 cm the circumference is about 24 cm, suitable only if it matches the actual bottle plus a little ease. Round 9: sc BLO around [48]. Rounds 10–40: sc around [48]. Stop at the bottle shoulder, keeping its opening clear.
- For the zigzag effect, change color every four rounds. On the first new-color round replace every sixth sc with a long sc inserted one round below, offsetting its position by two stitches on each new stripe. Each long sc replaces one ordinary sc; the count stays 48. This gives stepped color rhythm rather than the exact photographed tapestry chart.
- Top edge: work two additional sc rounds [48 each]. Fit the bottle before adding the strap. If 48 stitches do not fit, change the base by complete six-increase rounds, then carry the new total unchanged through the walls; record your actual count.
Reinforced strap
- Ch 7. Row 1: sc in second chain and across [6]. Repeat 6-sc rows for 120 rows, then measure against the intended use; row counts are a sample. Make the number of straps named in assembly. Sew a 4 cm overlap at each end through several body rows, reinforce the attachment corners and add a fabric tape backing for a bag carrying weight.
Assembly
- Make one strap per carrier and sew its ends to opposite top sides with 4 cm overlaps. Reinforce through the wall and a fabric tape backing. The bottom must support the bottle without stretching open; line it if needed and test gradually with the actual filled bottle. Add a decorative five-petal flower or small tassel only after the structural seams are complete.
Assembly and finishing
- Check all counts before joining. Weave ends through several stitches in three directions. Sew point joins more than once and distribute tension evenly.
- Wash a sample using the yarn care instructions, block gently and allow it to dry completely. Recheck fit or motif size after washing. These original patterns are photo-inspired and physically untested; they do not reproduce a verified photographed chart.
6. Orange Fruit Drawstring Bag

This orange fruit drawstring bag combines orange and green with the form shown in the reference. The original construction below simplifies details that cannot be reliably recovered from a photograph; it does not promise an exact chart match.
Materials, gauge and size
Firm cotton, approximately 350–700 g for a tote, 100–250 g for a pouch or bottle carrier, and 200–350 g for a small shoulder bag. Colors: orange and green. Hook: 3–4 mm. These are estimates: weigh a sample, multiply by component count and add 15–20% for joining and adjustments.
Also use a yarn needle, scissors, stitch markers, measuring tape and blocking pins. Add lining fabric, strong sewing thread, fabric reinforcement tape, and a zipper or buttons where specified.
Gauge and sizing: Provisional firm fabric: 20 sc × 22 rows = 10 cm. Measure the intended phone, book, bottle or bag contents before selecting panel widths.
Flat sc base
- Round 1: In a magic ring, ch 1 and work 6 sc; join. [6 sc]
- Round 2: Work 2 sc in each stitch; join. [12]
- Round 3: Repeat (1 sc, 2 sc in next stitch) six times; join. [18 sc]
- Round 4: Repeat (2 sc, 2 sc in next stitch) six times; join. [24 sc]
- Round 5: Repeat (3 sc, 2 sc in next stitch) six times; join. [30 sc]
- Round 6: Repeat (4 sc, 2 sc in next stitch) six times; join. [36 sc]
- Round 7: Repeat (5 sc, 2 sc in next stitch) six times; join. [42 sc]
- Round 8: Repeat (6 sc, 2 sc in next stitch) six times; join. [48 sc]
- Round 9: Repeat (7 sc, 2 sc in next stitch) six times; join. [54 sc]
- Round 10: Repeat (8 sc, 2 sc in next stitch) six times; join. [60 sc]
- Keep the beginning marked. If the disk cups, loosen tension; if it waves, check that each round has exactly six increases. Fasten off only after the final required round.
Orange pouch body and drawstring
- The base ends with 60 sc. Round 11: sc BLO [60]. Rounds 12–35: sc around [60]. Round 36: (dc in next, ch 1, skip next) thirty times [30 dc and 30 holes]. Round 37: sc in every dc and once in every hole [60]. Fasten off.
- Cord: ch 121, sl st along all 120 chains. Thread through alternating holes and tie its ends together. Make two large leaves using the counted leaf below; sew their bases beside the cord opening. Add a short stem: 6 sc in a magic ring, then four rounds of 6 sc, fasten off and sew to one leaf base. Keep the drawstring free to gather.
- Ch 13. Starting in the second chain work sc, hdc, dc in each of the next 8 chains, hdc, then 3 sc in the last chain. Rotate; work into the unused chain loops: hdc, dc in each of the next 8 chains, hdc, sc. Join to the first sc. [25 stitches]
- Ch 1; sl st loosely into each stitch around. Fasten off with a long tail. Sew only through the underside of the leaf edge to attach, keeping the center flexible.
Assembly and finishing
- Check all counts before joining. Weave ends through several stitches in three directions. Sew point joins more than once and distribute tension evenly.
- Wash a sample using the yarn care instructions, block gently and allow it to dry completely. Recheck fit or motif size after washing. These original patterns are photo-inspired and physically untested; they do not reproduce a verified photographed chart.
7. Natural Crochet Glasses Pouch

This natural crochet glasses pouch combines natural beige with the form shown in the reference. The original construction below simplifies details that cannot be reliably recovered from a photograph; it does not promise an exact chart match.
Materials, gauge and size
Firm cotton, approximately 350–700 g for a tote, 100–250 g for a pouch or bottle carrier, and 200–350 g for a small shoulder bag. Colors: natural beige. Hook: 3–4 mm. These are estimates: weigh a sample, multiply by component count and add 15–20% for joining and adjustments.
Also use a yarn needle, scissors, stitch markers, measuring tape and blocking pins. Add lining fabric, strong sewing thread, fabric reinforcement tape, and a zipper or buttons where specified.
Gauge and sizing: Provisional firm fabric: 20 sc × 22 rows = 10 cm. Measure the intended phone, book, bottle or bag contents before selecting panel widths.
Two pouch panels
- Ch 21. Row 1: sc in second chain and across [20]. Rows 2–44: ch 1, turn; sc in every stitch [20 each row]. Keep the same number of stitches at both edges; use markers in the first and last stitch. Make the number of panels specified in assembly. Wash and measure one before deciding the final size.
Seaming, top edge and closure
- Make two identical panels. At 20 sc per 10 cm each is about 10 cm wide before seam loss; compare to phone or glasses width plus thickness and at least 1 cm ease. Sew both side seams and the bottom, leaving the top open. Sc around the opening, one sc per panel top stitch [40 before seam loss].
- For the glasses drawstring, work one round (dc in next stitch, ch 1, skip next) twenty times [20 dc and 20 spaces], then one sc round [40]. Ch 81 and sl st along 80 chains to make a cord; thread through alternating holes. Knot cord ends and embroider a small knot instead of adding loose beads.
- Optional flower decoration uses the counted daisy or granny motif below; sew centers and outside corners flat. Weave tails inside before fitting a fabric lining. Do not assume that the measured sample fits every phone or glasses frame.
Assembly and finishing
- Check all counts before joining. Weave ends through several stitches in three directions. Sew point joins more than once and distribute tension evenly.
- Wash a sample using the yarn care instructions, block gently and allow it to dry completely. Recheck fit or motif size after washing. These original patterns are photo-inspired and physically untested; they do not reproduce a verified photographed chart.
8. Ivory Soft Shoulder Bag

This ivory soft shoulder bag combines ivory with the form shown in the reference. The original construction below simplifies details that cannot be reliably recovered from a photograph; it does not promise an exact chart match.
Materials, gauge and size
Firm cotton, approximately 350–700 g for a tote, 100–250 g for a pouch or bottle carrier, and 200–350 g for a small shoulder bag. Colors: ivory. Hook: 3–4 mm. These are estimates: weigh a sample, multiply by component count and add 15–20% for joining and adjustments.
Also use a yarn needle, scissors, stitch markers, measuring tape and blocking pins. Add lining fabric, strong sewing thread, fabric reinforcement tape, and a zipper or buttons where specified.
Gauge and sizing: Provisional firm fabric: 20 sc × 22 rows = 10 cm. Measure the intended phone, book, bottle or bag contents before selecting panel widths.
Front and back panels
- Ch 53. Row 1: sc in second chain and across [52]. Rows 2–58: ch 1, turn; sc in every stitch [52 each row]. Keep the same number of stitches at both edges; use markers in the first and last stitch. Make the number of panels specified in assembly. Wash and measure one before deciding the final size.
Body assembly and gusset
- Make two panels. At 20 sc per 10 cm each is approximately 26 cm wide before seams; wash and compare with the intended contents. Make an 8-sc-wide gusset strip, beginning ch 9 and repeating 8-sc rows until its measured length equals the two panel sides plus bottom. Pin it around the first panel, then sew its opposite long edge to the second panel.
- Top: work two sc rounds around the mouth, one per available stitch and approximately one per sc row edge. For the soft shoulder bag use one strap; for the structured tote use two handles. Sew a fabric lining inside and reinforce the gusset corners.
Reinforced strap
- Ch 9. Row 1: sc in second chain and across [8]. Repeat 8-sc rows for 110 rows, then measure against the intended use; row counts are a sample. Make the number of straps named in assembly. Sew a 4 cm overlap at each end through several body rows, reinforce the attachment corners and add a fabric tape backing for a bag carrying weight.
Make one shoulder strap, attached at opposite side gussets.
Assembly and finishing
- Check all counts before joining. Weave ends through several stitches in three directions. Sew point joins more than once and distribute tension evenly.
- Wash a sample using the yarn care instructions, block gently and allow it to dry completely. Recheck fit or motif size after washing. These original patterns are photo-inspired and physically untested; they do not reproduce a verified photographed chart.
9. Granny Phone-and-Bottle Sling
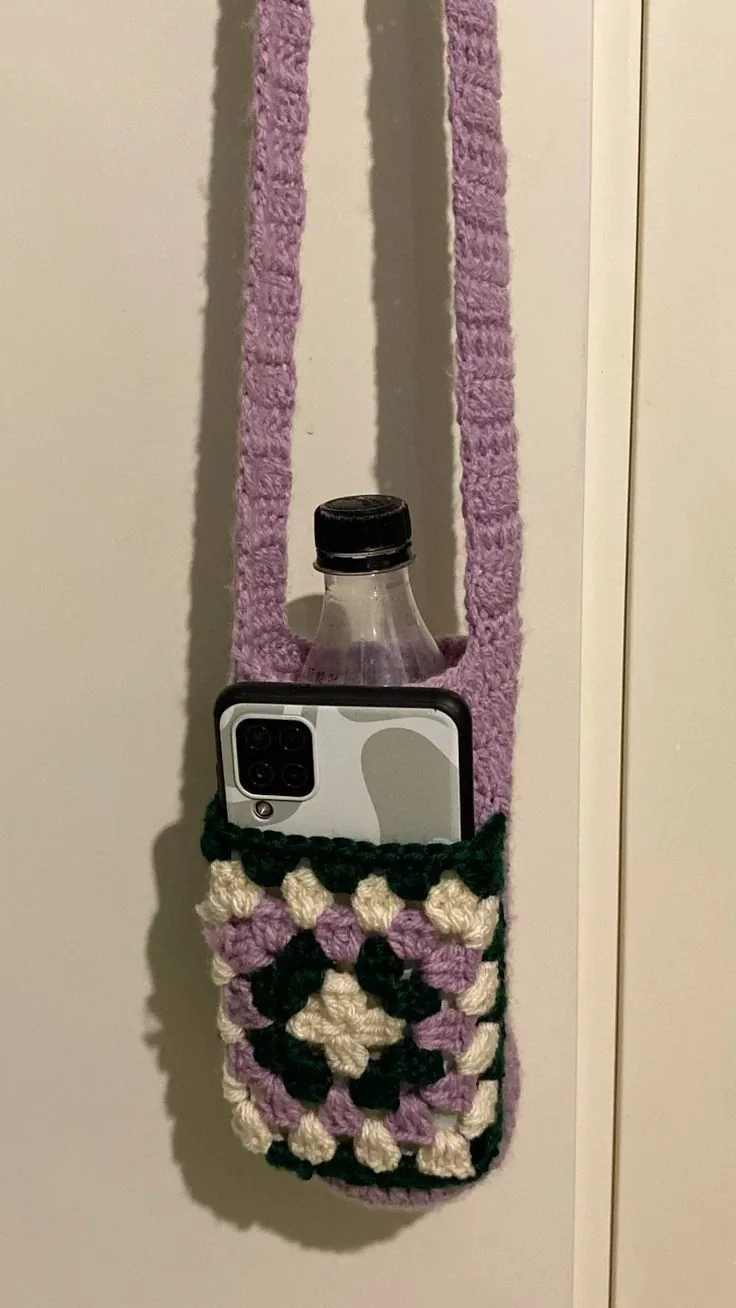
This granny phone-and-bottle sling combines black, sage, pink and cream with the form shown in the reference. The original construction below simplifies details that cannot be reliably recovered from a photograph; it does not promise an exact chart match.
Materials, gauge and size
Firm cotton, approximately 350–700 g for a tote, 100–250 g for a pouch or bottle carrier, and 200–350 g for a small shoulder bag. Colors: black, sage, pink and cream. Hook: 3–4 mm. These are estimates: weigh a sample, multiply by component count and add 15–20% for joining and adjustments.
Also use a yarn needle, scissors, stitch markers, measuring tape and blocking pins. Add lining fabric, strong sewing thread, fabric reinforcement tape, and a zipper or buttons where specified.
Gauge and sizing: Provisional firm fabric: 20 sc × 22 rows = 10 cm. Measure the intended phone, book, bottle or bag contents before selecting panel widths.
Two pouch panels
- Ch 21. Row 1: sc in second chain and across [20]. Rows 2–34: ch 1, turn; sc in every stitch [20 each row]. Keep the same number of stitches at both edges; use markers in the first and last stitch. Make the number of panels specified in assembly. Wash and measure one before deciding the final size.
Seaming, top edge and closure
- Make two identical panels. At 20 sc per 10 cm each is about 10 cm wide before seam loss; compare to phone or glasses width plus thickness and at least 1 cm ease. Sew both side seams and the bottom, leaving the top open. Sc around the opening, one sc per panel top stitch [40 before seam loss].
- Flap: work across the rear 20 stitches only. Rows 1–8: 20 sc. Row 9: 8 sc, ch 4, skip 4, 8 sc [16 sc, 1 loop]. Row 10: 8 sc, 4 sc in loop, 8 sc [20]. Sew a button to the front after folding the flap.
- Optional flower decoration uses the counted daisy or granny motif below; sew centers and outside corners flat. Weave tails inside before fitting a fabric lining. Do not assume that the measured sample fits every phone or glasses frame.
Daisy square
- Round 1: With yellow work 8 sc in a magic ring; join. [8 sc]
- Round 2: With white, in each sc work (sc, ch 3, dc, ch 3, sl st). [Eight petals]
- Round 3: Behind the petals, work sc around each Round-1 sc post, ch 3 after each sc; join. [Eight sc, eight ch-3 spaces]
- Round 4: With the frame color, in the first space work (3 dc, ch 2, 3 dc), 3 dc in next space; repeat four times. [36 dc, four corners]
- Round 5: Sc in each dc, and (sc, ch 2, sc) in each corner. [44 sc, four corners; 11 sc along each side] Block square.
Make two daisy squares in the pouch palette and sew one to the front and one to the flap, using only as many frame rounds as fit inside the panel.
Reinforced strap
- Ch 6. Row 1: sc in second chain and across [5]. Repeat 5-sc rows for 120 rows, then measure against the intended use; row counts are a sample. Make the number of straps named in assembly. Sew a 4 cm overlap at each end through several body rows, reinforce the attachment corners and add a fabric tape backing for a bag carrying weight.
Make one strap; attach it at opposite pouch side seams.
Assembly and finishing
- Check all counts before joining. Weave ends through several stitches in three directions. Sew point joins more than once and distribute tension evenly.
- Wash a sample using the yarn care instructions, block gently and allow it to dry completely. Recheck fit or motif size after washing. These original patterns are photo-inspired and physically untested; they do not reproduce a verified photographed chart.
Flat sc base
- Round 1: In a magic ring, ch 1 and work 6 sc; join. [6 sc]
- Round 2: Work 2 sc in each stitch; join. [12]
- Round 3: Repeat (1 sc, 2 sc in next stitch) six times; join. [18 sc]
- Round 4: Repeat (2 sc, 2 sc in next stitch) six times; join. [24 sc]
- Round 5: Repeat (3 sc, 2 sc in next stitch) six times; join. [30 sc]
- Round 6: Repeat (4 sc, 2 sc in next stitch) six times; join. [36 sc]
- Round 7: Repeat (5 sc, 2 sc in next stitch) six times; join. [42 sc]
- Round 8: Repeat (6 sc, 2 sc in next stitch) six times; join. [48 sc]
- Keep the beginning marked. If the disk cups, loosen tension; if it waves, check that each round has exactly six increases. Fasten off only after the final required round.
Carrier walls and colorwork
- The base ends with 48 sc. At 20 sc per 10 cm the circumference is about 24 cm, suitable only if it matches the actual bottle plus a little ease. Round 9: sc BLO around [48]. Rounds 10–40: sc around [48]. Stop at the bottle shoulder, keeping its opening clear.
- Use the stated carrier colors throughout.
- Top edge: work two additional sc rounds [48 each]. Fit the bottle before adding the strap. If 48 stitches do not fit, change the base by complete six-increase rounds, then carry the new total unchanged through the walls; record your actual count.
Reinforced strap
- Ch 7. Row 1: sc in second chain and across [6]. Repeat 6-sc rows for 120 rows, then measure against the intended use; row counts are a sample. Make the number of straps named in assembly. Sew a 4 cm overlap at each end through several body rows, reinforce the attachment corners and add a fabric tape backing for a bag carrying weight.
Assembly
- Make one strap per carrier and sew its ends to opposite top sides with 4 cm overlaps. Reinforce through the wall and a fabric tape backing. The bottom must support the bottle without stretching open; line it if needed and test gradually with the actual filled bottle. Add a decorative five-petal flower or small tassel only after the structural seams are complete.
Assembly and finishing
- Check all counts before joining. Weave ends through several stitches in three directions. Sew point joins more than once and distribute tension evenly.
- Wash a sample using the yarn care instructions, block gently and allow it to dry completely. Recheck fit or motif size after washing. These original patterns are photo-inspired and physically untested; they do not reproduce a verified photographed chart.
Combined sling assembly
- Use one long reinforced strap for both components instead of two separate straps. Sew the phone pouch flat to the front of the bottle wall along its bottom and sides, keeping its top opening accessible. Leave bottle shoulder clearance and ensure the pouch does not pull the carrier rim forward. Reinforce the combined strap ends through fabric tape.
10. Buttoned Crochet Book Sleeve

This buttoned crochet book sleeve combines cream, pink, sage and brown with the form shown in the reference. The original construction below simplifies details that cannot be reliably recovered from a photograph; it does not promise an exact chart match.
Materials, gauge and size
Firm cotton, approximately 350–700 g for a tote, 100–250 g for a pouch or bottle carrier, and 200–350 g for a small shoulder bag. Colors: cream, pink, sage and brown. Hook: 3–4 mm. These are estimates: weigh a sample, multiply by component count and add 15–20% for joining and adjustments.
Also use a yarn needle, scissors, stitch markers, measuring tape and blocking pins. Add lining fabric, strong sewing thread, fabric reinforcement tape, and a zipper or buttons where specified.
Gauge and sizing: Provisional firm fabric: 20 sc × 22 rows = 10 cm. Measure the intended phone, book, bottle or bag contents before selecting panel widths.
Front and back panels
- Ch 41. Row 1: sc in second chain and across [40]. Rows 2–60: ch 1, turn; sc in every stitch [40 each row]. Keep the same number of stitches at both edges; use markers in the first and last stitch. Make the number of panels specified in assembly. Wash and measure one before deciding the final size.
Body assembly and gusset
- Make two panels. At 20 sc per 10 cm each is approximately 20 cm wide before seams; wash and compare with the intended contents. Sew the sides and bottom directly, leaving the top open.
- Closure tab: ch 9, sc across [8] for ten rows; Row 11: 2 sc, ch 4, skip 4, 2 sc; Row 12: 2 sc, 4 sc in loop, 2 sc [8]. Sew tab to the back top and a button to the front. Make three colorways and fit the actual book before final seaming.
Assembly and finishing
- Check all counts before joining. Weave ends through several stitches in three directions. Sew point joins more than once and distribute tension evenly.
- Wash a sample using the yarn care instructions, block gently and allow it to dry completely. Recheck fit or motif size after washing. These original patterns are photo-inspired and physically untested; they do not reproduce a verified photographed chart.
11. Ivory Hen Shoulder Bag

This ivory hen shoulder bag combines ivory and red with the form shown in the reference. The original construction below simplifies details that cannot be reliably recovered from a photograph; it does not promise an exact chart match.
Materials, gauge and size
Firm cotton, approximately 350–700 g for a tote, 100–250 g for a pouch or bottle carrier, and 200–350 g for a small shoulder bag. Colors: ivory and red. Hook: 3–4 mm. These are estimates: weigh a sample, multiply by component count and add 15–20% for joining and adjustments.
Also use a yarn needle, scissors, stitch markers, measuring tape and blocking pins. Add lining fabric, strong sewing thread, fabric reinforcement tape, and a zipper or buttons where specified.
Gauge and sizing: Provisional firm fabric: 20 sc × 22 rows = 10 cm. Measure the intended phone, book, bottle or bag contents before selecting panel widths.
Two half-circle hen panels
- Ch 4, join to ring. Row 1: ch 3 counts as first dc, work 6 more dc in ring [7]. Row 2: ch 3 counts as first dc, turn; dc in same stitch, 2 dc in each remaining stitch [14]. Row 3: (dc, inc) seven times [21]. On each later row add seven evenly spaced dc increases: Rows 4–12 have 28, 35, 42, 49, 56, 63, 70, 77 and 84 dc. Make two matching half circles.
- Place curved edges together and whipstitch the 84-stitch curves, leaving straight edges open as the bag mouth. Outline each straight edge with about two sc per dc row end, adjusting to keep it flat. For the head, attach yarn across ten stitches at one end of the mouth, work 10 sc for eight rows, then decrease at both ends on three rows [8, 6, 4]; fasten off and round the tip with sc.
- Comb: join red on the head top and work (sl st in next, skip 1, 5 dc in next, skip 1) twice, using plain sc for any remaining edge stitches. Beak: ch 4, 3 sc across, then sc3tog [1]; sew to the head front. Embroider an eye. Make a short closure tab of 6 sc × 10 rows with a ch-3 buttonhole centered in its last two rows; sew a matching button to the opposite mouth edge.
Reinforced strap
- Ch 7. Row 1: sc in second chain and across [6]. Repeat 6-sc rows for 130 rows, then measure against the intended use; row counts are a sample. Make the number of straps named in assembly. Sew a 4 cm overlap at each end through several body rows, reinforce the attachment corners and add a fabric tape backing for a bag carrying weight.
Make one strap and attach its ends beside the head and tail ends of the mouth. Sew a fabric lining inside the rounded body. The hen silhouette is an original interpretation of the reference.
Assembly and finishing
- Check all counts before joining. Weave ends through several stitches in three directions. Sew point joins more than once and distribute tension evenly.
- Wash a sample using the yarn care instructions, block gently and allow it to dry completely. Recheck fit or motif size after washing. These original patterns are photo-inspired and physically untested; they do not reproduce a verified photographed chart.