
7 Crochet Lace Stitch and Motif Ideas
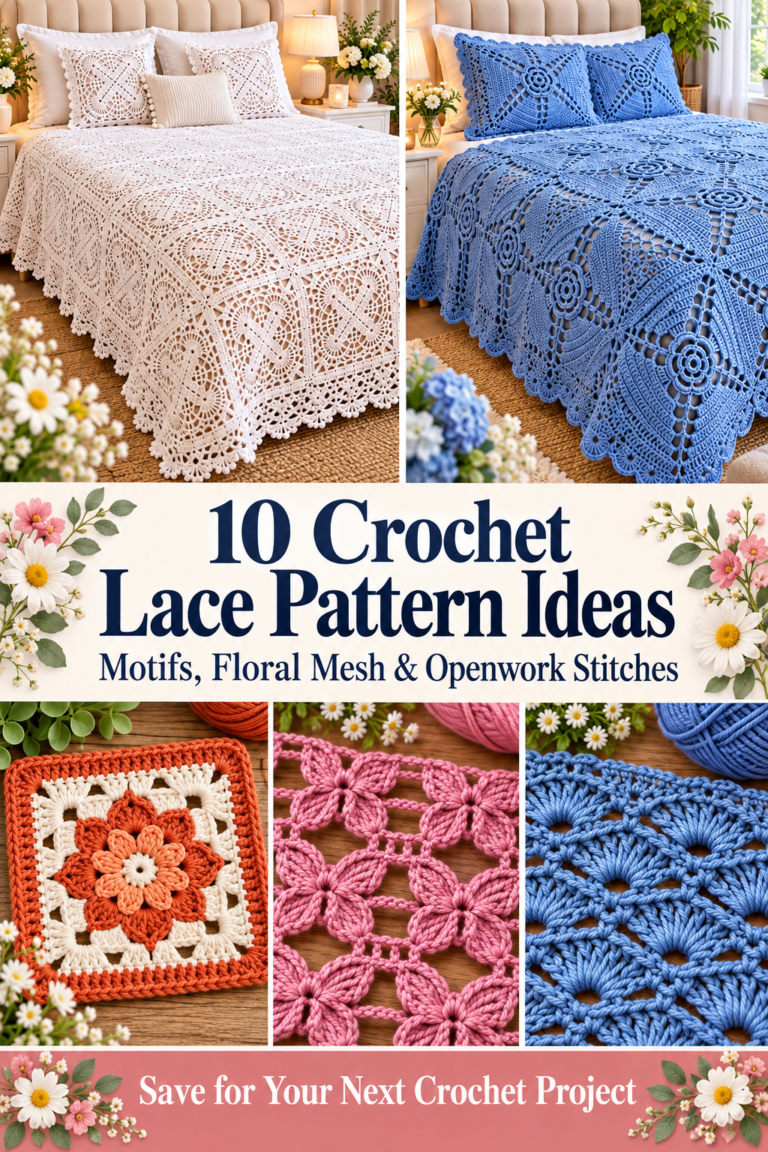
Try seven crochet lace stitch and motif ideas with counted US-term instructions for flower bands, filet medallions, shell textures and lace squares. Each reference below has its own materials, counted construction, assembly and finishing instructions.
US crochet terms and working rules
ch = chain; sl st = slip stitch; sc = single crochet; hdc = half double crochet; dc = double crochet; inc = 2 stitches in one stitch; sc2tog = single crochet two stitches together; st(s) = stitch(es); sp = space; RS = right side. A magic ring is an adjustable yarn loop. Numbers in brackets give end-of-round or end-of-row counts. Repeat instructions between parentheses the stated number of times.
Unless a step explicitly says otherwise, beginning chains do not count as stitches. For dc rounds, ch 2 to reach height, then work the first dc into the first stitch; join to the first real dc. For sc rounds, ch 1 and join to the first sc. For flat sc rows, ch 1 and turn. Flat dc rows explicitly use ch 3 as the first counted dc. Do not work into joining slip stitches. Change color by completing the last yarn-over of the preceding stitch with the new yarn.
To work sc2tog: insert hook into the next stitch and draw up a loop, repeat in the following stitch, yarn over and draw through all three loops. For a surface slip stitch, bring the yarn up from behind the fabric, insert the hook into the next chosen gap and pull the new loop through the loop already on the hook. Keep these stitches loose.
Additional US terms used here: inc = 2 stitches of the stated type in one stitch; dec/sc2tog = single crochet two together; dc2tog = double crochet two together; sc3tog = single crochet three together; tr = treble crochet; BLO = back loop only; front-post dc = work a dc around the post from front to back to front. A ch-3 turning chain counts as one dc unless a step explicitly states otherwise; a ch-1 turn never counts as a stitch.
1. Purple Flower-Wheel Lace Band
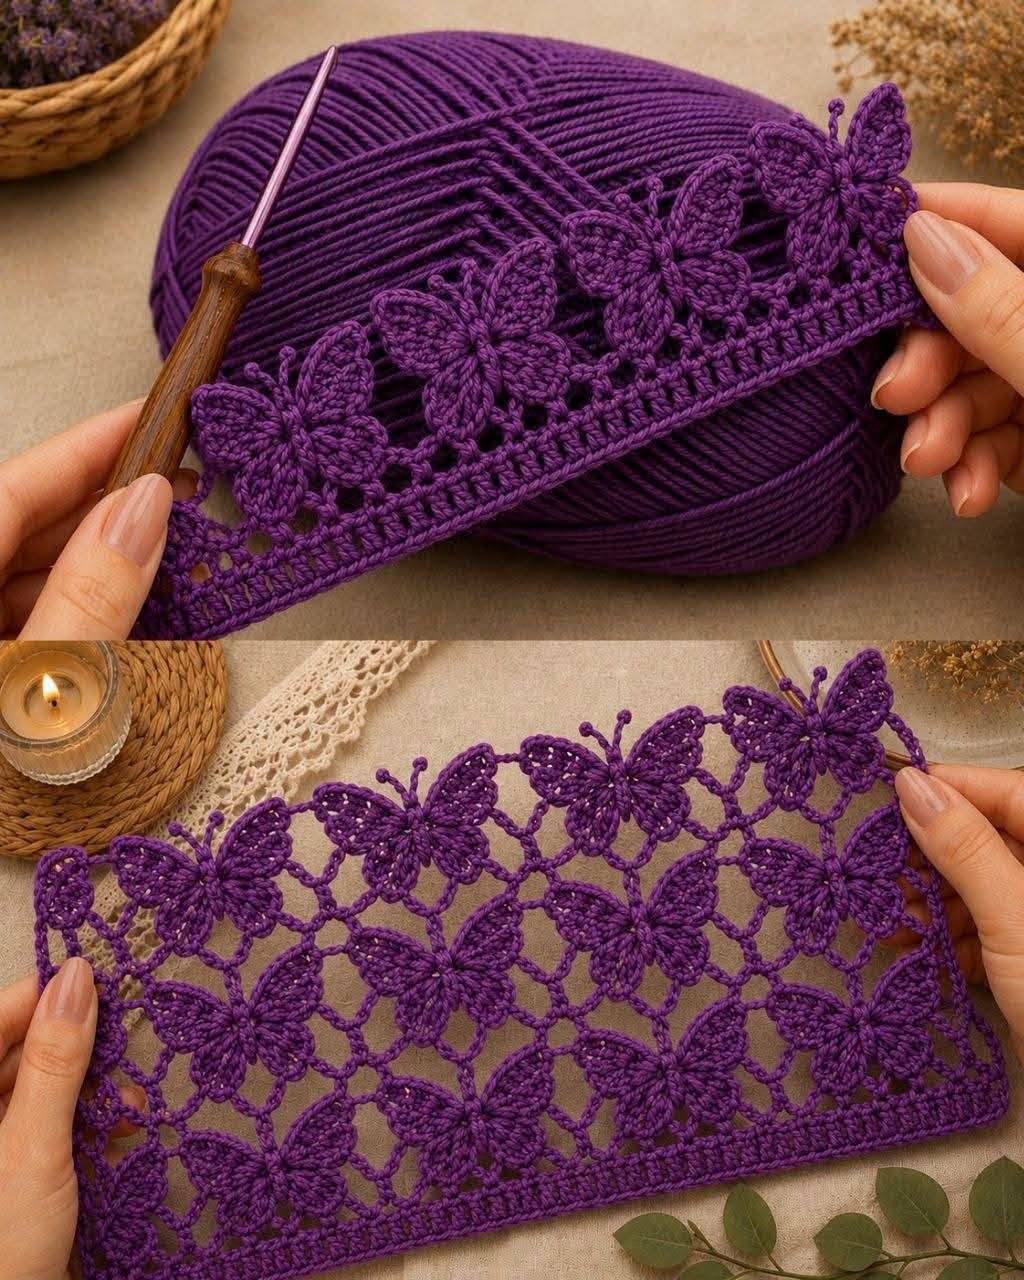
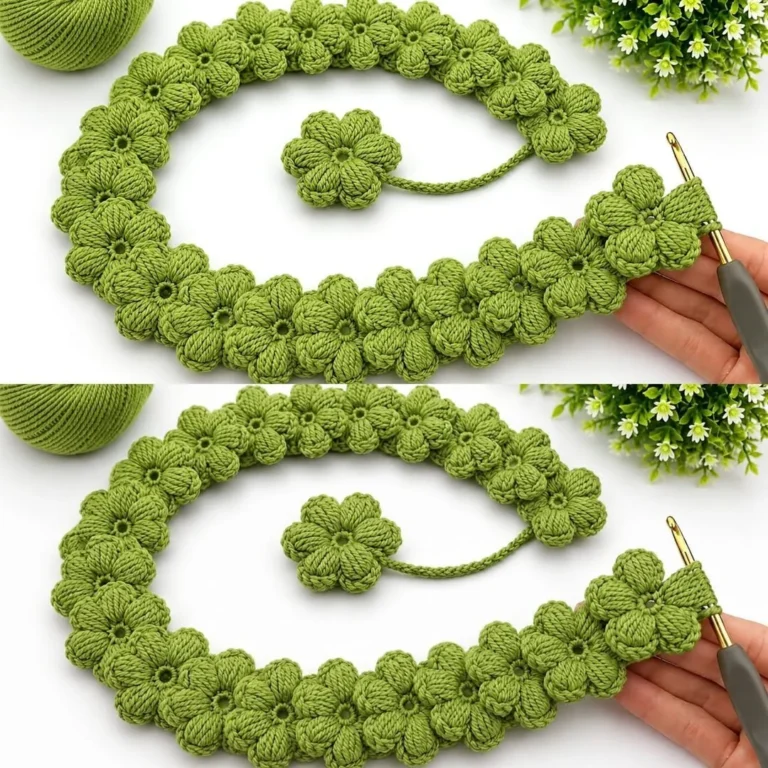
The reference highlights purple in a purple flower-wheel lace band. The written construction preserves the overall idea while simplifying details that cannot be reliably recovered from a photograph.
Materials, gauge and size
Sport cotton, approximately 40–150 g for a sample band or panel; 2.5–3.5 mm hook. Colors: purple. These are estimates: weigh a sample, multiply by the planned component count and add 15–20% for assembly and adjustments.
Also use a yarn needle, scissors, stitch markers and a measuring tape. Start around 16 dc and 9 rows per 10 cm, but measure the actual blocked motif and rail length. Sample stitch counts are more important than a promised finished dimension.
Open-center flower motif
- Ch 8, join without twisting. Round 1: work 16 sc into the ring, not into individual chains; join [16].
- Round 2: repeat (sc in next stitch, ch 5, skip next stitch) 8 times; join [8 sc and 8 loops].
- Round 3: into each loop work (sc, hdc, 5 dc, hdc, sc), then sl st into the next anchor sc [8 petals, nine stitches per petal plus 8 anchor sl sts]. Fasten off with a long sewing tail.
- Block the open center round. For a band, sew neighboring flowers together at two touching petal tips using at least four small stitches per connection. For a panel, lay out all motifs before sewing so every unit connects to at least two neighbors.
Band or panel layout
- For the narrow band make five eight-petal flowers and sew adjacent units at two touching petal tips. For the wide sample make 15 flowers in three rows of five, aligning corresponding petals and sewing every touching pair. Block all units before joining.
- Create straight rails along the top and bottom of the band: join at the outer top tip, ch 5 to the next outer tip and sl st to attach, repeating across. If five chains pull tight, increase every corresponding bridge equally until flat. Row 2: sc in every chain and in each attachment. Row 3: dc in every sc. Repeat along the lower edge. Record your bridge count; rail length depends on the blocked flower size.
- For a continuous fabric, sew a second band to the first at matching tips before adding outside rails. Work a final sc side edge with one sc per existing stitch and three at each corner. This construction uses separate flowers rather than claiming the exact continuous stitch shown.
Assembly and finishing
- Check all counts before joining. Weave ends through several stitches in three directions. Sew point joins more than once and distribute tension evenly.
- Wash a sample using the yarn care instructions, block gently and allow it to dry completely. Recheck fit or motif size after washing. These original patterns are photo-inspired and physically untested; they do not reproduce a verified photographed chart.
2. Blue Floral Lace Panel
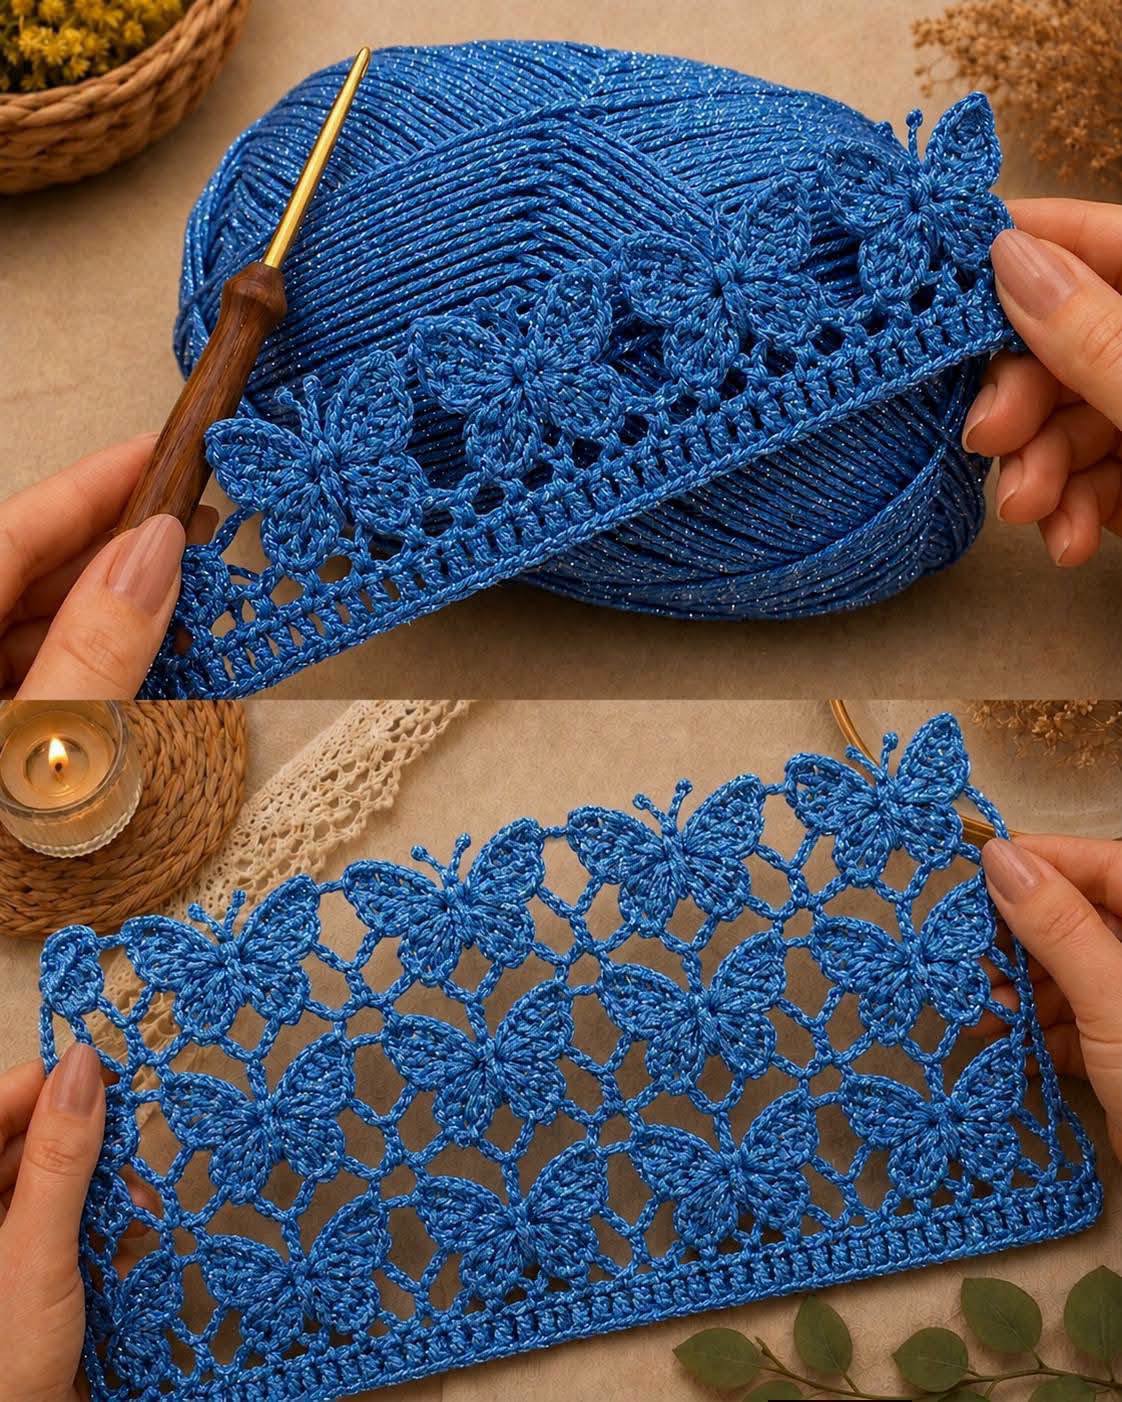
The reference highlights denim blue in a blue floral lace panel. The written construction preserves the overall idea while simplifying details that cannot be reliably recovered from a photograph.
Materials, gauge and size
Sport cotton, approximately 40–150 g for a sample band or panel; 2.5–3.5 mm hook. Colors: denim blue. These are estimates: weigh a sample, multiply by the planned component count and add 15–20% for assembly and adjustments.
Also use a yarn needle, scissors, stitch markers and a measuring tape. Start around 16 dc and 9 rows per 10 cm, but measure the actual blocked motif and rail length. Sample stitch counts are more important than a promised finished dimension.
Open-center flower motif
- Ch 8, join without twisting. Round 1: work 16 sc into the ring, not into individual chains; join [16].
- Round 2: repeat (sc in next stitch, ch 5, skip next stitch) 8 times; join [8 sc and 8 loops].
- Round 3: into each loop work (sc, hdc, 5 dc, hdc, sc), then sl st into the next anchor sc [8 petals, nine stitches per petal plus 8 anchor sl sts]. Fasten off with a long sewing tail.
- Block the open center round. For a band, sew neighboring flowers together at two touching petal tips using at least four small stitches per connection. For a panel, lay out all motifs before sewing so every unit connects to at least two neighbors.
Band or panel layout
- For the narrow band make five eight-petal flowers and sew adjacent units at two touching petal tips. For the wide sample make 15 flowers in three rows of five, aligning corresponding petals and sewing every touching pair. Block all units before joining.
- Create straight rails along the top and bottom of the band: join at the outer top tip, ch 5 to the next outer tip and sl st to attach, repeating across. If five chains pull tight, increase every corresponding bridge equally until flat. Row 2: sc in every chain and in each attachment. Row 3: dc in every sc. Repeat along the lower edge. Record your bridge count; rail length depends on the blocked flower size.
- For a continuous fabric, sew a second band to the first at matching tips before adding outside rails. Work a final sc side edge with one sc per existing stitch and three at each corner. This construction uses separate flowers rather than claiming the exact continuous stitch shown.
Assembly and finishing
- Check all counts before joining. Weave ends through several stitches in three directions. Sew point joins more than once and distribute tension evenly.
- Wash a sample using the yarn care instructions, block gently and allow it to dry completely. Recheck fit or motif size after washing. These original patterns are photo-inspired and physically untested; they do not reproduce a verified photographed chart.
3. Golden Flower-Wheel Lace Trim

The reference highlights golden yellow in a golden flower-wheel lace trim. The written construction preserves the overall idea while simplifying details that cannot be reliably recovered from a photograph.
Materials, gauge and size
Sport cotton, approximately 40–150 g for a sample band or panel; 2.5–3.5 mm hook. Colors: golden yellow. These are estimates: weigh a sample, multiply by the planned component count and add 15–20% for assembly and adjustments.
Also use a yarn needle, scissors, stitch markers and a measuring tape. Start around 16 dc and 9 rows per 10 cm, but measure the actual blocked motif and rail length. Sample stitch counts are more important than a promised finished dimension.
Open-center flower motif
- Ch 8, join without twisting. Round 1: work 16 sc into the ring, not into individual chains; join [16].
- Round 2: repeat (sc in next stitch, ch 5, skip next stitch) 8 times; join [8 sc and 8 loops].
- Round 3: into each loop work (sc, hdc, 5 dc, hdc, sc), then sl st into the next anchor sc [8 petals, nine stitches per petal plus 8 anchor sl sts]. Fasten off with a long sewing tail.
- Block the open center round. For a band, sew neighboring flowers together at two touching petal tips using at least four small stitches per connection. For a panel, lay out all motifs before sewing so every unit connects to at least two neighbors.
Band or panel layout
- For the narrow band make five eight-petal flowers and sew adjacent units at two touching petal tips. For the wide sample make 15 flowers in three rows of five, aligning corresponding petals and sewing every touching pair. Block all units before joining.
- Create straight rails along the top and bottom of the band: join at the outer top tip, ch 5 to the next outer tip and sl st to attach, repeating across. If five chains pull tight, increase every corresponding bridge equally until flat. Row 2: sc in every chain and in each attachment. Row 3: dc in every sc. Repeat along the lower edge. Record your bridge count; rail length depends on the blocked flower size.
- For a continuous fabric, sew a second band to the first at matching tips before adding outside rails. Work a final sc side edge with one sc per existing stitch and three at each corner. This construction uses separate flowers rather than claiming the exact continuous stitch shown.
Assembly and finishing
- Check all counts before joining. Weave ends through several stitches in three directions. Sew point joins more than once and distribute tension evenly.
- Wash a sample using the yarn care instructions, block gently and allow it to dry completely. Recheck fit or motif size after washing. These original patterns are photo-inspired and physically untested; they do not reproduce a verified photographed chart.
4. Gray Daisy Lace Band
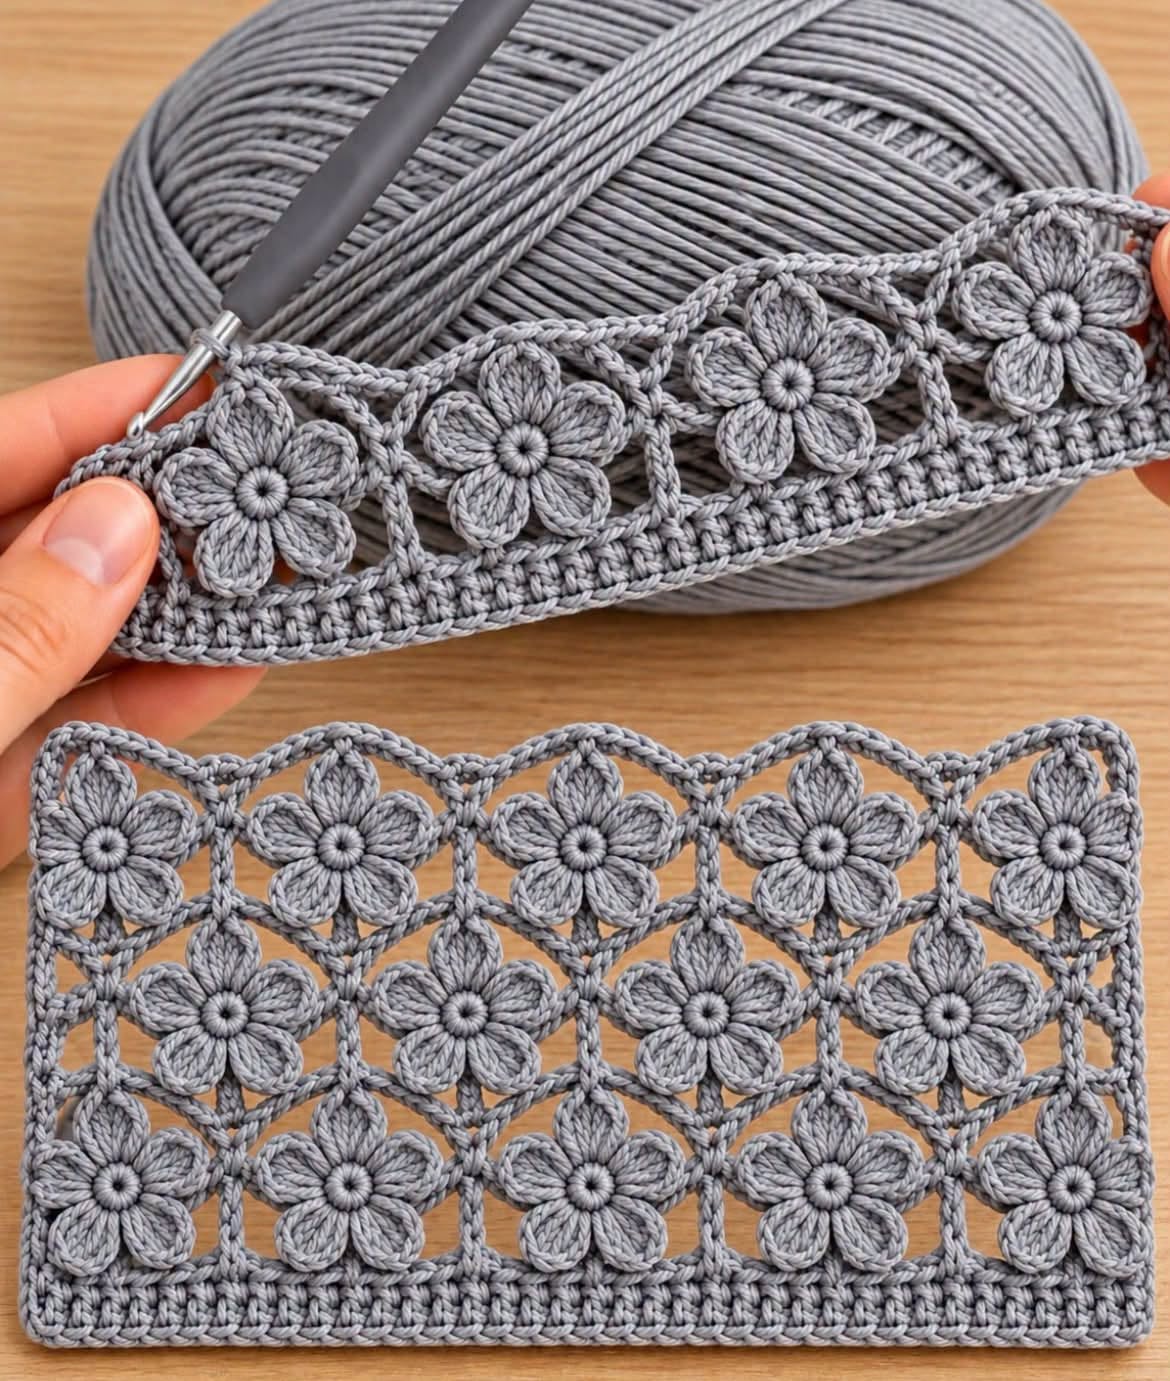
The reference highlights gray in a gray daisy lace band. The written construction preserves the overall idea while simplifying details that cannot be reliably recovered from a photograph.
Materials, gauge and size
Sport cotton, approximately 40–150 g for a sample band or panel; 2.5–3.5 mm hook. Colors: gray. These are estimates: weigh a sample, multiply by the planned component count and add 15–20% for assembly and adjustments.
Also use a yarn needle, scissors, stitch markers and a measuring tape. Start around 16 dc and 9 rows per 10 cm, but measure the actual blocked motif and rail length. Sample stitch counts are more important than a promised finished dimension.
Open-center flower motif
- Ch 8, join without twisting. Round 1: work 16 sc into the ring, not into individual chains; join [16].
- Round 2: repeat (sc in next stitch, ch 5, skip next stitch) 8 times; join [8 sc and 8 loops].
- Round 3: into each loop work (sc, hdc, 5 dc, hdc, sc), then sl st into the next anchor sc [8 petals, nine stitches per petal plus 8 anchor sl sts]. Fasten off with a long sewing tail.
- Block the open center round. For a band, sew neighboring flowers together at two touching petal tips using at least four small stitches per connection. For a panel, lay out all motifs before sewing so every unit connects to at least two neighbors.
Band or panel layout
- For the narrow band make five eight-petal flowers and sew adjacent units at two touching petal tips. For the wide sample make 15 flowers in three rows of five, aligning corresponding petals and sewing every touching pair. Block all units before joining.
- Create straight rails along the top and bottom of the band: join at the outer top tip, ch 5 to the next outer tip and sl st to attach, repeating across. If five chains pull tight, increase every corresponding bridge equally until flat. Row 2: sc in every chain and in each attachment. Row 3: dc in every sc. Repeat along the lower edge. Record your bridge count; rail length depends on the blocked flower size.
- For a continuous fabric, sew a second band to the first at matching tips before adding outside rails. Work a final sc side edge with one sc per existing stitch and three at each corner. This construction uses separate flowers rather than claiming the exact continuous stitch shown.
Assembly and finishing
- Check all counts before joining. Weave ends through several stitches in three directions. Sew point joins more than once and distribute tension evenly.
- Wash a sample using the yarn care instructions, block gently and allow it to dry completely. Recheck fit or motif size after washing. These original patterns are photo-inspired and physically untested; they do not reproduce a verified photographed chart.
5. Lilac Filet Medallion Strip
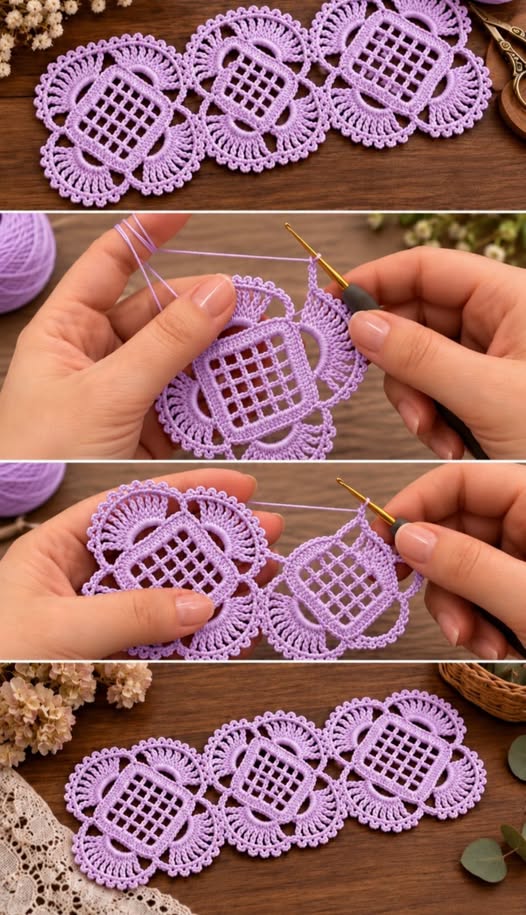
The reference highlights lilac in a lilac filet medallion strip. The written construction preserves the overall idea while simplifying details that cannot be reliably recovered from a photograph.
Materials, gauge and size
Sport cotton, approximately 40–150 g for a sample band or panel; 2.5–3.5 mm hook. Colors: lilac. These are estimates: weigh a sample, multiply by the planned component count and add 15–20% for assembly and adjustments.
Also use a yarn needle, scissors, stitch markers and a measuring tape. Start around 16 dc and 9 rows per 10 cm, but measure the actual blocked motif and rail length. Sample stitch counts are more important than a promised finished dimension.
Filet center — 13 positions
- Ch 15. Row 1: dc in fourth chain from hook and in each remaining chain, counting the skipped three chains as one dc [13 dc]. Row 2: ch 3 counts as first dc, turn; (ch 1, skip 1 stitch, dc in next) six times [7 dc, 6 spaces; 13 positions].
- Row 3: ch 3 counts as first dc, turn; dc in each dc and once in each space [13 dc]. Rows 4–7: repeat Rows 2–3 twice [13 positions each row]. Block the seven-row center flat.
Round outline and lace edging
- Join at a corner. Round 1: sc in each of the 13 top positions, 12 sc evenly down the side, 13 sc across the foundation and 12 sc up the other side [50 sc]. Do not duplicate corner stitches. Round 2: (sc in next stitch, ch 5, skip next) 25 times [25 anchors and 25 loops].
- Round 3: into each loop work (sc, hdc, 3 dc, hdc, sc), then sl st into next anchor [25 seven-stitch scallops]. Make five medallions, block each to the same oval outline and sew neighboring scallops at two points to form a strip. The original interpretation has an oval border around a filet center rather than an exact copy of the photographed circular grid.
Assembly and finishing
- Check all counts before joining. Weave ends through several stitches in three directions. Sew point joins more than once and distribute tension evenly.
- Wash a sample using the yarn care instructions, block gently and allow it to dry completely. Recheck fit or motif size after washing. These original patterns are photo-inspired and physically untested; they do not reproduce a verified photographed chart.
6. Purple Four-Petal Lace Squares

The reference highlights deep purple in a purple four-petal lace squares. The written construction preserves the overall idea while simplifying details that cannot be reliably recovered from a photograph.
Materials, gauge and size
Sport cotton, approximately 40–150 g for a sample band or panel; 2.5–3.5 mm hook. Colors: deep purple. These are estimates: weigh a sample, multiply by the planned component count and add 15–20% for assembly and adjustments.
Also use a yarn needle, scissors, stitch markers and a measuring tape. Start around 16 dc and 9 rows per 10 cm, but measure the actual blocked motif and rail length. Sample stitch counts are more important than a promised finished dimension.
Four-petal lace square
- Round 1: Work 8 sc in a magic ring; join [8]. Round 2: repeat (sc in next stitch, ch 10, skip next stitch) four times [four anchors and four loops].
- Round 3: into each loop work (sc, hdc, 9 dc, hdc, sc), then sl st in its next anchor sc [four petals, thirteen stitches per petal plus four anchor sl sts].
- Round 4: behind each petal, sc around the corresponding Round-2 anchor post and ch 7 [four sc and four loops]. Round 5: in each loop work (5 dc, ch 2, 5 dc) [40 dc and four ch-2 corners].
- Round 6: sc in every dc and (sc, ch 2, sc) in each corner [48 sc, four corners; twelve sc per side]. For corner picots, work ch 3 and sl st into the first chain at each corner instead of enlarging the corner space.
- Make one square as a coaster-scale sample or four for a 2 × 2 panel. Whipstitch corresponding edge loops without tightening. Block square and weave ends. This is a simpler framed four-petal motif than the intricate layered reference.
Square panel assembly
- Make nine equal squares for a 3 × 3 sample or four squares for a straight trim. Block to the measured width; whipstitch matching outside stitches, leaving the same seam allowance on every join. Work two sc edging rounds with (sc, ch 2, sc) at the outside corners. The stacked squares in the photo are lace units, not a basket pattern.
Assembly and finishing
- Check all counts before joining. Weave ends through several stitches in three directions. Sew point joins more than once and distribute tension evenly.
- Wash a sample using the yarn care instructions, block gently and allow it to dry completely. Recheck fit or motif size after washing. These original patterns are photo-inspired and physically untested; they do not reproduce a verified photographed chart.
7. Pink Raised Shell Lace Sample
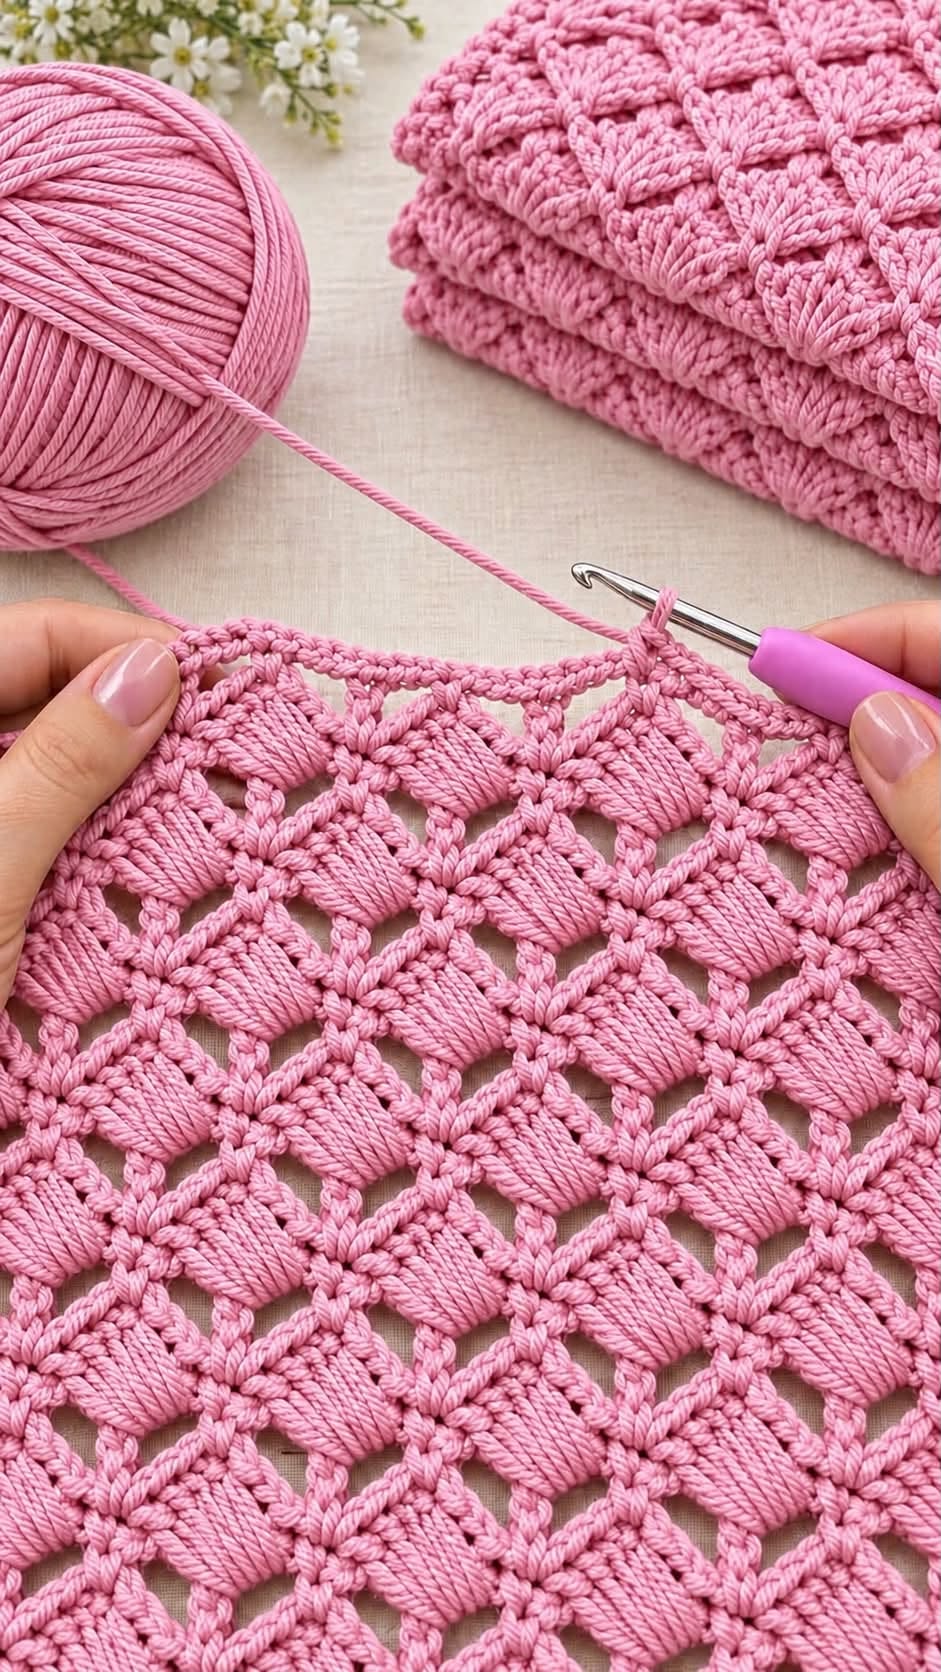
The reference highlights pink in a pink raised shell lace sample. The written construction preserves the overall idea while simplifying details that cannot be reliably recovered from a photograph.
Materials, gauge and size
Sport cotton, approximately 40–150 g for a sample band or panel; 2.5–3.5 mm hook. Colors: pink. These are estimates: weigh a sample, multiply by the planned component count and add 15–20% for assembly and adjustments.
Also use a yarn needle, scissors, stitch markers and a measuring tape. Start around 16 dc and 9 rows per 10 cm, but measure the actual blocked motif and rail length. Sample stitch counts are more important than a promised finished dimension.
Shell-and-mesh fabric
- Ch 49. Row 1: Sc in second chain and across. [48 sc]
- Row 2: Ch 1, turn; repeat (sc in next stitch, skip 2, 5 dc in next stitch, skip 2) eight times. [Eight sc and eight shells; 48 stitches]
- Row 3: Ch 3 (counts as first dc), turn; dc in every remaining stitch. [48 dc]
- Row 4: Ch 3, turn; (ch 1, skip 1, dc in next stitch) 23 times, then dc in the last stitch. [25 dc, 23 ch-1 spaces; 48 positions]
- Row 5: Ch 1, turn; sc in every dc and in each ch-1 space. [48 sc]
- Repeat Rows 2–5 until there are 33 rows, or the measured length is reached. End after a plain sc row. For a narrow trim use a multiple of six stitches; add one chain for the foundation. All rows retain the same number of stitch/chain positions.
- Border with one sc round, 3 sc at corners, one sc at sc row-ends and 2 sc at taller row-ends. Add an optional row of (sc, ch 3, skip 1) arches along the long sides. Use plain sc at corners and incomplete repeats. Wet-block without stretching the chain spaces.
This independent shell-and-mesh repeat interprets the lace texture; it does not reproduce a hidden stitch chart.
Raised texture option
- After finishing the plain shell sample, join at a Row-2 shell center and surface sl st along the front of each shell’s five dc, keeping the working yarn behind the fabric. Work loosely so the surface chain does not shorten the shell. Continue only over the raised shell rows; do not cross mesh openings. This adds relief without changing the base panel’s 48 positions.
Assembly and finishing
- Check all counts before joining. Weave ends through several stitches in three directions. Sew point joins more than once and distribute tension evenly.
- Wash a sample using the yarn care instructions, block gently and allow it to dry completely. Recheck fit or motif size after washing. These original patterns are photo-inspired and physically untested; they do not reproduce a verified photographed chart.