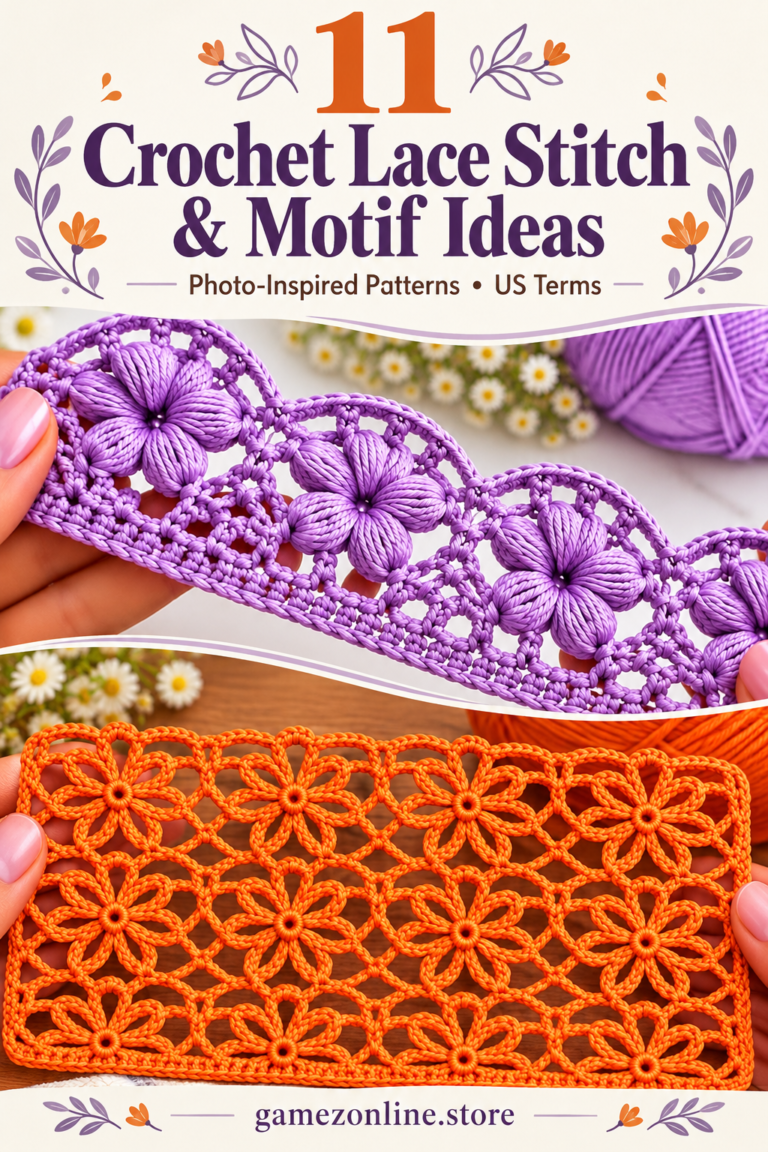

5 Crochet Cardigan, Top and Cap Ideas
Explore five crochet cardigan, top and cap ideas: a flower cap, cable-inspired cardigan, neutral coat, floral lace duster and airy mesh blouse. Each reference below has its own materials, counted construction, assembly and finishing instructions.
US crochet terms and working rules
ch = chain; sl st = slip stitch; sc = single crochet; hdc = half double crochet; dc = double crochet; inc = 2 stitches in one stitch; sc2tog = single crochet two stitches together; st(s) = stitch(es); sp = space; RS = right side. A magic ring is an adjustable yarn loop. Numbers in brackets give end-of-round or end-of-row counts. Repeat instructions between parentheses the stated number of times.
Unless a step explicitly says otherwise, beginning chains do not count as stitches. For dc rounds, ch 2 to reach height, then work the first dc into the first stitch; join to the first real dc. For sc rounds, ch 1 and join to the first sc. For flat sc rows, ch 1 and turn. Flat dc rows explicitly use ch 3 as the first counted dc. Do not work into joining slip stitches. Change color by completing the last yarn-over of the preceding stitch with the new yarn.
To work sc2tog: insert hook into the next stitch and draw up a loop, repeat in the following stitch, yarn over and draw through all three loops. For a surface slip stitch, bring the yarn up from behind the fabric, insert the hook into the next chosen gap and pull the new loop through the loop already on the hook. Keep these stitches loose.
Additional US terms used here: inc = 2 stitches of the stated type in one stitch; dec/sc2tog = single crochet two together; dc2tog = double crochet two together; sc3tog = single crochet three together; tr = treble crochet; BLO = back loop only; front-post dc = work a dc around the post from front to back to front. A ch-3 turning chain counts as one dc unless a step explicitly states otherwise; a ch-1 turn never counts as a stitch.
1. Flower-Net Cap with a Crochet Visor
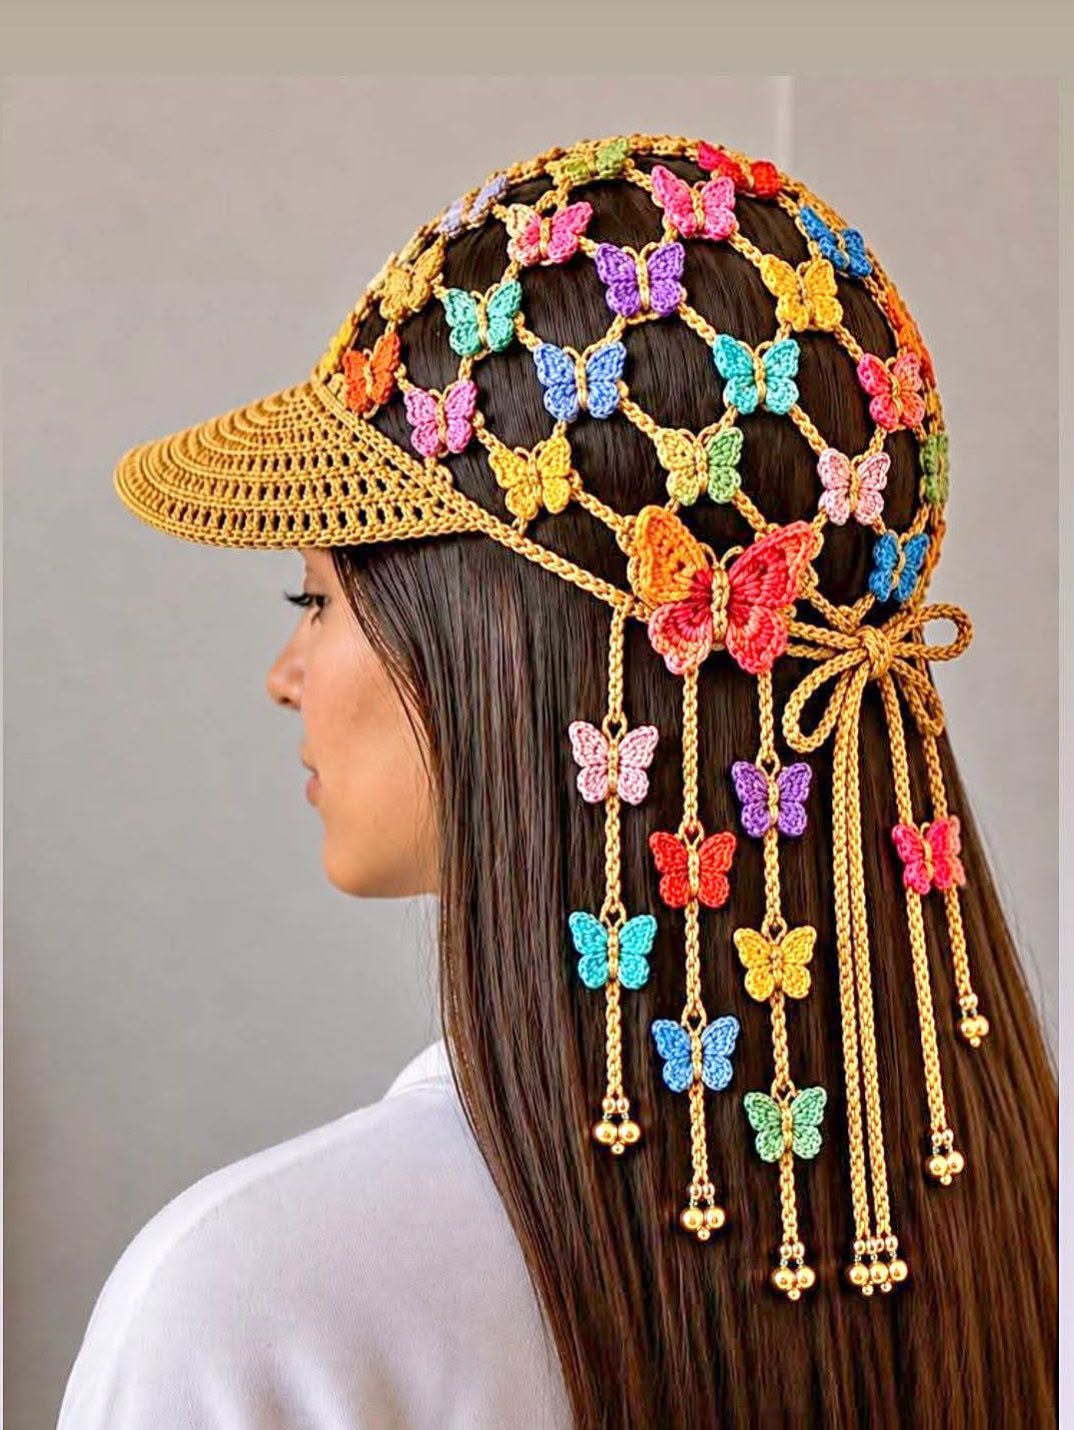
The reference highlights black, yellow, pink, blue and green in a flower-net cap with a crochet visor. The written construction preserves the overall idea while simplifying details that cannot be reliably recovered from a photograph.
Materials, gauge and size
Smooth DK cotton, approximately 120–180 g plus colorful scraps; 3.5–4 mm hook. Colors: black, yellow, pink, blue and green. These are estimates: weigh a sample, multiply by the planned component count and add 15–20% for assembly and adjustments.
Also use a yarn needle, scissors, stitch markers and a measuring tape. Provisional dc/mesh gauge: 16 positions × 9 rows = 10 cm. Wash a swatch in the actual stitch. Garment instructions give one measured worked example and resizing formulas, not a tested graded size range.
Measured crown and mesh sides
- Sample gauge: 16 dc × 9 rows per 10 cm. For a 56 cm head, a 90-stitch crown gives about 56 cm at this gauge; crochet stretch varies, so fit after Round 7. Start smaller or change yarn/hook if the circle already exceeds the head diameter.
- Joined rounds: Round 1: 12 dc in magic ring [12]. Round 2: 2 dc in each [24]. Round 3: (dc, inc) twelve times [36]. Round 4: (2 dc, inc) twelve times [48]. Round 5: (3 dc, inc) twelve times [60]. Round 6: (4 dc, inc) twelve times [72]. Round 7: (3 dc, inc) eighteen times [90]. In this paragraph inc means 2 dc in the same stitch.
- Round 8: (dc in next, ch 1, skip next) 45 times [45 dc, 45 spaces]. Round 9: dc in each dc and once in each space [90]. Rounds 10–15: repeat Rounds 8–9 three times [90 positions]. Round 16: sc around [90]. Round 17: sc around [90]. The height is provisional: stop the crown-to-edge depth at about 17–18 cm after trying it on.
Visor, flowers and optional fringe
- Mark the center-front 30 stitches. Visor Row 1: join yellow, sc in those 30 only [30]. Row 2: ch 1, turn; (4 sc, inc) six times [36]. Row 3: sc across [36]. Row 4: (5 sc, inc) six times [42]. Rows 5–7: sc across [42]. Row 8: sc2tog, 38 sc, sc2tog [40]. Row 9: sc2tog, 36 sc, sc2tog [38]. Work one sc outline around the visor; no hard insert is required.
- Make 12 small five-petal flowers using the motif below; sew each center and two petal tips securely to the cap mesh. Add six optional fringe cords at the back: ch 31, sl st along 30 chains, fasten off. Sew a small flower to each cord end and reinforce the cap attachment. The six fringes are decorative adult accessories; omit dangling cords for young children.
- With the center color work 10 sc into a magic ring; join [10]. With the petal color repeat (sl st in next sc, 5 dc in next sc) five times. [Five petals] Fasten off with a sewing tail; weave or sew both ends securely.
Assembly and finishing
- Check all counts before joining. Weave ends through several stitches in three directions. Sew point joins more than once and distribute tension evenly.
- Wash a sample using the yarn care instructions, block gently and allow it to dry completely. Recheck fit or motif size after washing. These original patterns are photo-inspired and physically untested; they do not reproduce a verified photographed chart.
2. Mustard Cable-Inspired Long Cardigan
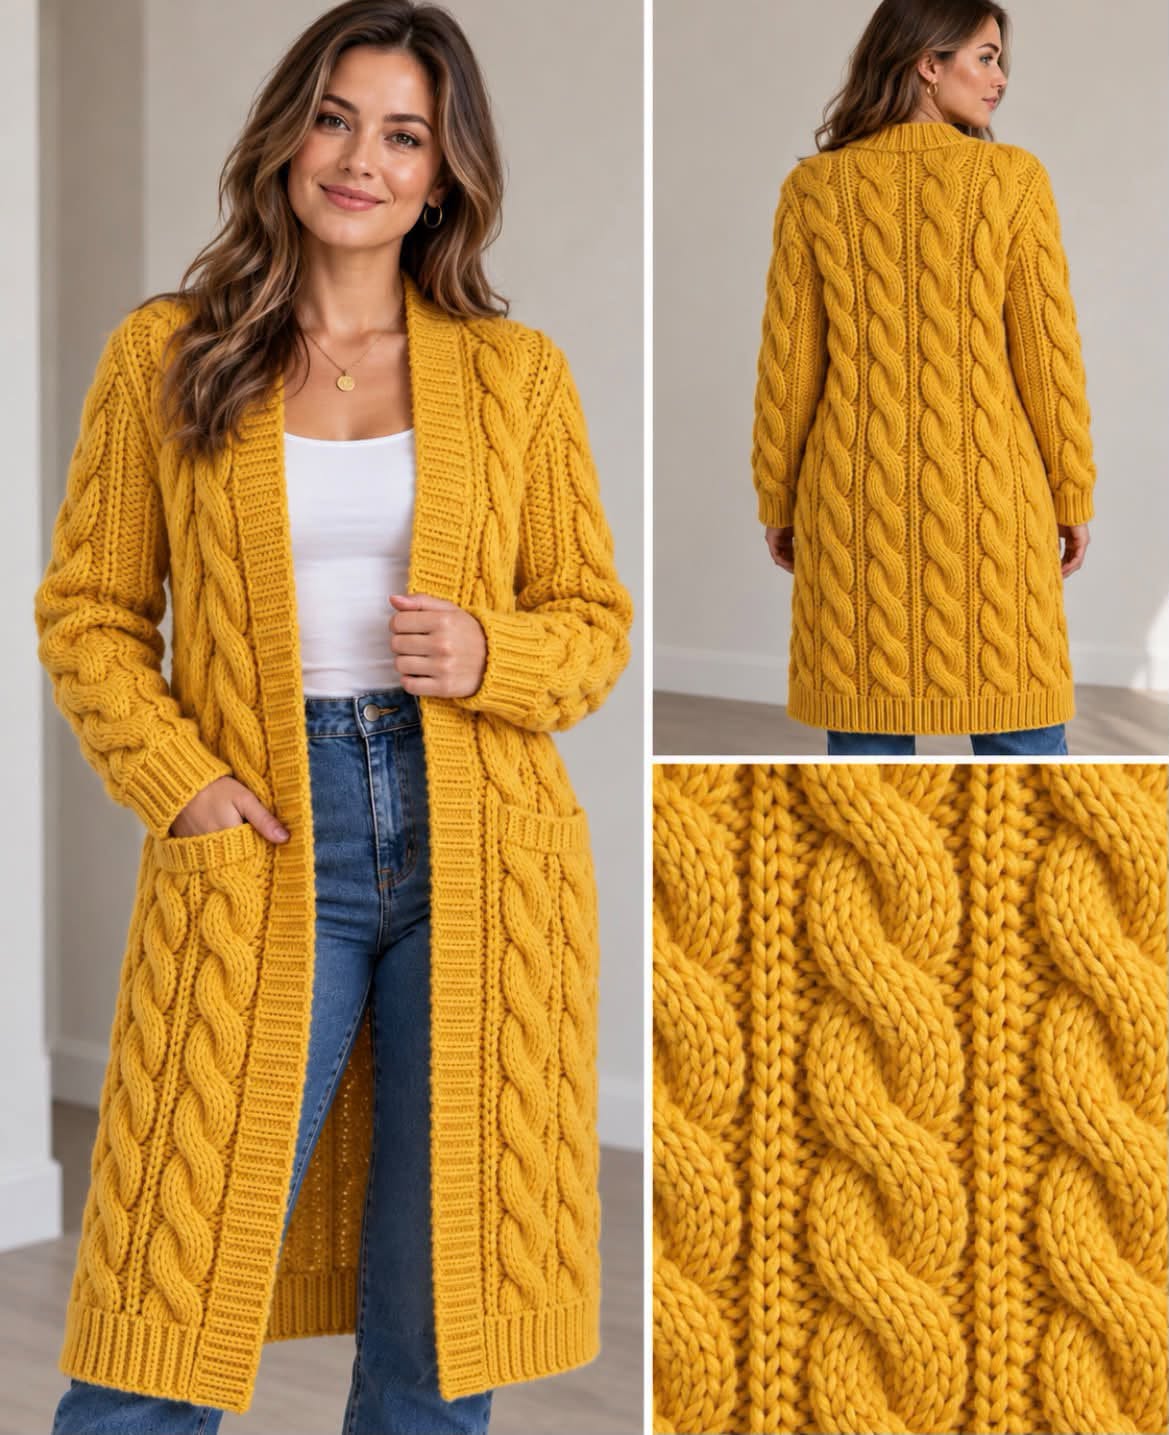
The reference highlights mustard in a mustard cable-inspired long cardigan. The written construction preserves the overall idea while simplifying details that cannot be reliably recovered from a photograph.
Materials, gauge and size
Smooth DK clothing yarn, approximately 700–1,300 g for a dress or long cardigan, 450–800 g for a skirt, 300–500 g for a blouse; 3.5–4 mm hook. Add lining, elastic or buttons where specified. Colors: mustard. These are estimates: weigh a sample, multiply by the planned component count and add 15–20% for assembly and adjustments.
Also use a yarn needle, scissors, stitch markers and a measuring tape. Provisional dc/mesh gauge: 16 positions × 9 rows = 10 cm. Wash a swatch in the actual stitch. Garment instructions give one measured worked example and resizing formulas, not a tested graded size range.
Measured open-front construction
- The reference has knitted cable or knit-like fabric. This is explicitly a crochet adaptation using counted rectangles, not the photographed knitting pattern. Wash a swatch first. Sample gauge is 16 stitches and 9 dc rows per 10 cm. Back: 88 stitches (55 cm); two fronts: 40 each (25 cm). The body totals 105 cm before front bands. Choose a finished chest 8–12 cm larger than your bust, then recalculate panel widths; no commercial size is claimed.
- Back foundation: ch 90; dc in fourth chain and across, counting skipped ch 3 as first dc [88]. Front foundation: ch 42; work the same way [40]. Make two matching fronts and one back. Turning ch 3 counts as one dc; never add an extra stitch in its base.
- Texture Row 2: ch 3 counts as first dc, turn; dc in next 2 stitches, then work front-post dc around the next four old dc posts; dc in all remaining stitches [88 or 40]. Row 3: ch 3, turn; dc in every stitch, including the post-stitch tops [same total]. Repeat Rows 2–3 to Row 72. The four-stitch raised column is a simple cable-inspired rib, not a crossed knitted cable.
- Block the three rectangles before seaming. Sew each front’s outside 32 top stitches to the corresponding outside 32 back stitches. Leave the middle 24 back stitches and each inner eight front stitches unsewn to form the neck. Sew side seams from the lower edge upward, leaving the top 18 cm open on each side for armholes, for an approximately 36 cm opening perimeter. Check this against the sleeve width before sewing.
Tapered sleeves and front bands
- Make two sleeves from cuff to upper arm. Ch 38. Row 1: dc in fourth chain and across [36 including turning chain]. Rows 2–4: dc across [36]. Row 5: 2 dc in first stitch, dc to last, 2 dc in last [38]. Rows 6–8 plain [38].
- Continue increasing two stitches on Rows 9, 13, 17, 21, 25, 29, 33, 37, 41 and 45 [40, 42, 44, 46, 48, 50, 52, 54, 56, 58]; all intervening rows are plain dc. Rows 46–48: dc across [58]. Measure the 58-stitch upper edge against the actual armhole: it must match without stretching. If necessary change width symmetrically or adjust the armhole opening before sewing.
- Sew the sleeve top around the armhole, matching its center to the shoulder seam. Sew the sleeve long edge. Cuff: work 36 sc into the foundation [36], then two more sc rounds. Along both front edges and around the neck, pick up approximately two sc per dc row edge and one per top stitch, adjusting at corners to lie flat. Work five sc band rows. For functional buttons, on Row 3 replace two sc with ch 2 at five evenly spaced positions on one front; Row 4 work two sc in each opening. Sew matching buttons to the opposite front.
- To emphasize vertical texture, surface sl st two parallel lines beside the raised column from hem to shoulder, keeping them loose and leaving the garment dimensions unchanged.
Assembly and finishing
- Check all counts before joining. Weave ends through several stitches in three directions. Sew point joins more than once and distribute tension evenly.
- Wash a sample using the yarn care instructions, block gently and allow it to dry completely. Recheck fit or motif size after washing. These original patterns are photo-inspired and physically untested; they do not reproduce a verified photographed chart.
3. Oatmeal Long Cardigan — Crochet Adaptation
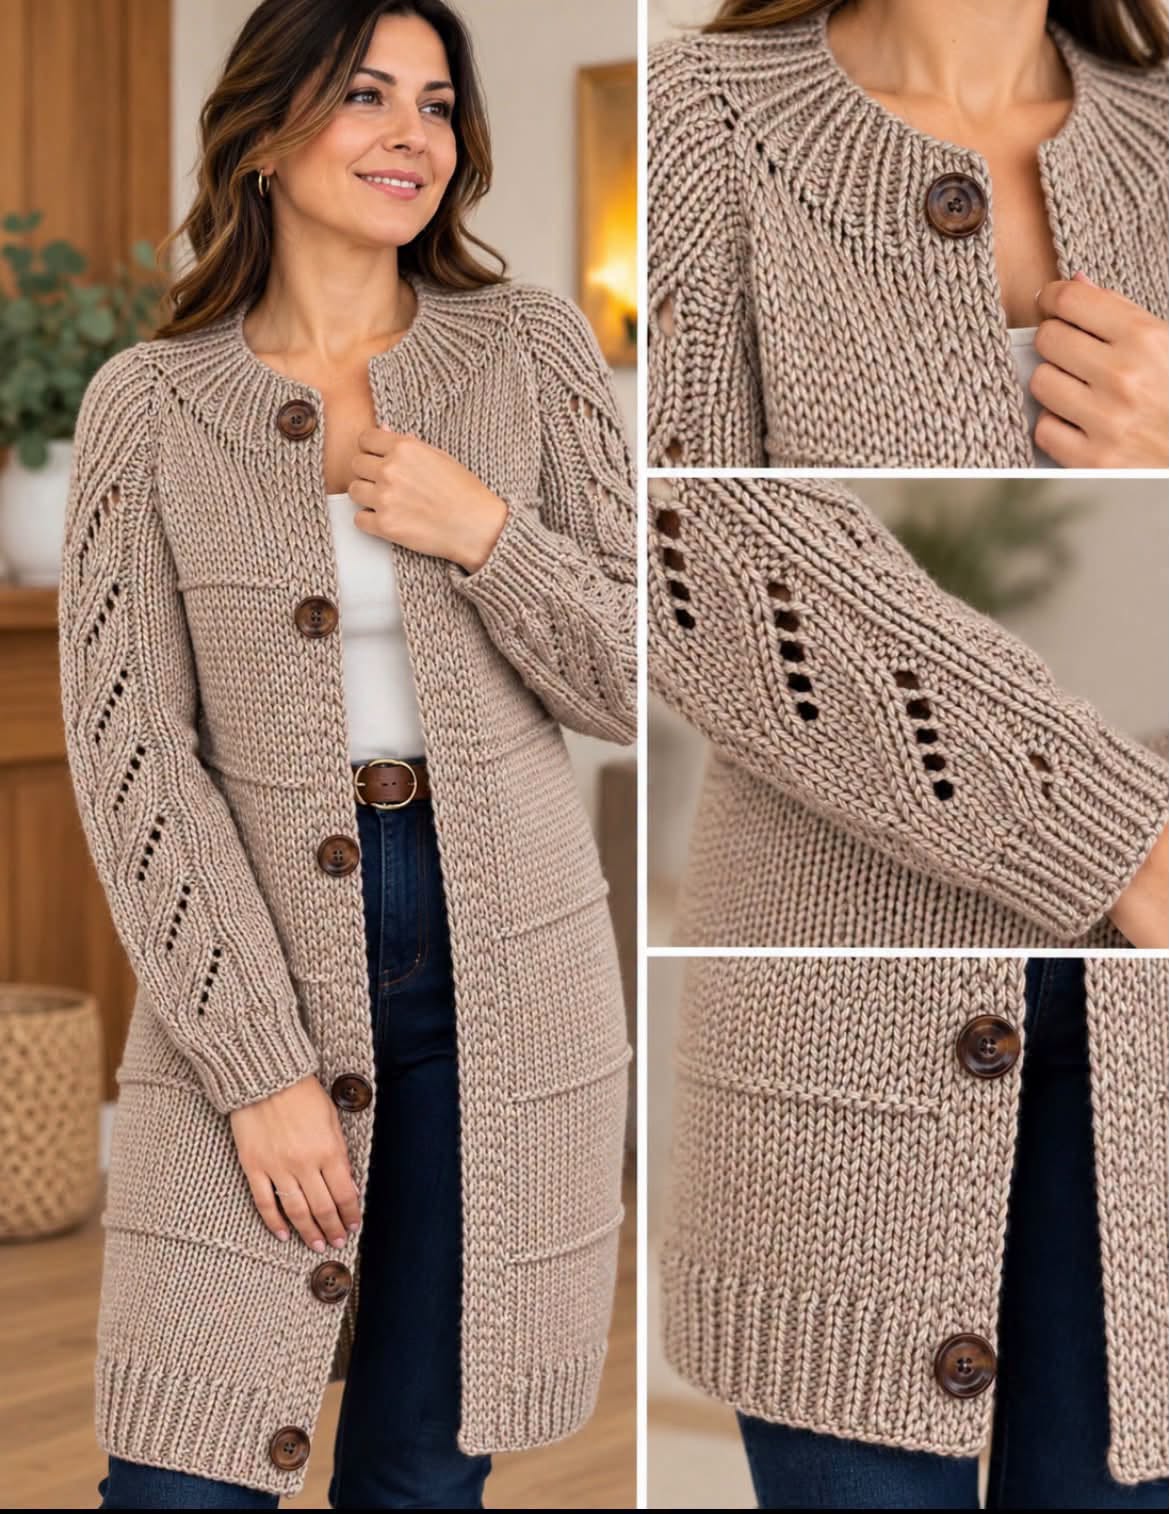
The reference highlights oatmeal in a oatmeal long cardigan — crochet adaptation. The written construction preserves the overall idea while simplifying details that cannot be reliably recovered from a photograph.
Materials, gauge and size
Smooth DK clothing yarn, approximately 700–1,300 g for a dress or long cardigan, 450–800 g for a skirt, 300–500 g for a blouse; 3.5–4 mm hook. Add lining, elastic or buttons where specified. Colors: oatmeal. These are estimates: weigh a sample, multiply by the planned component count and add 15–20% for assembly and adjustments.
Also use a yarn needle, scissors, stitch markers and a measuring tape. Provisional dc/mesh gauge: 16 positions × 9 rows = 10 cm. Wash a swatch in the actual stitch. Garment instructions give one measured worked example and resizing formulas, not a tested graded size range.
Measured open-front construction
- The reference has knitted cable or knit-like fabric. This is explicitly a crochet adaptation using counted rectangles, not the photographed knitting pattern. Wash a swatch first. Sample gauge is 16 stitches and 9 dc rows per 10 cm. Back: 88 stitches (55 cm); two fronts: 40 each (25 cm). The body totals 105 cm before front bands. Choose a finished chest 8–12 cm larger than your bust, then recalculate panel widths; no commercial size is claimed.
- Back foundation: ch 90; dc in fourth chain and across, counting skipped ch 3 as first dc [88]. Front foundation: ch 42; work the same way [40]. Make two matching fronts and one back. Turning ch 3 counts as one dc; never add an extra stitch in its base.
- Texture Row 2: ch 3 counts as first dc, turn; dc across [88 or 40]. Row 3: ch 3, turn; (ch 1, skip 1, dc in next) to last stitch; dc in last [88 or 40 positions]. Row 4: dc in every position [same]. Repeat Rows 3–4 to Row 72.
- Block the three rectangles before seaming. Sew each front’s outside 32 top stitches to the corresponding outside 32 back stitches. Leave the middle 24 back stitches and each inner eight front stitches unsewn to form the neck. Sew side seams from the lower edge upward, leaving the top 18 cm open on each side for armholes, for an approximately 36 cm opening perimeter. Check this against the sleeve width before sewing.
Tapered sleeves and front bands
- Make two sleeves from cuff to upper arm. Ch 38. Row 1: dc in fourth chain and across [36 including turning chain]. Rows 2–4: dc across [36]. Row 5: 2 dc in first stitch, dc to last, 2 dc in last [38]. Rows 6–8 plain [38].
- Continue increasing two stitches on Rows 9, 13, 17, 21, 25, 29, 33, 37, 41 and 45 [40, 42, 44, 46, 48, 50, 52, 54, 56, 58]; all intervening rows are plain dc. Rows 46–48: dc across [58]. Measure the 58-stitch upper edge against the actual armhole: it must match without stretching. If necessary change width symmetrically or adjust the armhole opening before sewing.
- Sew the sleeve top around the armhole, matching its center to the shoulder seam. Sew the sleeve long edge. Cuff: work 36 sc into the foundation [36], then two more sc rounds. Along both front edges and around the neck, pick up approximately two sc per dc row edge and one per top stitch, adjusting at corners to lie flat. Work five sc band rows. For functional buttons, on Row 3 replace two sc with ch 2 at five evenly spaced positions on one front; Row 4 work two sc in each opening. Sew matching buttons to the opposite front.
- Optional patch pockets: ch 26, work 24 dc for 12 rows. Make two, sc around each and sew three edges to the fronts about 12 cm above the hem, leaving the top open.
Assembly and finishing
- Check all counts before joining. Weave ends through several stitches in three directions. Sew point joins more than once and distribute tension evenly.
- Wash a sample using the yarn care instructions, block gently and allow it to dry completely. Recheck fit or motif size after washing. These original patterns are photo-inspired and physically untested; they do not reproduce a verified photographed chart.
4. Golden Floral Lace Duster
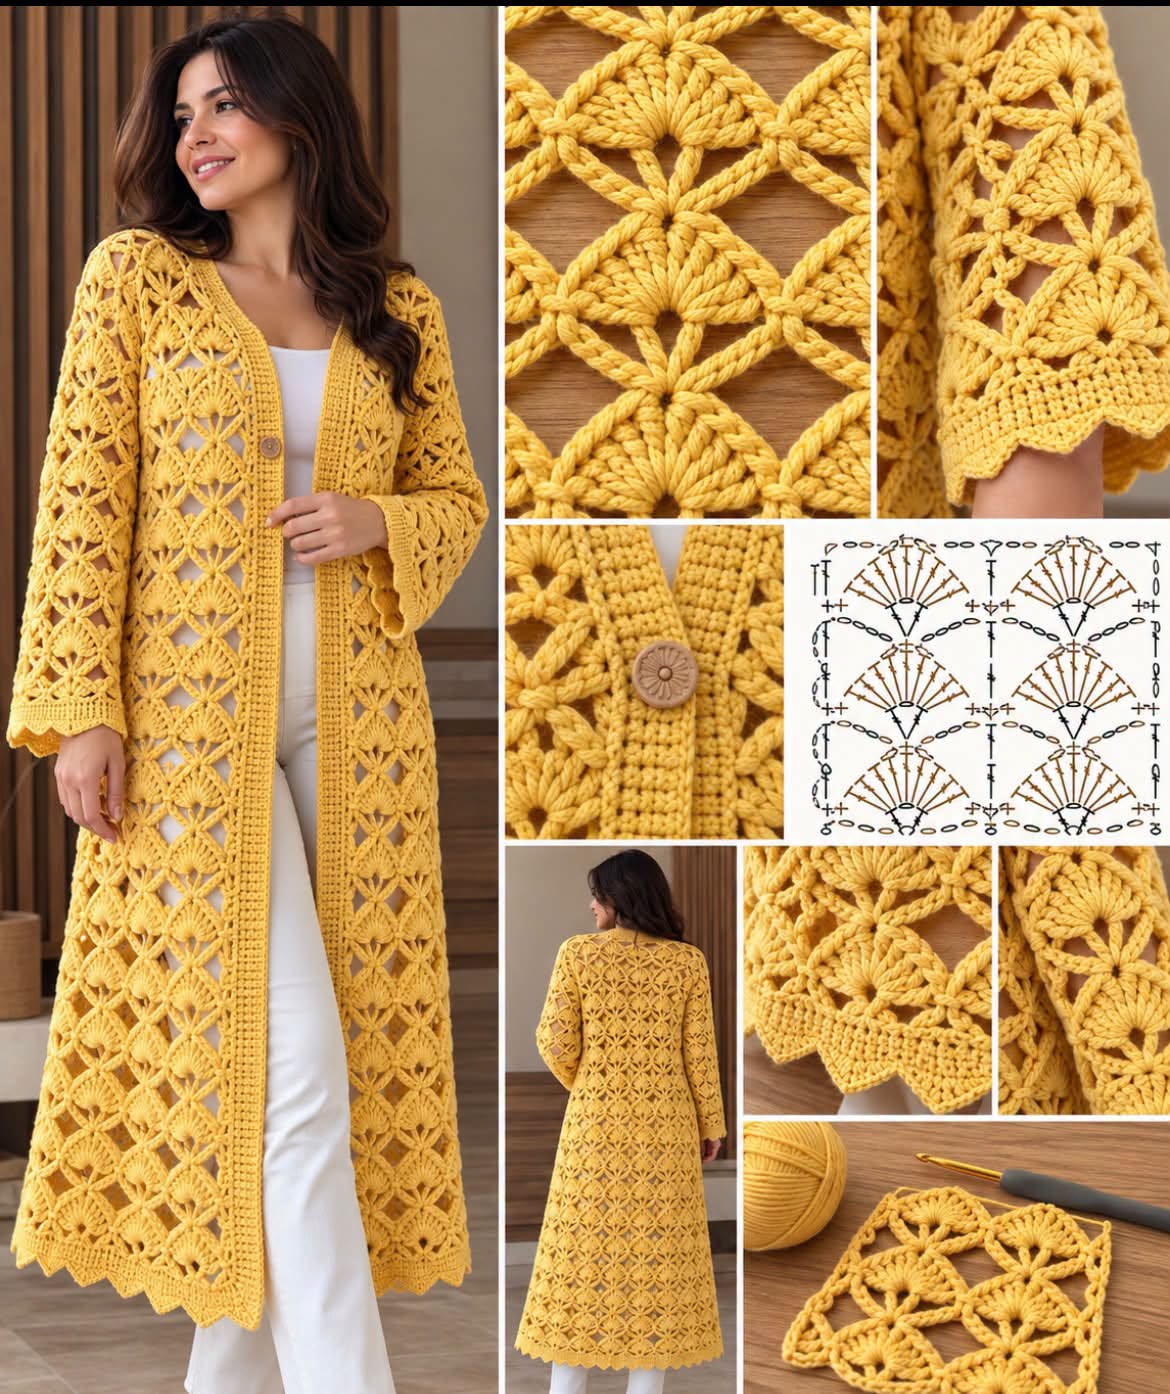
The reference highlights golden yellow in a golden floral lace duster. The written construction preserves the overall idea while simplifying details that cannot be reliably recovered from a photograph.
Materials, gauge and size
Smooth DK clothing yarn, approximately 700–1,300 g for a dress or long cardigan, 450–800 g for a skirt, 300–500 g for a blouse; 3.5–4 mm hook. Add lining, elastic or buttons where specified. Colors: golden yellow. These are estimates: weigh a sample, multiply by the planned component count and add 15–20% for assembly and adjustments.
Also use a yarn needle, scissors, stitch markers and a measuring tape. Provisional dc/mesh gauge: 16 positions × 9 rows = 10 cm. Wash a swatch in the actual stitch. Garment instructions give one measured worked example and resizing formulas, not a tested graded size range.
Measured open-front construction
- Wash a swatch first. Sample gauge is 16 stitches and 9 dc rows per 10 cm. Back: 88 stitches (55 cm); two fronts: 40 each (25 cm). The body totals 105 cm before front bands. Choose a finished chest 8–12 cm larger than your bust, then recalculate panel widths; no commercial size is claimed.
- Back foundation: ch 90; dc in fourth chain and across, counting skipped ch 3 as first dc [88]. Front foundation: ch 42; work the same way [40]. Make two matching fronts and one back. Turning ch 3 counts as one dc; never add an extra stitch in its base.
- Fabric Row 2: ch 3 counts as first dc, turn; (ch 1, skip 1, dc in next) repeatedly to the last stitch, dc in last [88 or 40 positions]. Row 3: dc in every stitch and chain space [88 or 40]. Repeat these two rows to Row 72. This mesh ground supports separate floral appliqués instead of assuming the photographed flower-lace chart.
- Block the three rectangles before seaming. Sew each front’s outside 32 top stitches to the corresponding outside 32 back stitches. Leave the middle 24 back stitches and each inner eight front stitches unsewn to form the neck. Sew side seams from the lower edge upward, leaving the top 18 cm open on each side for armholes, for an approximately 36 cm opening perimeter. Check this against the sleeve width before sewing.
Tapered sleeves and front bands
- Make two sleeves from cuff to upper arm. Ch 38. Row 1: dc in fourth chain and across [36 including turning chain]. Rows 2–4: dc across [36]. Row 5: 2 dc in first stitch, dc to last, 2 dc in last [38]. Rows 6–8 plain [38].
- Continue increasing two stitches on Rows 9, 13, 17, 21, 25, 29, 33, 37, 41 and 45 [40, 42, 44, 46, 48, 50, 52, 54, 56, 58]; all intervening rows are plain dc. Rows 46–48: dc across [58]. Measure the 58-stitch upper edge against the actual armhole: it must match without stretching. If necessary change width symmetrically or adjust the armhole opening before sewing.
- Sew the sleeve top around the armhole, matching its center to the shoulder seam. Sew the sleeve long edge. Cuff: work 36 sc into the foundation [36], then two more sc rounds. Along both front edges and around the neck, pick up approximately two sc per dc row edge and one per top stitch, adjusting at corners to lie flat. Work five sc band rows. For functional buttons, on Row 3 replace two sc with ch 2 at five evenly spaced positions on one front; Row 4 work two sc in each opening. Sew matching buttons to the opposite front.
- Flower trim: make 20 eight-petal flowers using the separate motif below. Sew ten down each front border at equal intervals, attaching at the center and four outer petals. Add six more to each lower sleeve if desired, budgeting yarn for twelve additional flowers.
Open-center flower motif
- Ch 8, join without twisting. Round 1: work 16 sc into the ring, not into individual chains; join [16].
- Round 2: repeat (sc in next stitch, ch 5, skip next stitch) 8 times; join [8 sc and 8 loops].
- Round 3: into each loop work (sc, hdc, 5 dc, hdc, sc), then sl st into the next anchor sc [8 petals, nine stitches per petal plus 8 anchor sl sts]. Fasten off with a long sewing tail.
- Block the open center round. For a band, sew neighboring flowers together at two touching petal tips using at least four small stitches per connection. For a panel, lay out all motifs before sewing so every unit connects to at least two neighbors.
Assembly and finishing
- Check all counts before joining. Weave ends through several stitches in three directions. Sew point joins more than once and distribute tension evenly.
- Wash a sample using the yarn care instructions, block gently and allow it to dry completely. Recheck fit or motif size after washing. These original patterns are photo-inspired and physically untested; they do not reproduce a verified photographed chart.
5. Sage Mesh Blouse with Scalloped Edges
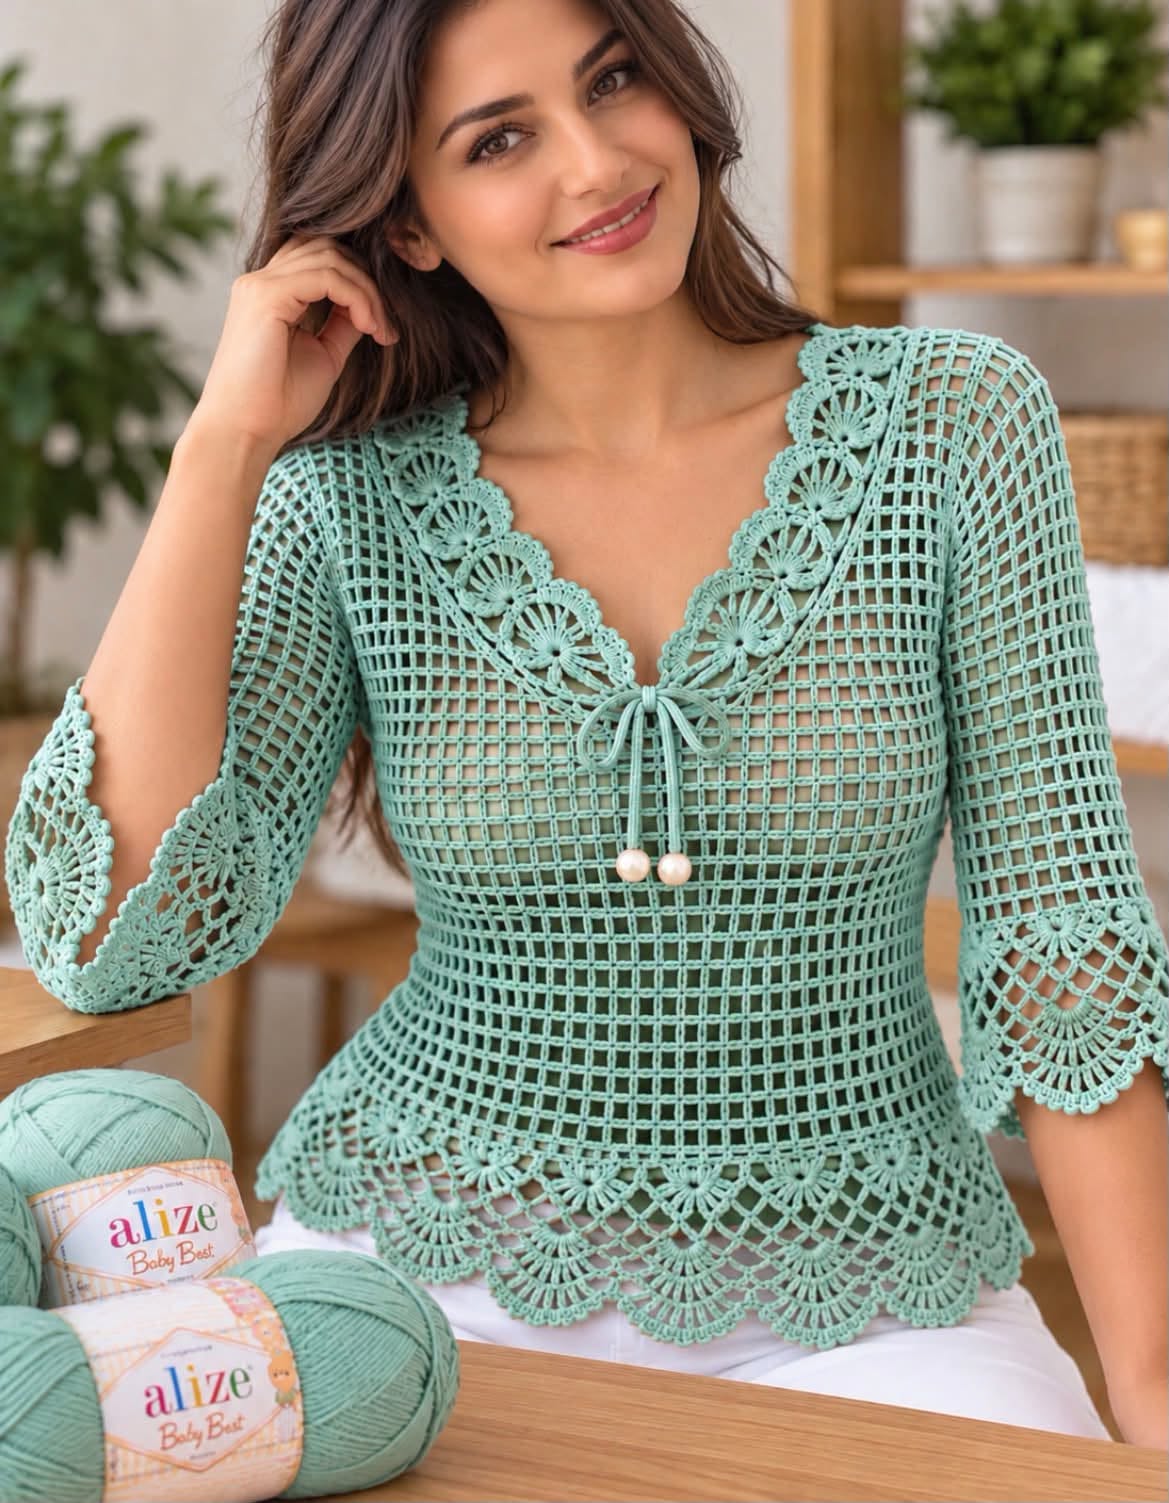
The reference highlights sage in a sage mesh blouse with scalloped edges. The written construction preserves the overall idea while simplifying details that cannot be reliably recovered from a photograph.
Materials, gauge and size
Smooth DK clothing yarn, approximately 700–1,300 g for a dress or long cardigan, 450–800 g for a skirt, 300–500 g for a blouse; 3.5–4 mm hook. Add lining, elastic or buttons where specified. Colors: sage. These are estimates: weigh a sample, multiply by the planned component count and add 15–20% for assembly and adjustments.
Also use a yarn needle, scissors, stitch markers and a measuring tape. Provisional dc/mesh gauge: 16 positions × 9 rows = 10 cm. Wash a swatch in the actual stitch. Garment instructions give one measured worked example and resizing formulas, not a tested graded size range.
Swatch and measured bodice
- This is an untested adult sample, not a graded commercial size. Wash a dc/mesh swatch first. Worked example: 16 positions and 9 rows = 10 cm; two 80-position panels give 100 cm around the body. Use body bust plus 4–8 cm ease, divide by two and multiply by positions per cm; round each panel to a multiple of eight. The example fits only if the washed gauge and intended ease agree.
- For each panel ch 82. Row 1: dc in fourth chain from hook and in each remaining chain; skipped ch 3 counts as first dc [80]. Row 2: ch 3 counts as first dc, turn; (ch 1, skip 1, dc in next) 39 times, dc in last stitch [41 dc and 39 spaces; 80 positions]. Row 3: ch 3 counts as first dc, turn; dc in each remaining stitch and once in each space [80 dc].
- Rows 4–22: alternate Rows 2 and 3, ending with a mesh row [80 positions]. For a longer torso add complete two-row repeats before armhole shaping, measuring from the shoulder down rather than relying on the photo.
- Armhole shaping: on the next row sl st across the first four positions, ch 3 counts as first dc in the next position, dc across the next 71 positions and leave the last four unworked [72 dc]. Mark this as Armhole Row 1. All later armhole rows are solid dc unless specified; ch 3 counts as first dc.
Neck and shoulder shaping
- Front: after Armhole Row 1 divide into two 36-stitch halves. Work each half separately. On Armhole Rows 2–13 decrease once at the neckline on every row using dc2tog, keeping the outside armhole edge straight [35, 34, 33, 32, 31, 30, 29, 28, 27, 26, 25, 24]. Rows 14–16: dc across [24 each shoulder].
- Back: Armhole Rows 2–10 work across all 72 dc. Row 11: work each outside 24 stitches separately, leaving the middle 24 unworked. Rows 12–16: work each shoulder separately [24 each]. Sew matching 24-stitch shoulder seams. Sew side seams from foundation to armhole start, leaving the shaped upper edges open.
- Neck edge: join at a shoulder, sc evenly around, using approximately two sc per dc row edge; sc2tog at sharp inside neckline corners. Join, then work one more sc round. Armhole edges: work one sc round, skipping a stitch at each underarm corner if needed to prevent flaring. Actual edge totals depend on the measured row extensions, so record them rather than assuming a fixed perimeter.
Blouse sleeves and scalloped hem
- For each sleeve ch 58. Row 1: dc in fourth chain and across [56 positions including turning chain]. Row 2: ch 3 counts as first dc; (ch 1, skip 1, dc in next) 27 times; dc in last [56 positions]. Row 3: dc in every position [56]. Repeat Rows 2–3 to 26 rows total. The example sleeve is approximately 35 cm around and 29 cm long.
- Lay the sleeve top against the open armhole before seaming. Its 56-stitch width must match the measured armhole perimeter without stretching; adjust foundation by even numbers if required. Sew sleeve top around the armhole, matching center to shoulder and ends to underarm; sew the sleeve’s long seam.
- Cuff round: sc in each of 56 foundation positions [56]. Next round: (sl st in next, skip 1, 5 dc in next, skip 1) fourteen times [14 scallops]. For the blouse lower edge, pick up 160 sc around both panels and work the same four-position scallop repeat forty times [40 scallops]. Add two neckline ties: ch 51, sl st back along all 50 chains and sew one to each front neckline side.
Assembly and finishing
- Check all counts before joining. Weave ends through several stitches in three directions. Sew point joins more than once and distribute tension evenly.
- Wash a sample using the yarn care instructions, block gently and allow it to dry completely. Recheck fit or motif size after washing. These original patterns are photo-inspired and physically untested; they do not reproduce a verified photographed chart.