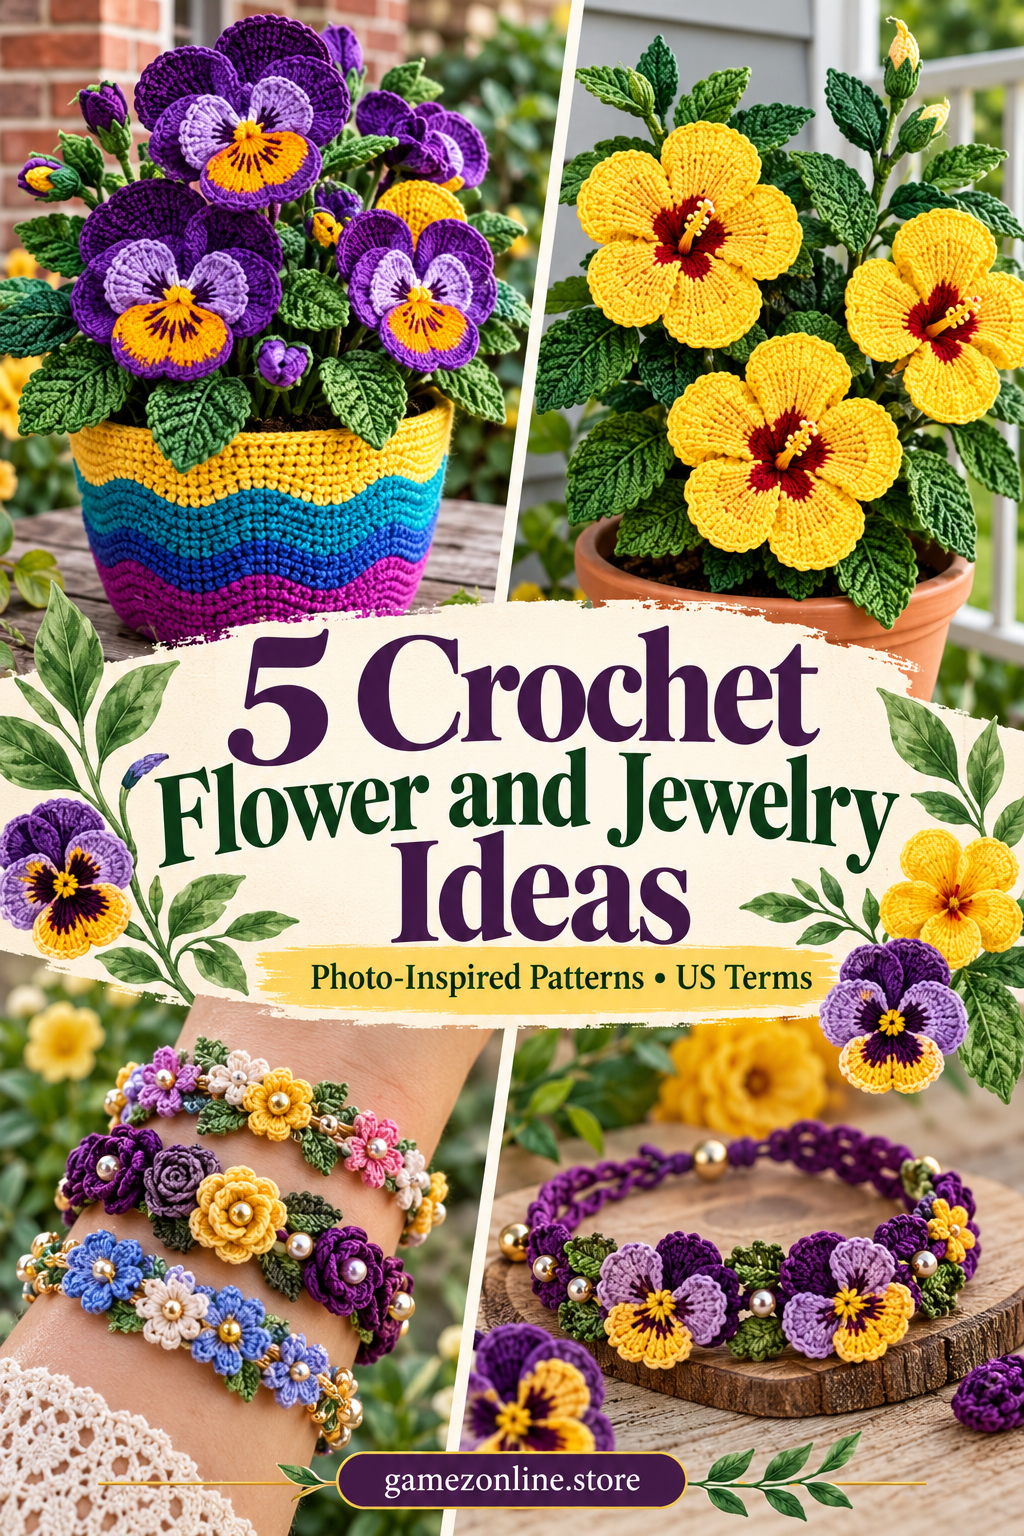
5 Crochet Flower and Jewelry Ideas
Make crochet flower and jewelry ideas inspired by pansies, purple and yellow hibiscus, and floral bracelets, with original US-term written patterns. Each reference below has its own materials, counted construction, assembly and finishing instructions.
US crochet terms and working rules
ch = chain; sl st = slip stitch; sc = single crochet; hdc = half double crochet; dc = double crochet; inc = 2 stitches in one stitch; sc2tog = single crochet two stitches together; st(s) = stitch(es); sp = space; RS = right side. A magic ring is an adjustable yarn loop. Numbers in brackets give end-of-round or end-of-row counts. Repeat instructions between parentheses the stated number of times.
Unless a step explicitly says otherwise, beginning chains do not count as stitches. For dc rounds, ch 2 to reach height, then work the first dc into the first stitch; join to the first real dc. For sc rounds, ch 1 and join to the first sc. For flat sc rows, ch 1 and turn. Flat dc rows explicitly use ch 3 as the first counted dc. Do not work into joining slip stitches. Change color by completing the last yarn-over of the preceding stitch with the new yarn.
To work sc2tog: insert hook into the next stitch and draw up a loop, repeat in the following stitch, yarn over and draw through all three loops. For a surface slip stitch, bring the yarn up from behind the fabric, insert the hook into the next chosen gap and pull the new loop through the loop already on the hook. Keep these stitches loose.
Additional US terms used here: inc = 2 stitches of the stated type in one stitch; dec/sc2tog = single crochet two together; dc2tog = double crochet two together; sc3tog = single crochet three together; tr = treble crochet; BLO = back loop only; front-post dc = work a dc around the post from front to back to front. A ch-3 turning chain counts as one dc unless a step explicitly states otherwise; a ch-1 turn never counts as a stitch.
1. Potted Pansy Flower Arrangement

The reference highlights purple, orange, yellow and green in a potted pansy flower arrangement. The written construction preserves the overall idea while simplifying details that cannot be reliably recovered from a photograph.
Materials, gauge and size
Sport/DK cotton, approximately 100–250 g for three flowers and leaves or 250–400 g for the pansy pot; 2–3 mm hook. Add purchased wrapped floral stems, floral tape, a stable container and fabric-covered floral insert. Colors: purple, orange, yellow and green. These are estimates: weigh a sample, multiply by the planned component count and add 15–20% for assembly and adjustments.
Also use a yarn needle, scissors, stitch markers and a measuring tape. Make one petal and leaf first. Yarn and tension change flower scale. Jewelry requires a measured wrist sample; stated stitch counts are not a guaranteed wrist size.
Five separate pansy petals
- Upper petal, make two per flower: ch 4; Row 1 sc in second chain and across [3]. Rows 2–4: increase once at each end [5, 7, 9]. Rows 5–6: sc across [9]. Rows 7–9: decrease once at each end using sc2tog [7, 5, 3]. Fasten off.
- Side petal, make two: ch 4; Row 1 sc across [3]. Rows 2–3: increase at both ends [5, 7]. Rows 4–5: sc across [7]. Rows 6–7: decrease at both ends [5, 3]. Lower petal, make one: use the upper petal pattern but work Rows 5–8 plain at 9 stitches, then three decreasing rows [7, 5, 3].
- Edge each petal with one sc per row edge or stitch, adding three at a pointed turn if needed. Arrange the two upper purple petals behind the two side purple petals and place the lower yellow/purple petal in front. Sew the narrow bases into a five-petal flower. Embroider dark lines from the throat outward and a small yellow central knot. Make seven flowers: four purple/yellow and three orange/yellow.
Stems, leaves and pot cover
- Make fourteen green leaves using the counted leaf below. Sew two leaves to each wrapped purchased floral stem. Stitch each flower to its stem with a small green calyx: 6 sc in a magic ring, then one round of 6 sc; sew the cup behind the flower and wrap the stem attachment.
- Pot cover: joined sc rounds. Round 1: 6 sc in magic ring [6]. Rounds 2–8: add six evenly spaced increases per round [12, 18, 24, 30, 36, 42, 48]. Round 9: sc BLO around [48]. Rounds 10–13: sc around [48]. Round 14: (7 sc, inc) six times [54]. Rounds 15–18 plain [54]. Round 19: (8 sc, inc) six times [60]. Rounds 20–24 plain [60]. Change stripe colors every four rounds.
- Fit the cover over a small purchased plant pot, with a solid base and fabric-covered floral insert inside. The cover is not self-supporting. If it does not fit, recalculate the base diameter and wall circumference before continuing. Insert seven stems at varied heights and secure them in the insert so the pot remains stable.
- Ch 13. Starting in the second chain work sc, hdc, dc in each of the next 8 chains, hdc, then 3 sc in the last chain. Rotate; work into the unused chain loops: hdc, dc in each of the next 8 chains, hdc, sc. Join to the first sc. [25 stitches]
- Ch 1; sl st loosely into each stitch around. Fasten off with a long tail. Sew only through the underside of the leaf edge to attach, keeping the center flexible.
Assembly and finishing
- Check all counts before joining. Weave ends through several stitches in three directions. Sew point joins more than once and distribute tension evenly.
- Wash a sample using the yarn care instructions, block gently and allow it to dry completely. Recheck fit or motif size after washing. These original patterns are photo-inspired and physically untested; they do not reproduce a verified photographed chart.
2. Purple Hibiscus Plant
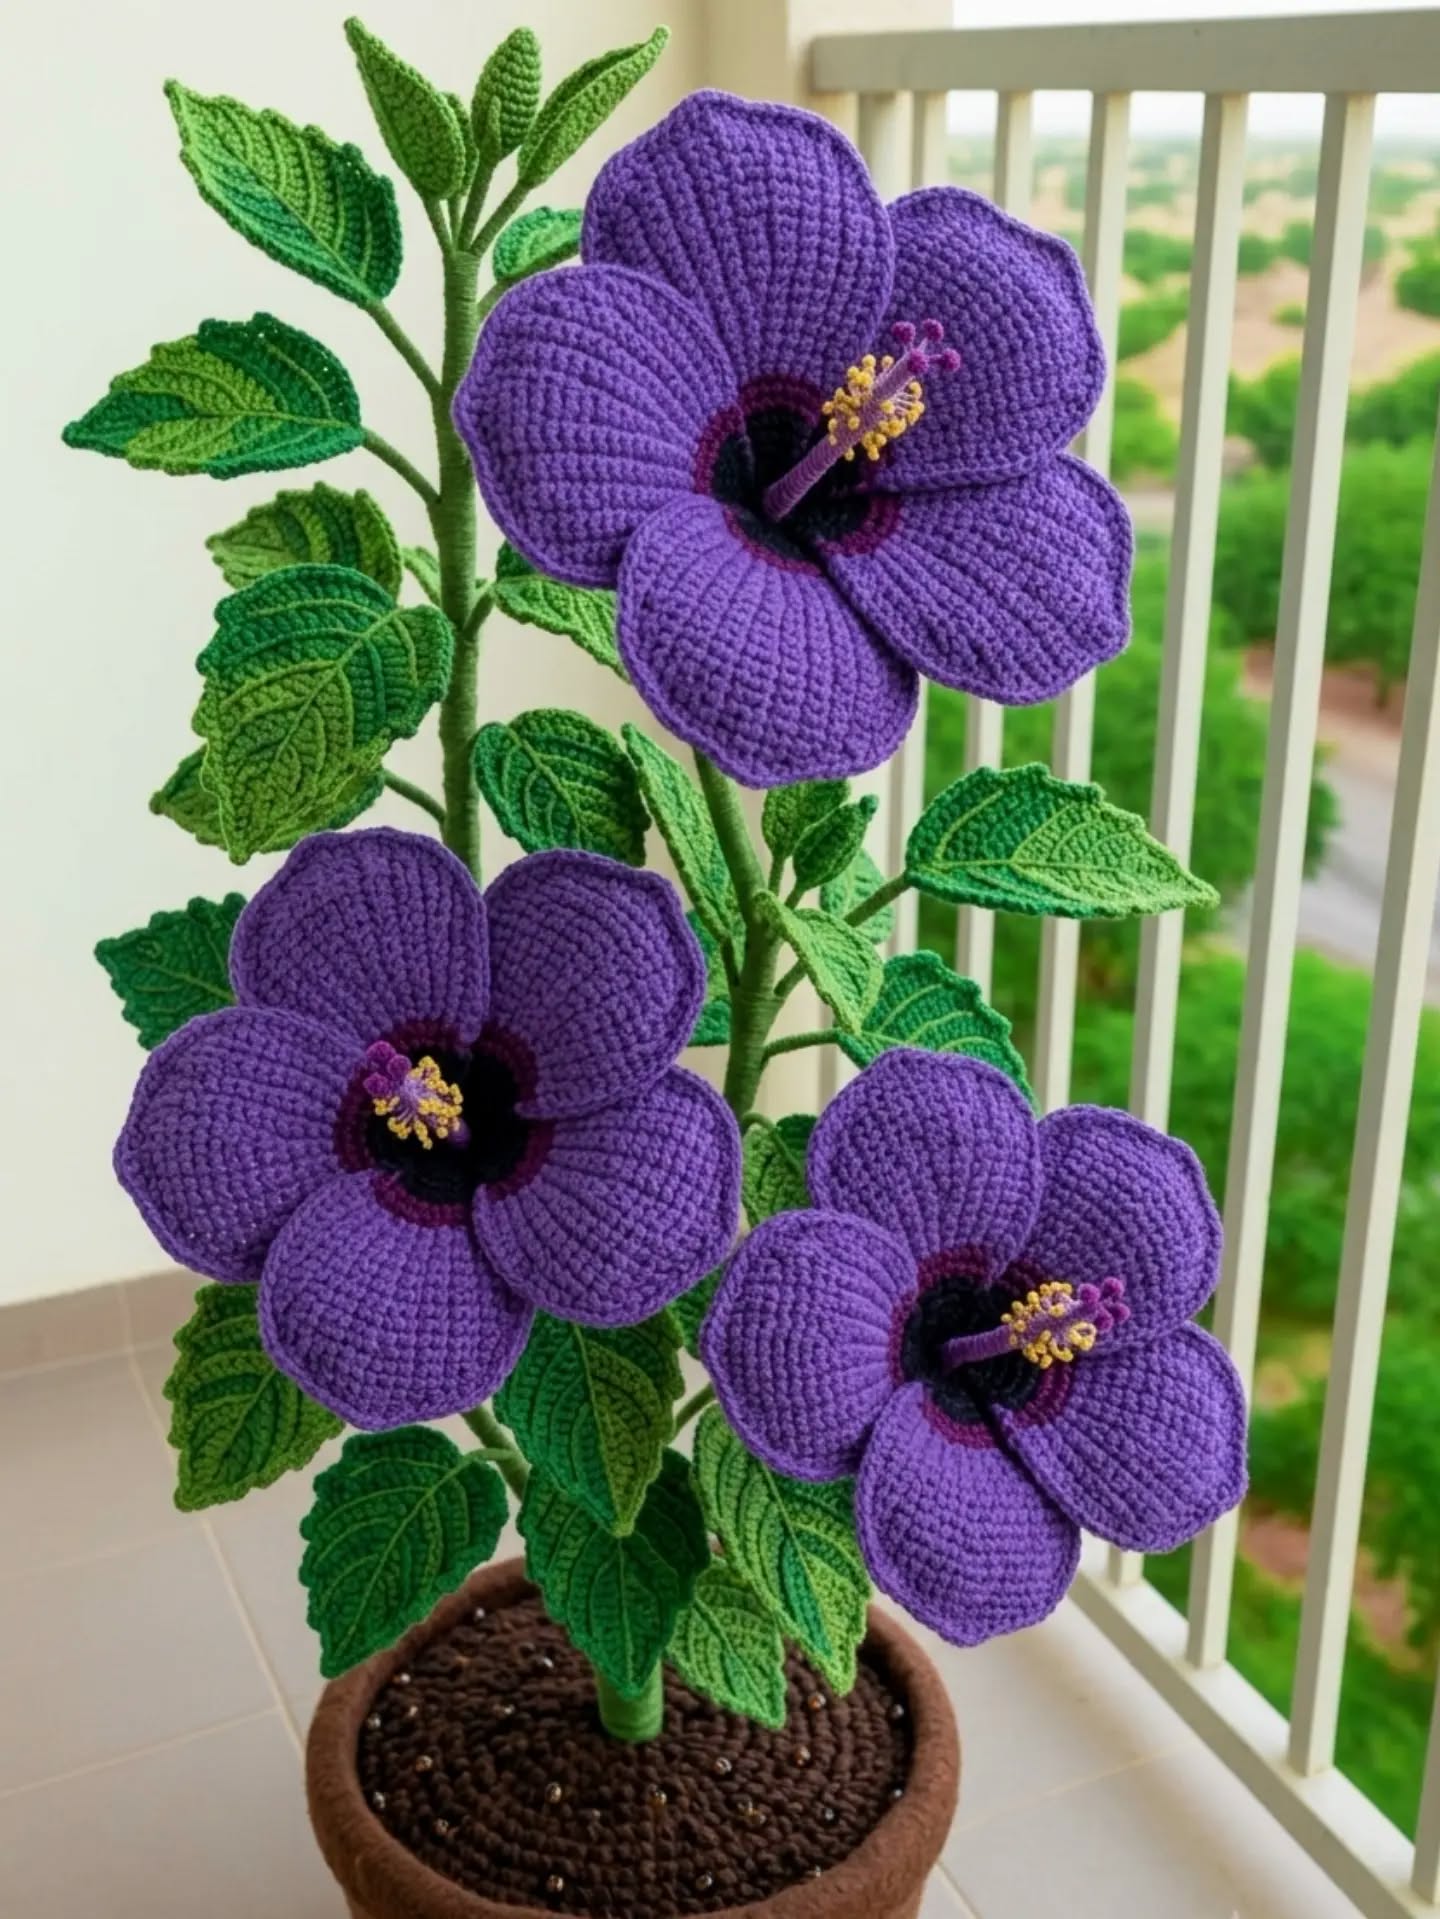
The reference highlights violet and green in a purple hibiscus plant. The written construction preserves the overall idea while simplifying details that cannot be reliably recovered from a photograph.
Materials, gauge and size
Sport/DK cotton, approximately 100–250 g for three flowers and leaves or 250–400 g for the pansy pot; 2–3 mm hook. Add purchased wrapped floral stems, floral tape, a stable container and fabric-covered floral insert. Colors: violet and green. These are estimates: weigh a sample, multiply by the planned component count and add 15–20% for assembly and adjustments.
Also use a yarn needle, scissors, stitch markers and a measuring tape. Make one petal and leaf first. Yarn and tension change flower scale. Jewelry requires a measured wrist sample; stated stitch counts are not a guaranteed wrist size.
Five broad petals — make five per flower
- Ch 4. Row 1: sc in second chain and across [3]. Row 2: ch 1, turn; inc in first, sc in next, inc in last [5]. Row 3: inc, 3 sc, inc [7]. Row 4: inc, 5 sc, inc [9]. Row 5: inc, 7 sc, inc [11]. Row 6: inc, 9 sc, inc [13]. Rows 7–10: sc across [13].
- Row 11: sc2tog, 9 sc, sc2tog [11]. Row 12: sc2tog, 7 sc, sc2tog [9]. Row 13: sc2tog, 5 sc, sc2tog [7]. Row 14: sc2tog, 3 sc, sc2tog [5]. Row 15: sc2tog, sc, sc2tog [3]. Fasten off. Edge each petal with sc, one per stitch across curved ends and one per row edge; use three sc at a sharp tip if needed, recording the actual outline count.
- Layer the five narrow bases in a shallow fan around a central opening, overlapping each by about 5 mm. Sew the overlaps and gather the bases lightly; the wide upper portions form the petals. Make three complete flowers for the plant arrangement.
Stamen, calyx, leaves and stems
- Stamen: ch 13, sl st in second chain and next 11 chains [12]. At the tip embroider six small contrasting French knots, then stitch the cord through the flower center so about 3 cm projects. Use embroidery thread for the dark throat lines; do not use loose beads.
- Green calyx: Round 1: 5 sc in magic ring [5]. Round 2: inc in every stitch [10]. Round 3: (sc, ch 4, sl st back along the three chains, sc in next stitch) five times [5 pointed sepals; 10 base sc]. Sew the calyx behind the gathered petal bases. Make nine leaves using the separate counted leaf below and attach three to each stem.
- Use three purchased wrapped floral stems of different heights. Sew each calyx securely around its stem top, then wrap the join and leaf bases with floral tape. Wrap all exposed ends. Insert into a stable purchased pot with a fabric-covered floral insert. The pot and support insert are styling supplies, not omitted crochet components. Arrange one flower higher and two lower; adjust height to the actual container.
- Ch 13. Starting in the second chain work sc, hdc, dc in each of the next 8 chains, hdc, then 3 sc in the last chain. Rotate; work into the unused chain loops: hdc, dc in each of the next 8 chains, hdc, sc. Join to the first sc. [25 stitches]
- Ch 1; sl st loosely into each stitch around. Fasten off with a long tail. Sew only through the underside of the leaf edge to attach, keeping the center flexible.
Assembly and finishing
- Check all counts before joining. Weave ends through several stitches in three directions. Sew point joins more than once and distribute tension evenly.
- Wash a sample using the yarn care instructions, block gently and allow it to dry completely. Recheck fit or motif size after washing. These original patterns are photo-inspired and physically untested; they do not reproduce a verified photographed chart.
3. Yellow Hibiscus Pot
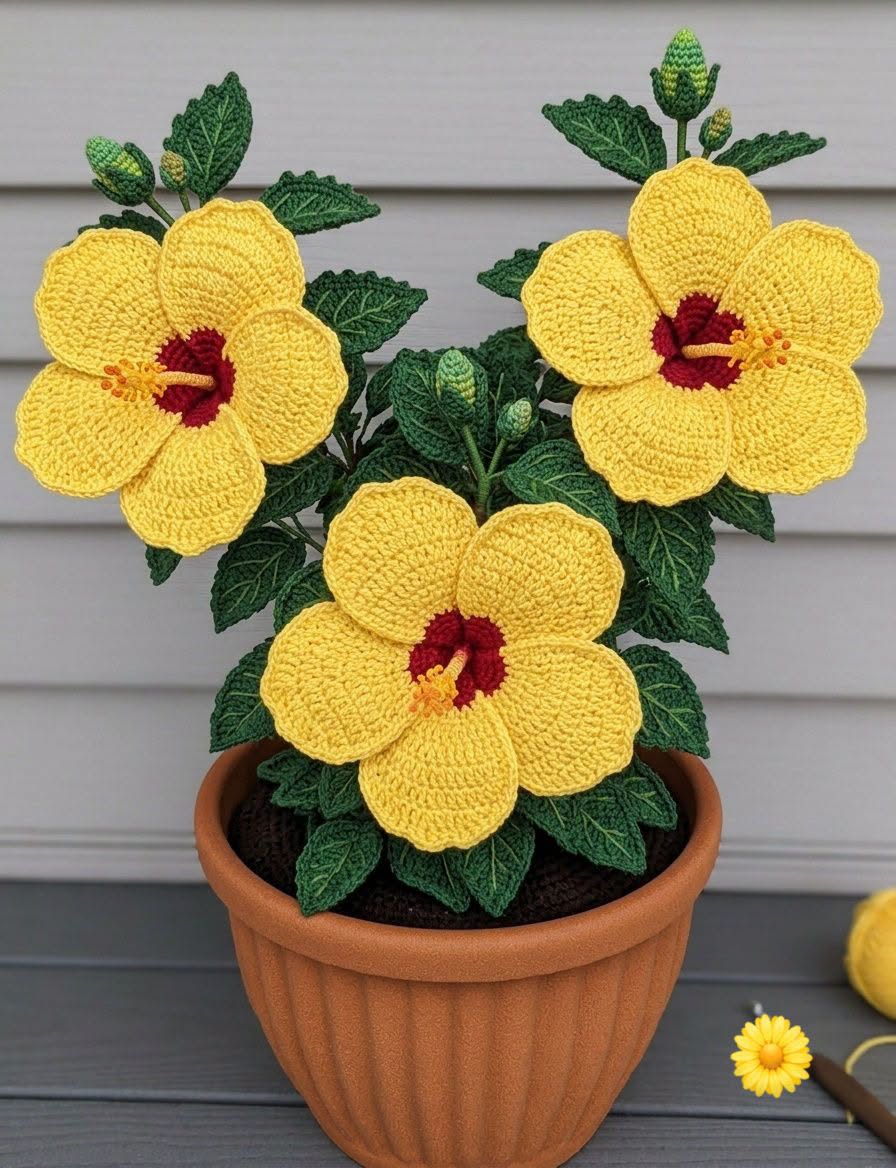
The reference highlights yellow, burgundy and green in a yellow hibiscus pot. The written construction preserves the overall idea while simplifying details that cannot be reliably recovered from a photograph.
Materials, gauge and size
Sport/DK cotton, approximately 100–250 g for three flowers and leaves or 250–400 g for the pansy pot; 2–3 mm hook. Add purchased wrapped floral stems, floral tape, a stable container and fabric-covered floral insert. Colors: yellow, burgundy and green. These are estimates: weigh a sample, multiply by the planned component count and add 15–20% for assembly and adjustments.
Also use a yarn needle, scissors, stitch markers and a measuring tape. Make one petal and leaf first. Yarn and tension change flower scale. Jewelry requires a measured wrist sample; stated stitch counts are not a guaranteed wrist size.
Five broad petals — make five per flower
- Ch 4. Row 1: sc in second chain and across [3]. Row 2: ch 1, turn; inc in first, sc in next, inc in last [5]. Row 3: inc, 3 sc, inc [7]. Row 4: inc, 5 sc, inc [9]. Row 5: inc, 7 sc, inc [11]. Row 6: inc, 9 sc, inc [13]. Rows 7–10: sc across [13].
- Row 11: sc2tog, 9 sc, sc2tog [11]. Row 12: sc2tog, 7 sc, sc2tog [9]. Row 13: sc2tog, 5 sc, sc2tog [7]. Row 14: sc2tog, 3 sc, sc2tog [5]. Row 15: sc2tog, sc, sc2tog [3]. Fasten off. Edge each petal with sc, one per stitch across curved ends and one per row edge; use three sc at a sharp tip if needed, recording the actual outline count.
- Layer the five narrow bases in a shallow fan around a central opening, overlapping each by about 5 mm. Sew the overlaps and gather the bases lightly; the wide upper portions form the petals. Make three complete flowers for the plant arrangement.
Stamen, calyx, leaves and stems
- Stamen: ch 13, sl st in second chain and next 11 chains [12]. At the tip embroider six small contrasting French knots, then stitch the cord through the flower center so about 3 cm projects. Use embroidery thread for the dark throat lines; do not use loose beads.
- Green calyx: Round 1: 5 sc in magic ring [5]. Round 2: inc in every stitch [10]. Round 3: (sc, ch 4, sl st back along the three chains, sc in next stitch) five times [5 pointed sepals; 10 base sc]. Sew the calyx behind the gathered petal bases. Make nine leaves using the separate counted leaf below and attach three to each stem.
- Use three purchased wrapped floral stems of different heights. Sew each calyx securely around its stem top, then wrap the join and leaf bases with floral tape. Wrap all exposed ends. Insert into a stable purchased pot with a fabric-covered floral insert. The pot and support insert are styling supplies, not omitted crochet components. Arrange one flower higher and two lower; adjust height to the actual container.
- Ch 13. Starting in the second chain work sc, hdc, dc in each of the next 8 chains, hdc, then 3 sc in the last chain. Rotate; work into the unused chain loops: hdc, dc in each of the next 8 chains, hdc, sc. Join to the first sc. [25 stitches]
- Ch 1; sl st loosely into each stitch around. Fasten off with a long tail. Sew only through the underside of the leaf edge to attach, keeping the center flexible.
Assembly and finishing
- Check all counts before joining. Weave ends through several stitches in three directions. Sew point joins more than once and distribute tension evenly.
- Wash a sample using the yarn care instructions, block gently and allow it to dry completely. Recheck fit or motif size after washing. These original patterns are photo-inspired and physically untested; they do not reproduce a verified photographed chart.
4. Burgundy Hibiscus Stems
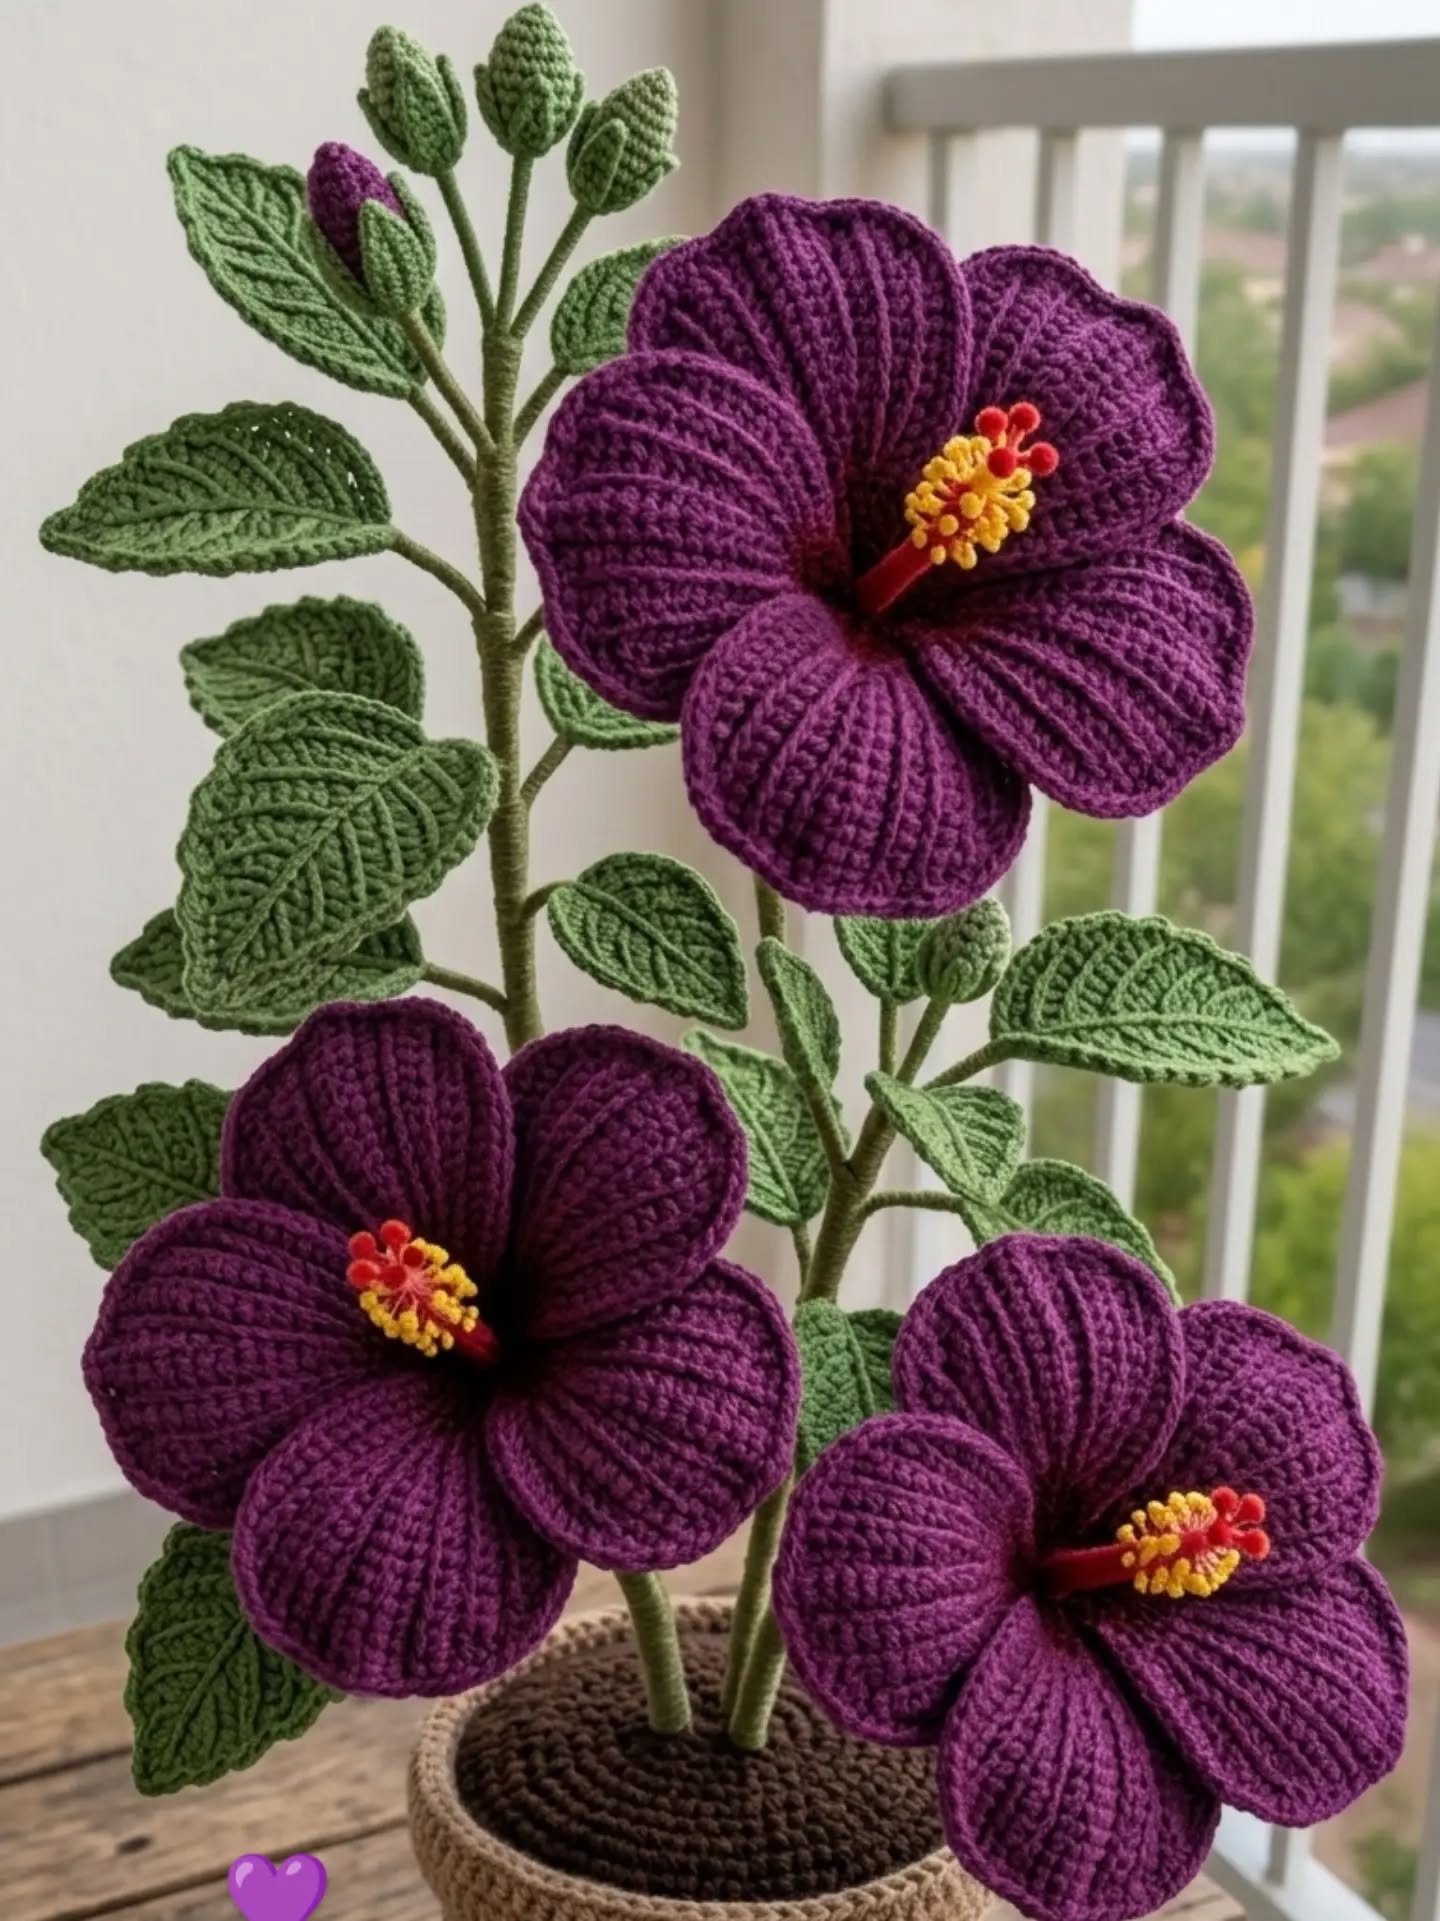
The reference highlights burgundy, gold and green in a burgundy hibiscus stems. The written construction preserves the overall idea while simplifying details that cannot be reliably recovered from a photograph.
Materials, gauge and size
Sport/DK cotton, approximately 100–250 g for three flowers and leaves or 250–400 g for the pansy pot; 2–3 mm hook. Add purchased wrapped floral stems, floral tape, a stable container and fabric-covered floral insert. Colors: burgundy, gold and green. These are estimates: weigh a sample, multiply by the planned component count and add 15–20% for assembly and adjustments.
Also use a yarn needle, scissors, stitch markers and a measuring tape. Make one petal and leaf first. Yarn and tension change flower scale. Jewelry requires a measured wrist sample; stated stitch counts are not a guaranteed wrist size.
Five broad petals — make five per flower
- Ch 4. Row 1: sc in second chain and across [3]. Row 2: ch 1, turn; inc in first, sc in next, inc in last [5]. Row 3: inc, 3 sc, inc [7]. Row 4: inc, 5 sc, inc [9]. Row 5: inc, 7 sc, inc [11]. Row 6: inc, 9 sc, inc [13]. Rows 7–10: sc across [13].
- Row 11: sc2tog, 9 sc, sc2tog [11]. Row 12: sc2tog, 7 sc, sc2tog [9]. Row 13: sc2tog, 5 sc, sc2tog [7]. Row 14: sc2tog, 3 sc, sc2tog [5]. Row 15: sc2tog, sc, sc2tog [3]. Fasten off. Edge each petal with sc, one per stitch across curved ends and one per row edge; use three sc at a sharp tip if needed, recording the actual outline count.
- Layer the five narrow bases in a shallow fan around a central opening, overlapping each by about 5 mm. Sew the overlaps and gather the bases lightly; the wide upper portions form the petals. Make three complete flowers for the plant arrangement.
Stamen, calyx, leaves and stems
- Stamen: ch 13, sl st in second chain and next 11 chains [12]. At the tip embroider six small contrasting French knots, then stitch the cord through the flower center so about 3 cm projects. Use embroidery thread for the dark throat lines; do not use loose beads.
- Green calyx: Round 1: 5 sc in magic ring [5]. Round 2: inc in every stitch [10]. Round 3: (sc, ch 4, sl st back along the three chains, sc in next stitch) five times [5 pointed sepals; 10 base sc]. Sew the calyx behind the gathered petal bases. Make nine leaves using the separate counted leaf below and attach three to each stem.
- Use three purchased wrapped floral stems of different heights. Sew each calyx securely around its stem top, then wrap the join and leaf bases with floral tape. Wrap all exposed ends. Insert into a stable purchased pot with a fabric-covered floral insert. The pot and support insert are styling supplies, not omitted crochet components. Arrange one flower higher and two lower; adjust height to the actual container.
- Ch 13. Starting in the second chain work sc, hdc, dc in each of the next 8 chains, hdc, then 3 sc in the last chain. Rotate; work into the unused chain loops: hdc, dc in each of the next 8 chains, hdc, sc. Join to the first sc. [25 stitches]
- Ch 1; sl st loosely into each stitch around. Fasten off with a long tail. Sew only through the underside of the leaf edge to attach, keeping the center flexible.
Assembly and finishing
- Check all counts before joining. Weave ends through several stitches in three directions. Sew point joins more than once and distribute tension evenly.
- Wash a sample using the yarn care instructions, block gently and allow it to dry completely. Recheck fit or motif size after washing. These original patterns are photo-inspired and physically untested; they do not reproduce a verified photographed chart.
5. Botanical Crochet Bracelet Collection
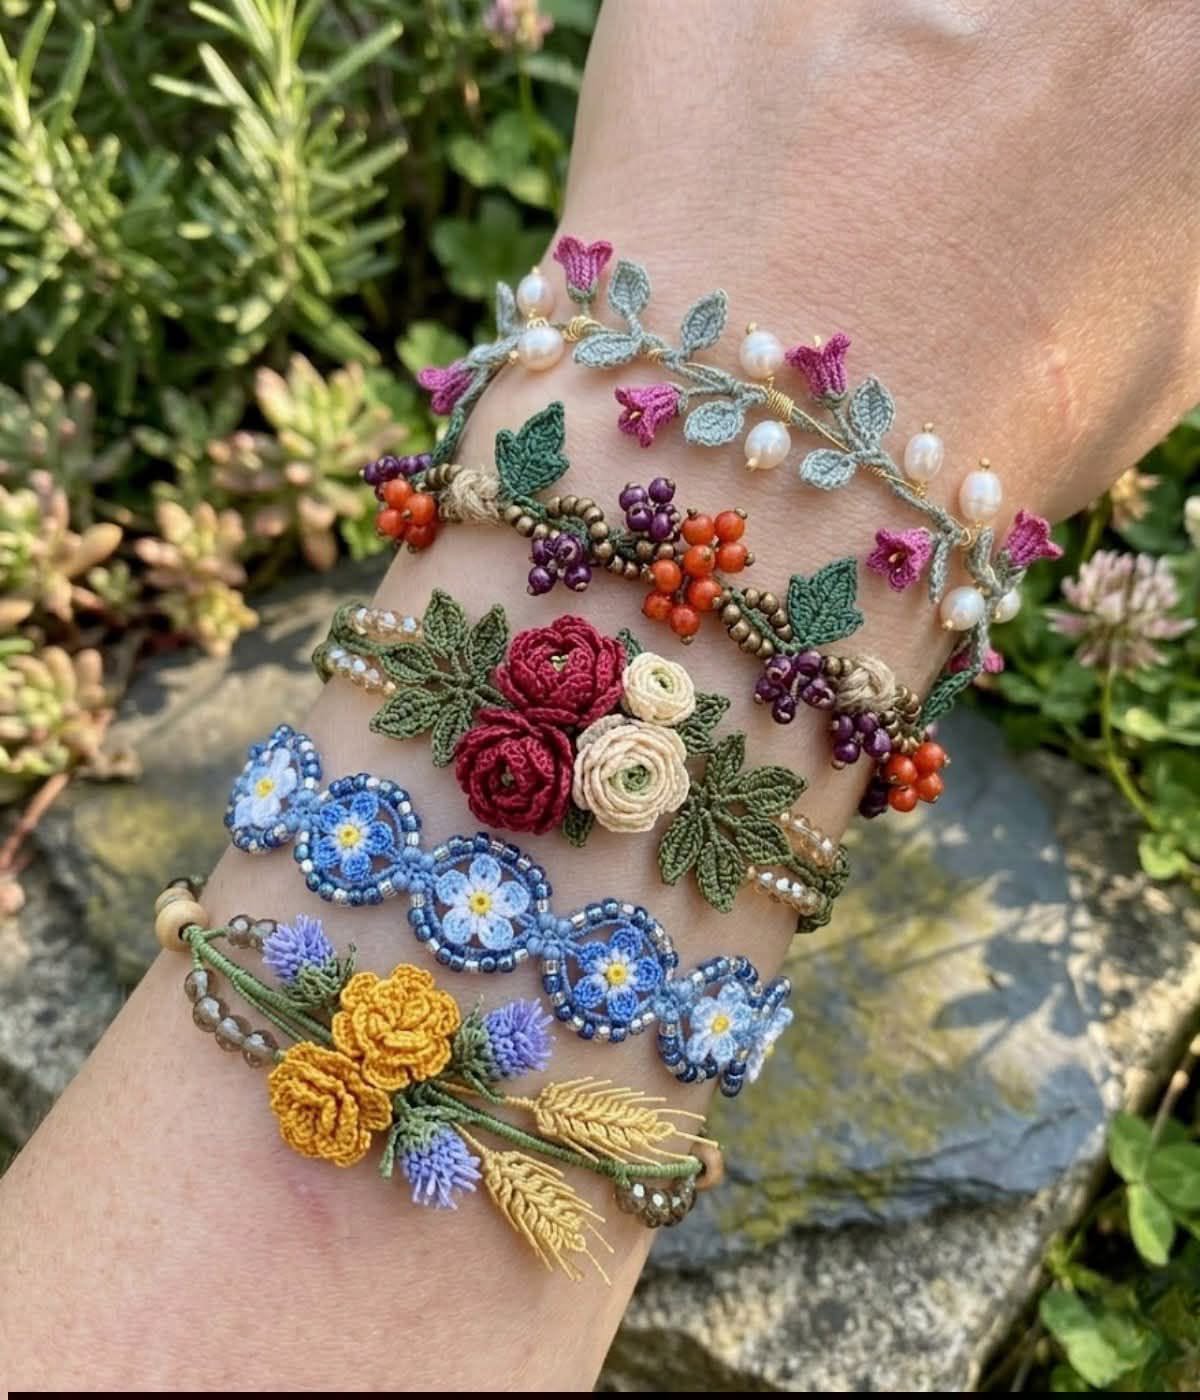
The reference highlights pink, red, blue, cream, purple, gold and green in a botanical crochet bracelet collection. The written construction preserves the overall idea while simplifying details that cannot be reliably recovered from a photograph.
Materials, gauge and size
Fine cotton, approximately 10–25 g per bracelet; 1.5–2 mm hook, sewing thread and small buttons. Colors: pink, red, blue, cream, purple, gold and green. These are estimates: weigh a sample, multiply by the planned component count and add 15–20% for assembly and adjustments.
Also use a yarn needle, scissors, stitch markers and a measuring tape. Make one petal and leaf first. Yarn and tension change flower scale. Jewelry requires a measured wrist sample; stated stitch counts are not a guaranteed wrist size.
Adjustable crocheted bracelet base
- Use fine cotton and a 1.5–2 mm hook. Make a washed sample: expected sc gauge may be 28–32 stitches per 10 cm, but measure it. Example ch 49; Row 1 sc in second chain and across [48]. Rows 2–3: sc across [48]. At 30 sc per 10 cm this makes a 16 cm band. Adjust starting stitches to wrist circumference minus about 1 cm, allowing the closure to add the remainder.
- At one short end ch 6, sl st into the opposite corner of that end to create a loop. Work six sc around the chain loop and fasten off. Sew a suitably sized button to the other end, checking the loop before making all bracelets. Decorate the band before closing it around the wrist.
- With the center color work 10 sc into a magic ring; join [10]. With the petal color repeat (sl st in next sc, 5 dc in next sc) five times. [Five petals] Fasten off with a sewing tail; weave or sew both ends securely.
Raised rose appliqué
- Ch 21. Row 1: Sc in second chain and across. [20 sc]
- Row 2: Ch 1, turn; repeat (sl st in next stitch, 5 dc in next stitch) ten times. [Ten petals; 10 sl sts and 50 dc] Fasten off with a 40 cm tail.
- Roll the petal strip from one end, keeping the sc foundation along the bottom. Stitch through the base several times, then spread the outer petals gently. Sew the rose to the motif through the base, then tack each outer petal so it cannot catch on loose threads.
- Ch 13. Starting in the second chain work sc, hdc, dc in each of the next 8 chains, hdc, then 3 sc in the last chain. Rotate; work into the unused chain loops: hdc, dc in each of the next 8 chains, hdc, sc. Join to the first sc. [25 stitches]
- Ch 1; sl st loosely into each stitch around. Fasten off with a long tail. Sew only through the underside of the leaf edge to attach, keeping the center flexible.
Five botanical versions
- Blue daisy band: make five mini five-petal flowers with pale centers and blue petals. Sew them at evenly spaced positions along one band. Rose band: make three rolled roses, one red, one pink, one cream, and four leaves. Sew the roses as a central cluster and place two leaves on each side.
- Lavender band: make three short sprigs. For each ch 16; sl st in second chain, then repeat (ch 3, sl st in first of these three chains, sl st in next main-chain stitch) fourteen times. Roll nothing; keep each sprig straight, sew its full length to the base and add two small leaves.
- Mixed bud band: make five tiny buds, each 6 sc in a magic ring, one plain 6-sc round, then three sc2tog [3]; close without stuffing. Sew buds along the band and add four leaves. Golden flower band: make three gold mini flowers and two lavender sprigs, arranging them alternately. For smaller jewelry leaves, ch 7; sc, hdc, 2 dc, hdc, 3 sc in last chain, then hdc, 2 dc, hdc, sc up the other side [13 stitches].
- Sew every embellishment at its center and at least two outer points so it cannot flip. Reinforce the button and weave fine thread ends through the band. These five constructions interpret the photographed jewelry; individual petal shapes and jewelry findings differ.
Assembly and finishing
- Check all counts before joining. Weave ends through several stitches in three directions. Sew point joins more than once and distribute tension evenly.
- Wash a sample using the yarn care instructions, block gently and allow it to dry completely. Recheck fit or motif size after washing. These original patterns are photo-inspired and physically untested; they do not reproduce a verified photographed chart.