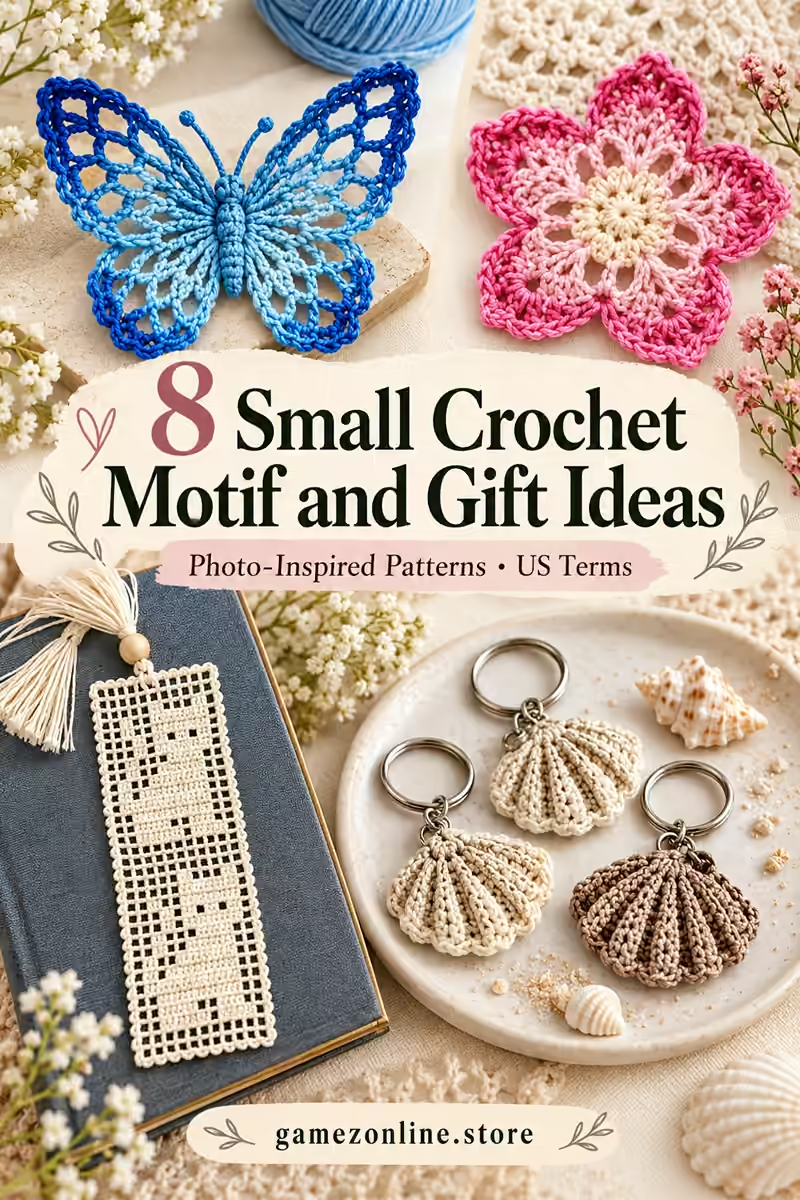
8 Small Crochet Motif and Gift Ideas
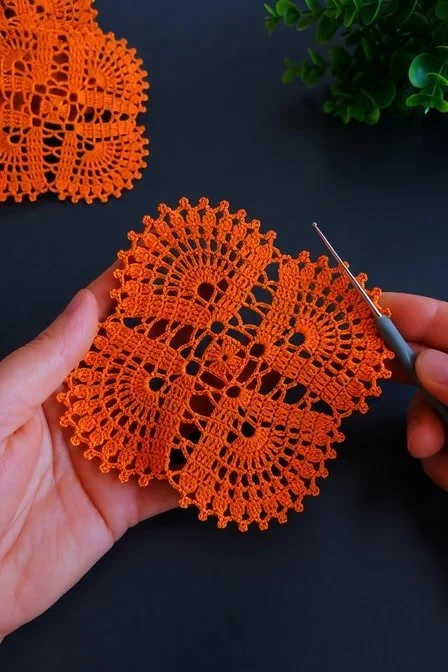
Make eight small crochet motif and gift ideas inspired by butterflies, a cat bookmark, shell keyrings, flowers, fishbones and a maple leaf. Each image below has its own original written construction, materials, stitch counts, assembly and finishing notes.
US crochet terms and working rules
ch = chain; sl st = slip stitch; sc = single crochet; hdc = half double crochet; dc = double crochet; inc = 2 stitches in one stitch; sc2tog = single crochet two stitches together; st(s) = stitch(es); sp = space; RS = right side. A magic ring is an adjustable yarn loop. Numbers in brackets give end-of-round or end-of-row counts. Repeat instructions between parentheses the stated number of times.
Unless a step explicitly says otherwise, beginning chains do not count as stitches. For dc rounds, ch 2 to reach height, then work the first dc into the first stitch; join to the first real dc. For sc rounds, ch 1 and join to the first sc. For flat sc rows, ch 1 and turn. Flat dc rows explicitly use ch 3 as the first counted dc. Do not work into joining slip stitches. Change color by completing the last yarn-over of the preceding stitch with the new yarn.
To work sc2tog: insert hook into the next stitch and draw up a loop, repeat in the following stitch, yarn over and draw through all three loops. For a surface slip stitch, bring the yarn up from behind the fabric, insert the hook into the next chosen gap and pull the new loop through the loop already on the hook. Keep these stitches loose.
Additional US terms: inc = 2 stitches of the stated type in one stitch; sc2tog/dc2tog/dc3tog = work two or three stitches together as named; sc3tog = single crochet three together; BLO = back loop only; FPdc = front-post double crochet; BPdc = back-post double crochet; tr = treble crochet. Ch 3 counts as one dc unless stated otherwise; ch 1 for turning does not count. Close joined rounds with a sl st unless continuous rounds are specified. Photographed charts are visual references, not patterns verified or transcribed here.
1. Blue Lace Butterfly
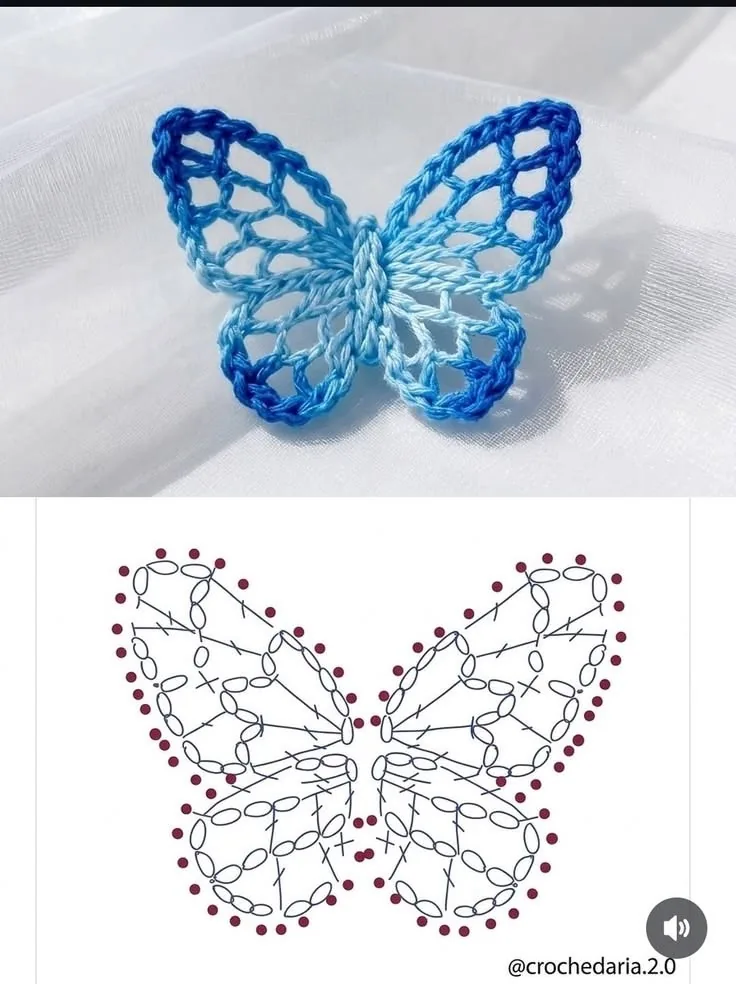
This blue lace butterfly combines blue with the form shown in the reference. The original construction below simplifies details that cannot be reliably recovered from a photograph; it does not promise an exact chart match.
Materials, gauge and size
Fine or sport cotton, approximately 10–40 g per small motif or bookmark. Colors: blue. Hook: 1.5–3 mm. These are estimates: weigh a sample, multiply by component count and add 15–20% for joining and adjustments.
Also use a yarn needle, scissors, stitch markers, measuring tape and blocking pins. Add purchased split keyrings for the shell project and a thin felt insert where specified.
Gauge and sizing: Measure a washed sample. Fine thread makes thinner bookmarks and smaller motifs; yarn weight changes size without changing the counted construction.
Four-wing butterfly motif
- Ch 5 and join to form a ring. Round 1: (sc in ring, ch 7) four times; join to first sc [4 anchors, 4 loops]. Mark the first two loops as upper wings and the next two as lower wings.
- Round 2: in each of the two upper loops work (sc, hdc, 4 dc, 3 tr, 4 dc, hdc, sc); sl st in the following anchor [15 stitches per upper wing]. In each lower loop work (sc, hdc, 5 dc, hdc, sc); sl st in its following anchor [9 stitches per lower wing]. Fasten off [48 wing stitches plus 4 anchor sl sts].
- Round 3: join at an upper wing base. Sc in each of that wing’s 15 stitches, adding a ch-3 picot after its eighth stitch (ch 3, sl st in first of these chains). Repeat for the other upper wing. Sc in each lower wing’s nine stitches, adding a picot after its fifth stitch. Sl st across the four old anchor joins as you reach them; no extra stitches in those joins [48 sc, 4 picots and 4 anchor sl sts].
- Body: ch 13. Row 1: sc in second chain and across [12]. Row 2: sc across [12]. Fold the strip lengthwise, sew the long edges together without stuffing, and stitch it down the motif center. Arrange upper wings above lower wings before fixing it. Antennae: join at body top, ch 9, sl st along 8 chains, sl st in body; repeat once [two antennae]. Embroider a small knot at each tip.
Project variation and assembly
- Make one lilac motif. For a lighter second example use ch 9 for each wing loop but keep the Round-2 stitches unchanged, spreading them evenly. This enlarges the openings rather than producing an exact alternate-size pattern.
- Block with the two upper wings slightly higher than the body top and lower wings angled down. Sew onto fabric through the body and wing tips, or reinforce two tip connections per neighboring motif for a lace strip.
Assembly and finishing
- Check all counts before joining. Weave ends through several stitches in three directions. Sew point joins more than once and distribute tension evenly.
- Wash a sample using the yarn care instructions, block gently and allow it to dry completely. Recheck fit or motif size after washing. These original patterns are photo-inspired and physically untested; they do not reproduce a verified photographed chart.
2. Filet Cat Bookmark
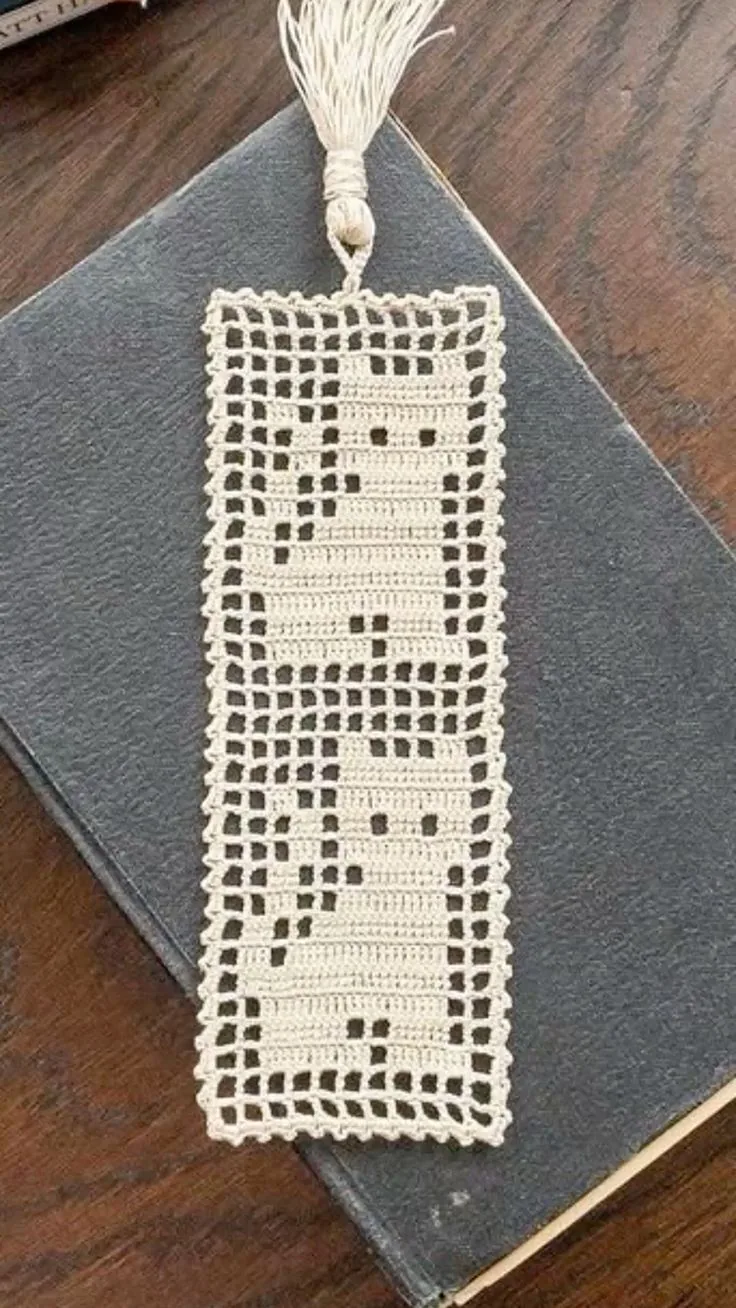
This filet cat bookmark combines ivory with the form shown in the reference. The original construction below simplifies details that cannot be reliably recovered from a photograph; it does not promise an exact chart match.
Materials, gauge and size
Fine or sport cotton, approximately 10–40 g per small motif or bookmark. Colors: ivory. Hook: 1.5–3 mm. These are estimates: weigh a sample, multiply by component count and add 15–20% for joining and adjustments.
Also use a yarn needle, scissors, stitch markers, measuring tape and blocking pins. Add purchased split keyrings for the shell project and a thin felt insert where specified.
Gauge and sizing: Measure a washed sample. Fine thread makes thinner bookmarks and smaller motifs; yarn weight changes size without changing the counted construction.
Filet cat bookmark — eight cells wide
- Ch 27. Row 1: dc in fourth chain and across, skipped ch 3 counts as first dc [25]. Each later row has eight three-position cells plus the first boundary dc. Filled cell F = dc in each of the next three positions; open cell O = ch 2, skip two positions, dc in the third. A chain counts as one position. On a solid row, work into each existing chain space as needed to restore three positions per cell.
- For each chart row ch 3 counts as the first boundary dc, turn and read the eight-cell sequence in the direction worked. Rows 2–17: FFFFFFFF, FOOOOOOF, FOOFFOOF, FOFFFFOF, FOOFFOOF, FOOFFOOF, FOFFFFOF, FFFFFFFF, FOOOOOOF, FOOFFOOF, FOFFFFOF, FOFFFFOF, FOOFFOOF, FOOFFOOF, FOOOOOOF, FFFFFFFF. Every row remains 25 positions.
- This grid suggests a simple cat silhouette and border, not an exact transcription of the photographed cat chart. If you prefer a solid bookmark, use all-filled rows and embroider a cat face afterward. Outline with sc, one per top/bottom position and approximately two per dc row edge, with three sc at corners.
- Tassel: cut ten 18 cm strands, fold through the top-center edge, wrap their neck with a separate strand and trim to 7 cm. Weave in ends and block flat. Use fine thread for a thinner bookmark, measuring its thickness before placing it inside a book.
Assembly and finishing
- Check all counts before joining. Weave ends through several stitches in three directions. Sew point joins more than once and distribute tension evenly.
- Wash a sample using the yarn care instructions, block gently and allow it to dry completely. Recheck fit or motif size after washing. These original patterns are photo-inspired and physically untested; they do not reproduce a verified photographed chart.
3. Seashell Keyring Collection
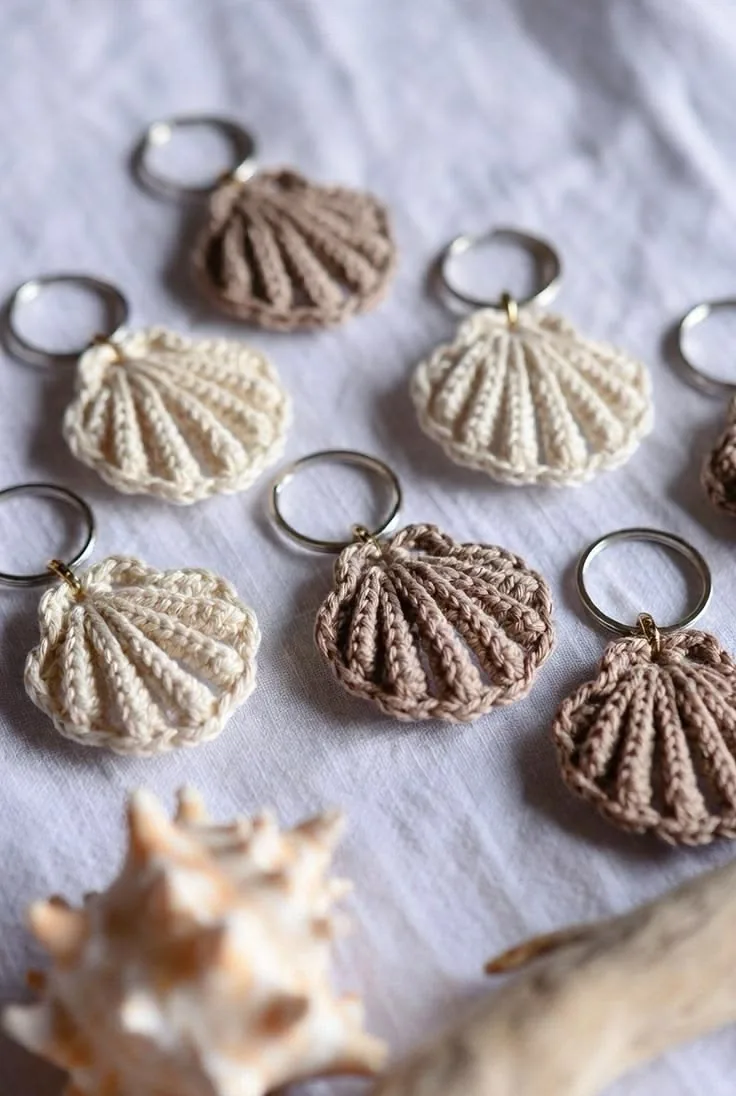
This seashell keyring collection combines ivory, sand and taupe with the form shown in the reference. The original construction below simplifies details that cannot be reliably recovered from a photograph; it does not promise an exact chart match.
Materials, gauge and size
Fine or sport cotton, approximately 10–40 g per small motif or bookmark. Colors: ivory, sand and taupe. Hook: 1.5–3 mm. These are estimates: weigh a sample, multiply by component count and add 15–20% for joining and adjustments.
Also use a yarn needle, scissors, stitch markers, measuring tape and blocking pins. Add purchased split keyrings for the shell project and a thin felt insert where specified.
Gauge and sizing: Measure a washed sample. Fine thread makes thinner bookmarks and smaller motifs; yarn weight changes size without changing the counted construction.
Seashell fan with raised ribs
- Ch 4, join ring. Row 1: ch 3 counts as first dc, work 6 more dc in ring [7]. Row 2: ch 3, turn; dc in same first stitch and 2 dc in every remaining stitch [14]. Row 3: ch 3 counts as first dc, turn; 2 dc in next stitch, (dc in next, 2 dc in next) six more times [21].
- Row 4: ch 3 counts as first dc, turn; dc in next stitch, 2 dc in next, (dc in next 2, 2 dc in next) six times [28]. Row 5: ch 1, turn; sc in each stitch [28]. Work one loose sc along the straight lower edge, gathering the two lower corners slightly toward the ring center.
- Embroider six raised ribs with surface sl st from the ring center to evenly spaced points on the curved edge, keeping each chain loose. Make two matching fans, place backs together and sew the curved and lower outlines, leaving a tiny space for a thin felt insert if desired.
- Loop: ch 11, sl st along ten chains and sew both ends through the shell top. Attach a purchased split keyring through that loop. Make six shells in the stated neutral shades. Reinforce the loop with fine sewing thread and keep hard metal findings off the crocheted fabric surface.
Assembly and finishing
- Check all counts before joining. Weave ends through several stitches in three directions. Sew point joins more than once and distribute tension evenly.
- Wash a sample using the yarn care instructions, block gently and allow it to dry completely. Recheck fit or motif size after washing. These original patterns are photo-inspired and physically untested; they do not reproduce a verified photographed chart.
4. Ivory Butterfly Applique
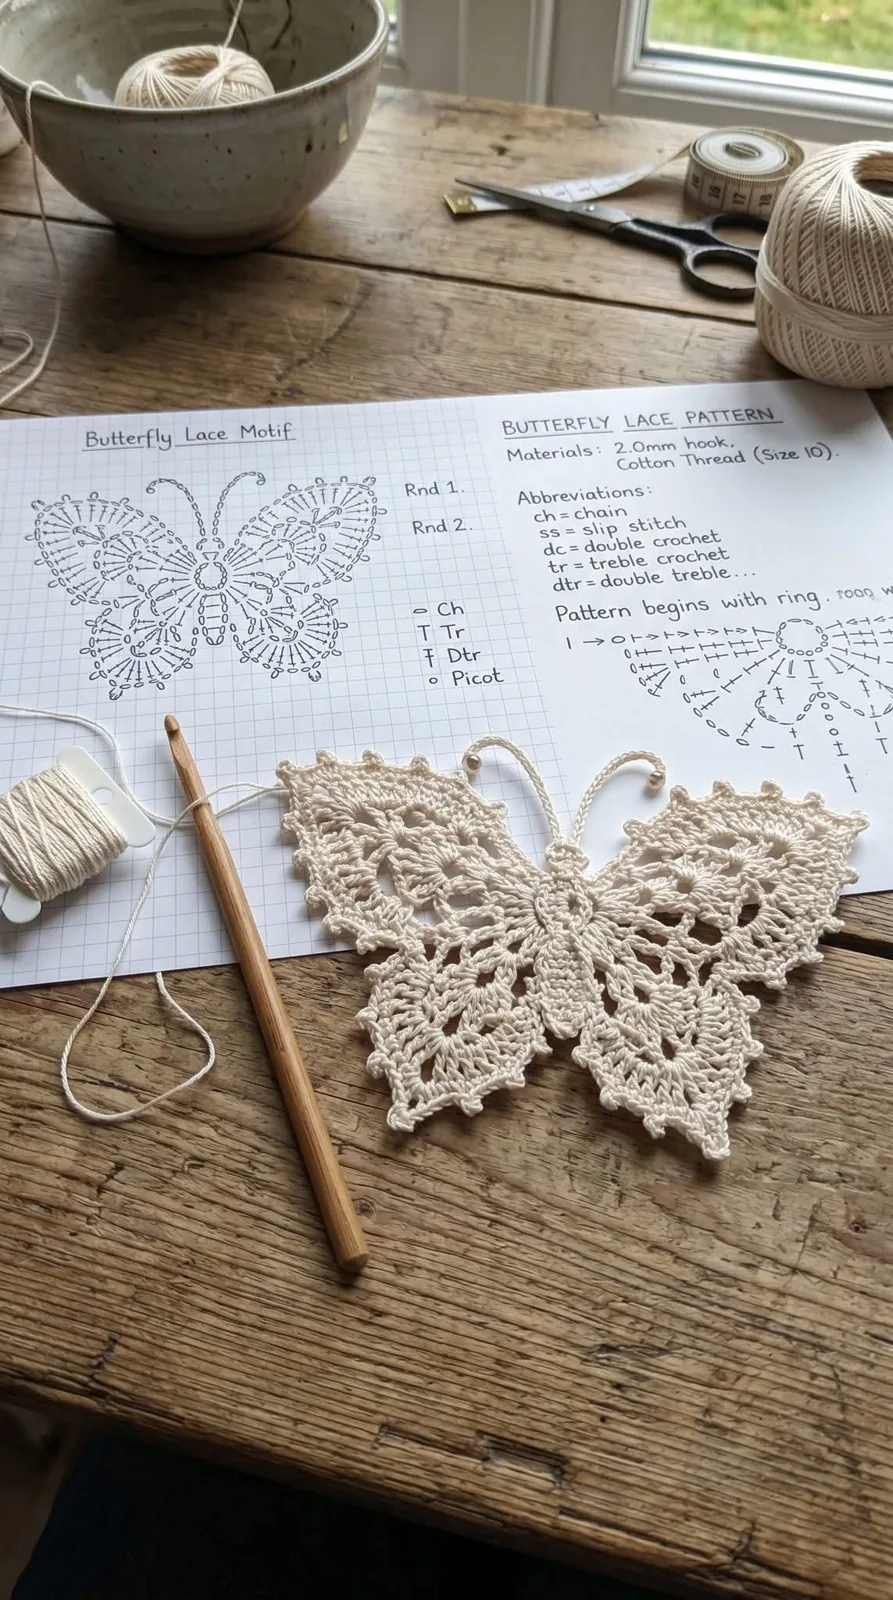
This ivory butterfly applique combines ivory with the form shown in the reference. The original construction below simplifies details that cannot be reliably recovered from a photograph; it does not promise an exact chart match.
Materials, gauge and size
Fine or sport cotton, approximately 10–40 g per small motif or bookmark. Colors: ivory. Hook: 1.5–3 mm. These are estimates: weigh a sample, multiply by component count and add 15–20% for joining and adjustments.
Also use a yarn needle, scissors, stitch markers, measuring tape and blocking pins. Add purchased split keyrings for the shell project and a thin felt insert where specified.
Gauge and sizing: Measure a washed sample. Fine thread makes thinner bookmarks and smaller motifs; yarn weight changes size without changing the counted construction.
Four-wing butterfly motif
- Ch 5 and join to form a ring. Round 1: (sc in ring, ch 7) four times; join to first sc [4 anchors, 4 loops]. Mark the first two loops as upper wings and the next two as lower wings.
- Round 2: in each of the two upper loops work (sc, hdc, 4 dc, 3 tr, 4 dc, hdc, sc); sl st in the following anchor [15 stitches per upper wing]. In each lower loop work (sc, hdc, 5 dc, hdc, sc); sl st in its following anchor [9 stitches per lower wing]. Fasten off [48 wing stitches plus 4 anchor sl sts].
- Round 3: join at an upper wing base. Sc in each of that wing’s 15 stitches, adding a ch-3 picot after its eighth stitch (ch 3, sl st in first of these chains). Repeat for the other upper wing. Sc in each lower wing’s nine stitches, adding a picot after its fifth stitch. Sl st across the four old anchor joins as you reach them; no extra stitches in those joins [48 sc, 4 picots and 4 anchor sl sts].
- Body: ch 13. Row 1: sc in second chain and across [12]. Row 2: sc across [12]. Fold the strip lengthwise, sew the long edges together without stuffing, and stitch it down the motif center. Arrange upper wings above lower wings before fixing it. Antennae: join at body top, ch 9, sl st along 8 chains, sl st in body; repeat once [two antennae]. Embroider a small knot at each tip.
Project variation and assembly
- Make one motif in sport cotton with a 2.5 mm hook and another in fine crochet thread with a 1.5 mm hook. Keep all counts unchanged; the yarn and washed gauge create the two sizes. Measure and record each wingspan instead of assuming the photograph’s scale.
- Use each as a flat applique: sew the body and four wing tips to the receiving fabric with matching thread. Optional trim sample: arrange four small motifs in a row and connect corresponding wing tips with reinforced sewing stitches.
Assembly and finishing
- Check all counts before joining. Weave ends through several stitches in three directions. Sew point joins more than once and distribute tension evenly.
- Wash a sample using the yarn care instructions, block gently and allow it to dry completely. Recheck fit or motif size after washing. These original patterns are photo-inspired and physically untested; they do not reproduce a verified photographed chart.
5. Fishbone Bookmark Trio
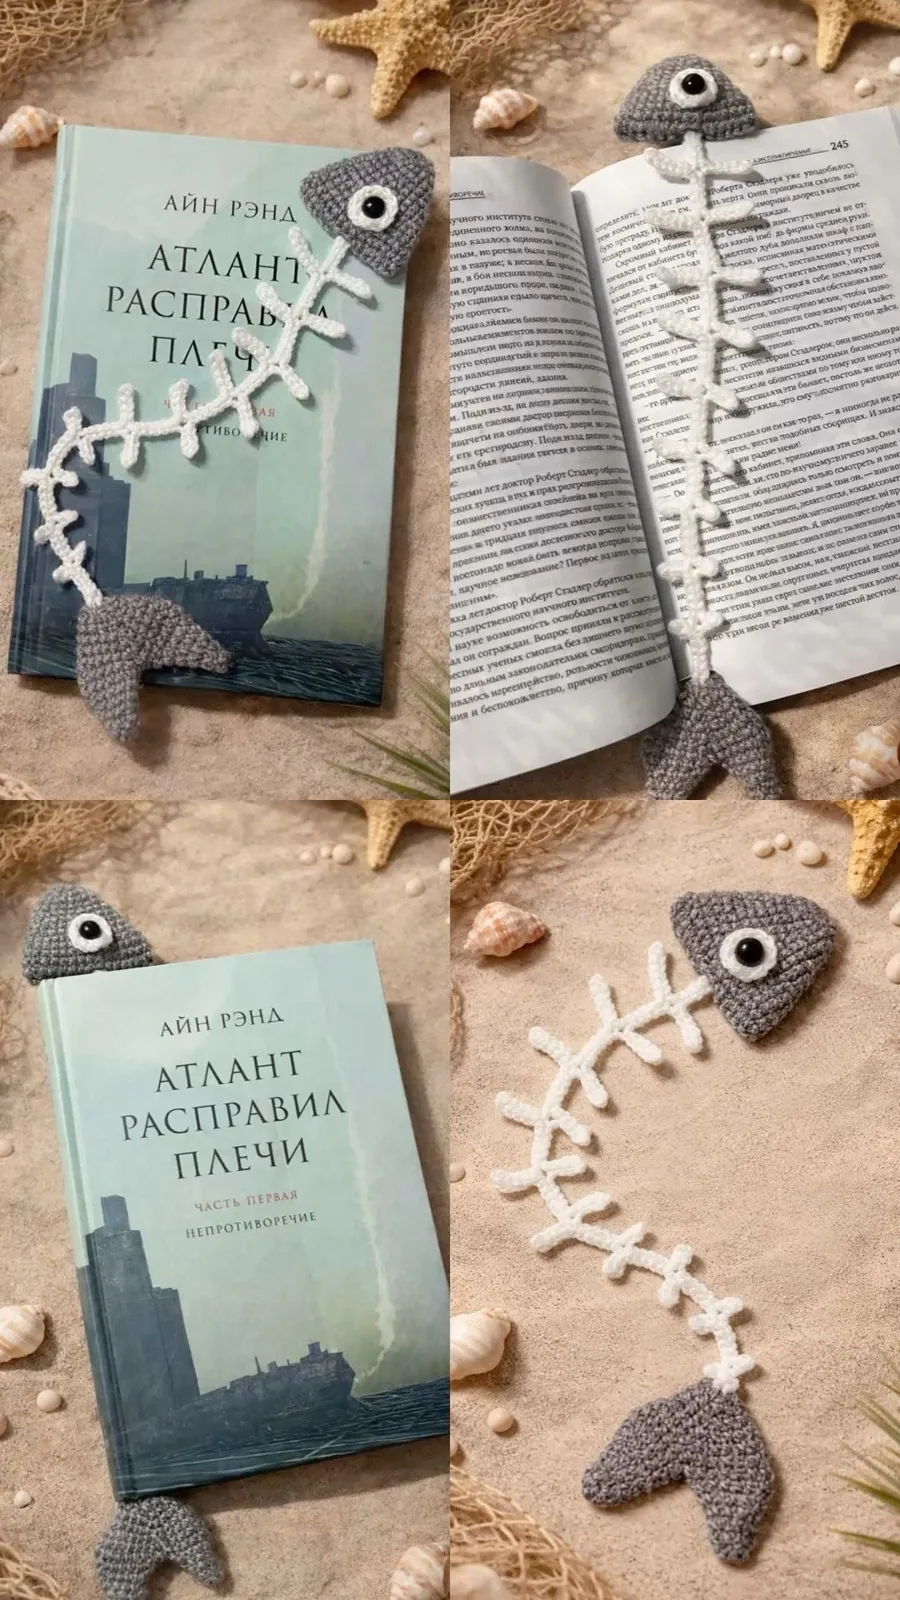
This fishbone bookmark trio combines sage, gray and taupe with the form shown in the reference. The original construction below simplifies details that cannot be reliably recovered from a photograph; it does not promise an exact chart match.
Materials, gauge and size
Fine or sport cotton, approximately 10–40 g per small motif or bookmark. Colors: sage, gray and taupe. Hook: 1.5–3 mm. These are estimates: weigh a sample, multiply by component count and add 15–20% for joining and adjustments.
Also use a yarn needle, scissors, stitch markers, measuring tape and blocking pins. Add purchased split keyrings for the shell project and a thin felt insert where specified.
Gauge and sizing: Measure a washed sample. Fine thread makes thinner bookmarks and smaller motifs; yarn weight changes size without changing the counted construction.
Flat fishbone bookmark
- Spine Row 1: ch 41, sl st in second chain and along the remaining 39 chains [40]. Head disc Round 1: 6 sc in magic ring; Round 2: increase to 12, fasten off flat. Sew it to one spine end and embroider one eye.
- Make five rib pairs. For each pair join yarn at a marked spine point, ch 8, sl st back along seven chains, sl st at the spine; ch 8, sl st back along seven chains, sl st at the same spine point and fasten off. Space the five pairs at spine positions 7, 13, 19, 25 and 31 from the head end.
- Tail fin: ch 4, sc across [3]. Increase at both ends on the next two rows [5, 7], then work one plain 7-sc row. Make two small fins and sew their narrow ends to the spine bottom, spreading the wide ends. Make three bookmarks in sage, gray and taupe. Block the ribs flat and sew every knot into the spine so no hard lump presses into a page.
Assembly and finishing
- Check all counts before joining. Weave ends through several stitches in three directions. Sew point joins more than once and distribute tension evenly.
- Wash a sample using the yarn care instructions, block gently and allow it to dry completely. Recheck fit or motif size after washing. These original patterns are photo-inspired and physically untested; they do not reproduce a verified photographed chart.
6. Pink Five-Petal Lace Flower
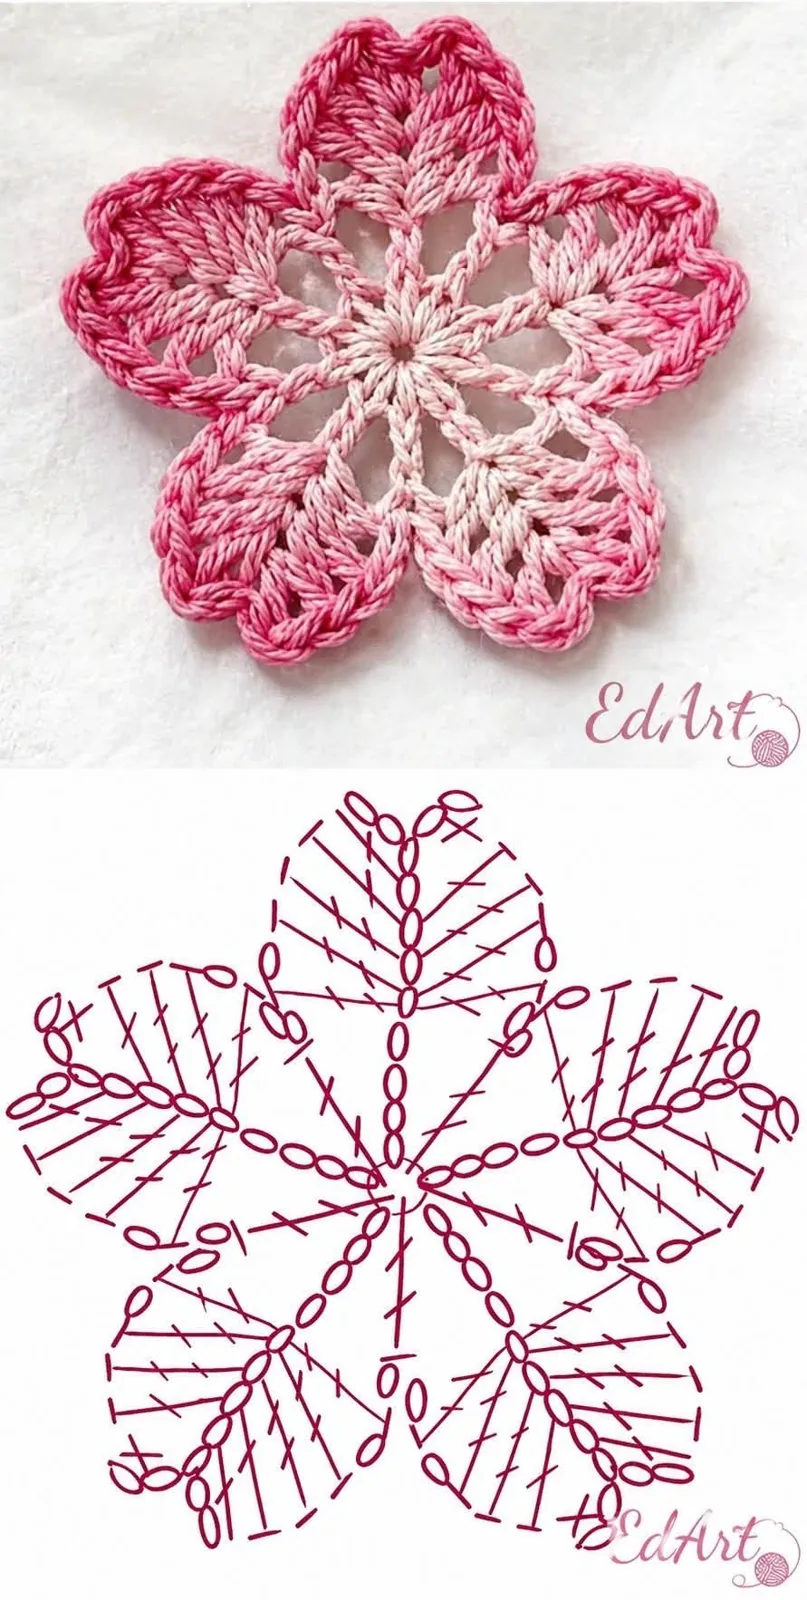
This pink five-petal lace flower combines pink with the form shown in the reference. The original construction below simplifies details that cannot be reliably recovered from a photograph; it does not promise an exact chart match.
Materials, gauge and size
Fine or sport cotton, approximately 10–40 g per small motif or bookmark. Colors: pink. Hook: 1.5–3 mm. These are estimates: weigh a sample, multiply by component count and add 15–20% for joining and adjustments.
Also use a yarn needle, scissors, stitch markers, measuring tape and blocking pins. Add purchased split keyrings for the shell project and a thin felt insert where specified.
Gauge and sizing: Measure a washed sample. Fine thread makes thinner bookmarks and smaller motifs; yarn weight changes size without changing the counted construction.
Five-petal lace flower
- Ch 5, join ring. Round 1: 10 sc in ring [10]. Round 2: (sc in next stitch, ch 7, skip next) five times [5 anchors, 5 loops]. Round 3: into each loop work (sc, hdc, 3 dc, ch 3, 3 dc, hdc, sc), then sl st in next anchor [5 petals; 10 stitches and one ch-3 tip per petal].
- Round 4: sc in every petal stitch and (sc, ch 3, sc) in each tip space, sl st across each old anchor join [60 sc and 5 ch-3 tips]. Fasten off and block. Make four flowers for an applique set, or one as a lace practice motif. The written five-petal outline is an original interpretation of the pictured chart.
Assembly and finishing
- Check all counts before joining. Weave ends through several stitches in three directions. Sew point joins more than once and distribute tension evenly.
- Wash a sample using the yarn care instructions, block gently and allow it to dry completely. Recheck fit or motif size after washing. These original patterns are photo-inspired and physically untested; they do not reproduce a verified photographed chart.
7. Open Maple Leaf Applique
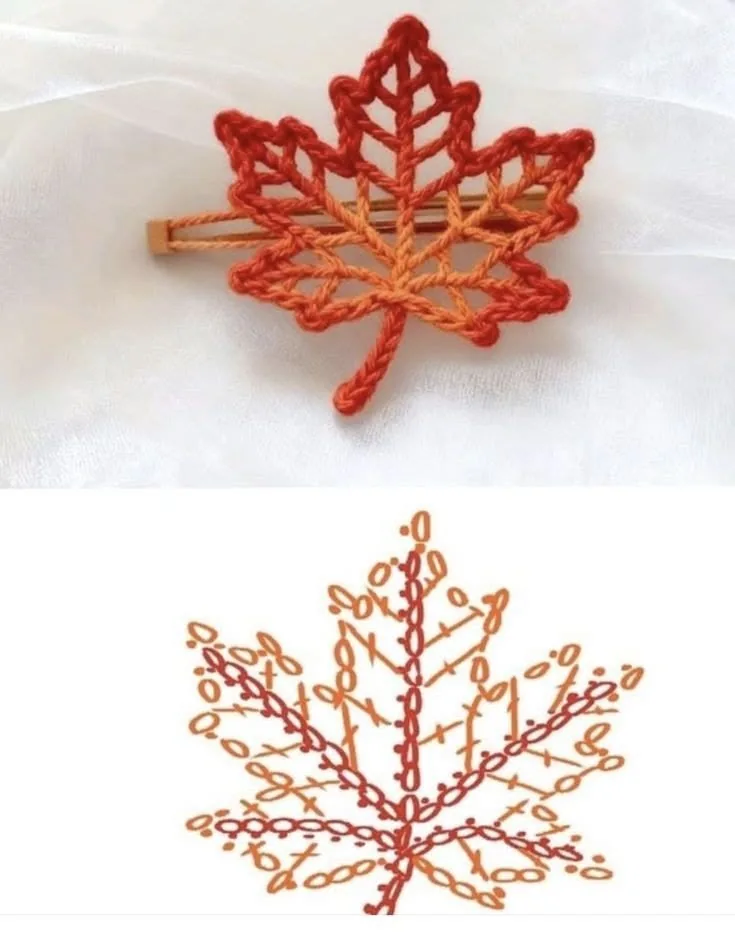
This open maple leaf applique combines rust with the form shown in the reference. The original construction below simplifies details that cannot be reliably recovered from a photograph; it does not promise an exact chart match.
Materials, gauge and size
Fine or sport cotton, approximately 10–40 g per small motif or bookmark. Colors: rust. Hook: 1.5–3 mm. These are estimates: weigh a sample, multiply by component count and add 15–20% for joining and adjustments.
Also use a yarn needle, scissors, stitch markers, measuring tape and blocking pins. Add purchased split keyrings for the shell project and a thin felt insert where specified.
Gauge and sizing: Measure a washed sample. Fine thread makes thinner bookmarks and smaller motifs; yarn weight changes size without changing the counted construction.
Five-lobed maple leaf interpretation
- Center: 10 sc in magic ring; join [10]. Round 2: (sc in next stitch, ch 9, skip next) five times [5 anchors, 5 loops]. Round 3: into each loop work (sc, hdc, 3 dc, 3 tr, 3 dc, hdc, sc), sl st in next anchor [5 lobes; 13 stitches per lobe plus 5 anchor sl sts].
- Outline: sc in each lobe stitch, with (sc, ch 3, sl st in first of those three chains, sc) replacing the middle tr’s ordinary sc [14 sc and one picot per lobe]. Sl st across old anchor joins. Stem: ch 11, sl st in second chain and along the remaining nine chains [10 sl sts], sl st at the leaf center base and fasten off.
- Embroider a central vein from stem to the middle lobe tip and two side veins to the neighboring lobe tips, using loose surface chains. Block the five tips into a maple-like outline. This open five-lobe motif is an original simplification rather than a transcription of the photographed seven-point chart.
Assembly and finishing
- Check all counts before joining. Weave ends through several stitches in three directions. Sew point joins more than once and distribute tension evenly.
- Wash a sample using the yarn care instructions, block gently and allow it to dry completely. Recheck fit or motif size after washing. These original patterns are photo-inspired and physically untested; they do not reproduce a verified photographed chart.
8. Layered Pink and Green Flower Motif
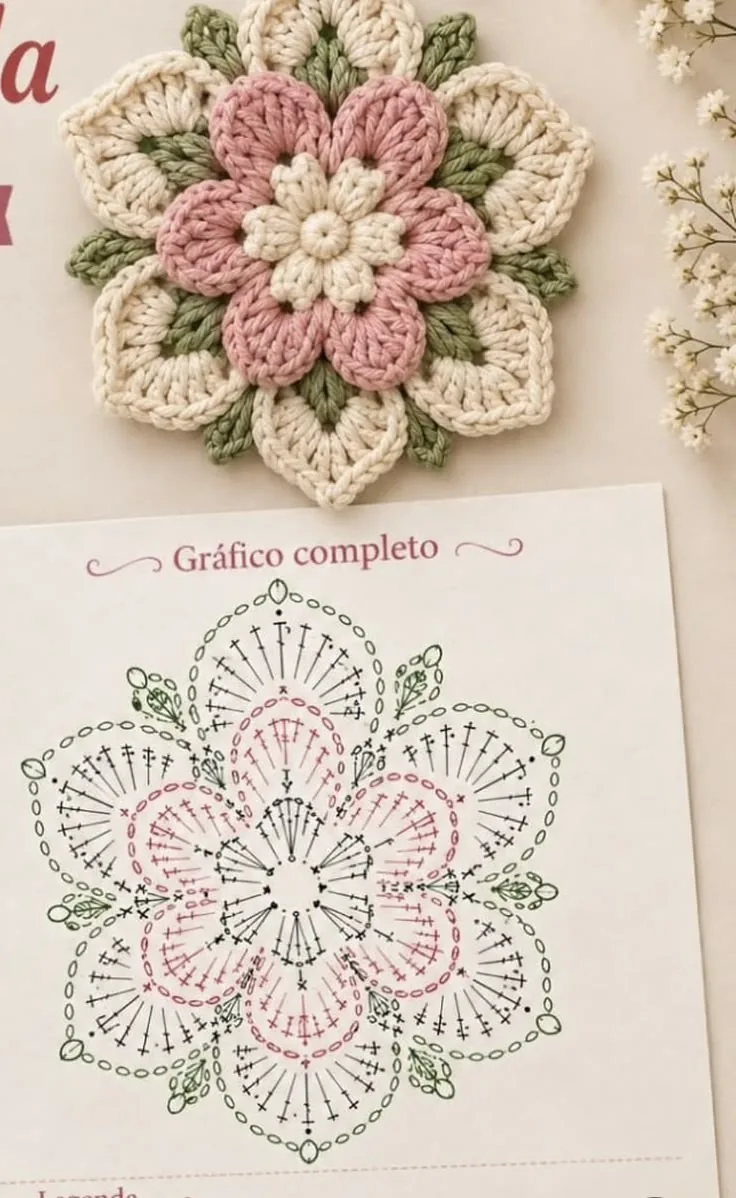
This layered pink and green flower motif combines pink, cream and green with the form shown in the reference. The original construction below simplifies details that cannot be reliably recovered from a photograph; it does not promise an exact chart match.
Materials, gauge and size
Fine or sport cotton, approximately 10–40 g per small motif or bookmark. Colors: pink, cream and green. Hook: 1.5–3 mm. These are estimates: weigh a sample, multiply by component count and add 15–20% for joining and adjustments.
Also use a yarn needle, scissors, stitch markers, measuring tape and blocking pins. Add purchased split keyrings for the shell project and a thin felt insert where specified.
Gauge and sizing: Measure a washed sample. Fine thread makes thinner bookmarks and smaller motifs; yarn weight changes size without changing the counted construction.
Two-layer flower square
- Round 1: With the center color work 8 sc in a magic ring; join [8]. Round 2: in each sc work (sc, ch 3, dc, ch 3, sl st) [eight small petals].
- Round 3: Behind the petals, sc around each Round-1 sc post, ch 5 after each sc [eight anchors, eight loops]. Round 4: into each loop work (sc, hdc, 5 dc, hdc, sc), then sl st into the next anchor sc [eight outer petals, nine stitches per petal plus eight anchor sl sts].
- Round 5: Behind the outer petals, sc around each Round-3 anchor post and ch 5 after each sc [eight anchors and eight loops]. Round 6: (3 dc, ch 2, 3 dc) in first loop, 3 dc in next loop; repeat four times [36 dc, four corners].
- Round 7: Dc in each dc and (2 dc, ch 2, 2 dc) in each corner [52 dc]. Round 8: sc in each dc and (sc, ch 2, sc) in each corner [60 sc, four corners]. Block square. Use the listed palette: contrast center, pale inner petals, main outer petals and the background shade for the frame.
Standalone flower variation
- For the layered flower reference, stop the flower-square construction after the outer petal round, before adding the square frame. Use cream center, pink petals and green back loops. Sew five tiny leaves around the back or continue to the square frame if using it as a coaster. The photographed layered shape is interpreted with eight petals rather than claimed as an exact match.
Tiny leaf
- Ch 7. Starting in second chain, work sc, hdc, 2 dc, hdc, then 3 sc in the last chain. Working along the underside, hdc, 2 dc, hdc, sc [13 stitches]. Sl st to the beginning and fasten off. Make the number specified in the project, leaving sewing tails.
Assembly and finishing
- Check all counts before joining. Weave ends through several stitches in three directions. Sew point joins more than once and distribute tension evenly.
- Wash a sample using the yarn care instructions, block gently and allow it to dry completely. Recheck fit or motif size after washing. These original patterns are photo-inspired and physically untested; they do not reproduce a verified photographed chart.